
Pressure Treated Deck Boards Dimensions: Key Measurements for Your Project
When selecting pressure treated deck boards, it's important to understand the standard dimensions available in the market.
When planning a deck, understanding the dimensions of pressure-treated deck boards is crucial for achieving a sturdy and visually appealing structure. Common sizes include 5/4 x 6 inches, available in various lengths such as 8, 12, and 16 feet, allowing for versatile design options. Utilizing these dimensions helps ensure that your deck not only meets your aesthetic preferences but also stands up to the elements.
In Utah, where weather conditions can vary significantly, quality pressure-treated lumber plays a critical role in preserving your deck’s longevity. Choosing the right dimensions is just the beginning; combining quality materials with meticulous construction techniques enhances durability. This attention to detail allows you to create a resilient structure that can withstand seasonal challenges, ensuring your investment lasts for years.
At Salt City Decks, you can find exceptional craftsmanship tailored to meet your decking needs. By prioritizing high-quality materials and expert construction methods, your project will not only be structurally sound but also visually striking, attracting admiration from neighbors and enhancing your outdoor living space.
Standard Dimensions of Pressure Treated Deck Boards
When selecting pressure treated deck boards, it's important to understand the standard dimensions available in the market. Knowledge of common widths, thicknesses, and typical lengths can assist you in making informed decisions for your decking projects.
Common Widths and Thicknesses
Pressure treated lumber commonly comes in various widths and thicknesses. The most frequent widths for deck boards include:
2 in. – Typically used for structural support.
5/4 in. – Ideal for deck surfaces; offers a good balance of strength and aesthetic appeal.
Thicknesses generally range from 1 in. (which measures about 0.75 in. actual thickness) to 2 in. options that offer robust support and integrity. Standard size definitions help ensure compatibility with various building codes and practices.
Using the right dimensions is essential for achieving a sturdy deck that can withstand Utah's fluctuating climate, especially during winter snow.
Typical Lengths for Decking
Deck boards are available in several lengths, allowing you to choose what suits your project best. The typical lengths available include:
8 ft.
12 ft.
16 ft.
20 ft.
These lengths give you flexibility in design and can minimize the number of seams on your deck, enhancing both visual appeal and structural stability. By selecting longer boards, you reduce the number of joints, which can help in maintaining the integrity of the decking over time.
For any specific requirements or questions about decking materials, Salt City Decks provides high-quality options tailored for the unique climate of Utah. Their expertise helps ensure the longevity and stability of your outdoor structures.
Selecting the Right Deck Board Size
Choosing the appropriate deck board size is crucial for ensuring the structural integrity and longevity of your outdoor space. Considerations around load-bearing requirements and proper spacing will help you achieve a robust and visually pleasing deck that withstands the elements.
Load-Bearing Considerations
When selecting deck board dimensions, load-bearing capacity is paramount. Building codes dictate specific requirements based on the intended use of your deck. For instance, decks exposed to frequent foot traffic must use thicker boards for better support.
Typically, pressure-treated boards come in dimensions such as 2” x 6” or 5/4” x 6”. Thicker boards provide increased strength, particularly if installed on wider joist spacings. If you're in areas like Utah, where snow loads can be significant, using stronger materials will enhance durability against harsh weather and prevent insect damage.
Spacing and Expansion Allowances
Proper spacing between deck boards is essential for accommodating expansion and contraction due to temperature changes. A common recommendation is to maintain a gap of 1/8 inch to 1/4 inch between boards. This allows for drainage and reduces the risk of warping, especially in moist conditions.
In addition, consider the joist spacing when selecting your board size. Closer joist spacing enhances stability and allows for the use of thinner boards without compromising strength. Applying waterproof tape at the joist locations can also protect them from moisture and extend your deck’s lifespan.
Comparing Pressure Treated Deck Boards with Alternative Materials
When considering deck materials, it’s crucial to understand how pressure treated wood compares to alternatives like cedar and western red cedar. This section explores the distinct properties of each, as well as the advantages of pressure treated lumber over untreated wood.
Differences from Cedar and Western Red Cedar
Cedar and western red cedar are popular decking options due to their natural resistance to decay and insects. However, these woods are softer and can be more susceptible to wear over time compared to pressure treated wood.
Pressure treated lumber undergoes a chemical process that enhances its durability. This makes it an ideal choice in areas like Utah, where snow and harsh conditions can take a toll on outdoor structures.
While cedar possesses aesthetic appeal with its rich colors and grain patterns, it typically requires more maintenance, including regular sealing and staining. On the other hand, pressure treated wood can be more cost-effective due to its longevity and lower maintenance needs.
Benefits of Pressure Treated Lumber vs. Untreated Wood
Pressure treated wood offers several advantages that make it a superior choice for outdoor projects. The treatment process prevents decay and insect damage, ensuring a longer lifespan under various weather conditions.
In contrast, untreated wood can deteriorate quickly, especially in areas where moisture and temperature fluctuations are common. For instance, untreated lumber may warp, crack, or rot when exposed to snow and rain.
Choosing pressure treated wood means less frequent repairs and replacements, saving you money over time. You can also pair this material with quality construction techniques, such as using waterproof tape and closer joist spacing, to enhance stability and durability.
Investing in pressure treated lumber is a smart decision for outdoor structures that need to withstand Utah's elements while providing an appealing visual aspect.
Installation and Maintenance Factors
When installing pressure-treated deck boards, careful attention to cutting, sizing, and maintenance will ensure longevity and durability. This section addresses essential practices for working with pressure-treated lumber and protecting your structure from common threats.
Cutting and Sizing Pressure Treated Lumber
Accurate cutting and sizing of pressure-treated lumber are crucial for optimal installation. Use a sharp saw to prevent splintering, as clean cuts enhance fit and finish. Ensure your boards are cut to the appropriate length based on your deck design.
When sizing, keep in mind that gaps between boards should range from 1/8 inch to 1/4 inch to allow for drainage and expansion. Accurately measure and mark your cuts to maintain uniformity and reduce waste.
Utilize waterproof tape on joists to prevent moisture absorption and increase the lifespan of your deck. Always follow manufacturer guidelines for installation to achieve the best results.
Protecting Against Moisture and Insect Damage
Maintaining your pressure-treated deck involves protecting it from moisture and insect damage. In Utah's snowy climate, applying a high-quality paint or sealant can create a barrier against water infiltration. Choose products specifically designed for outdoor wood to enhance weather resistance.
Inspect your deck regularly for signs of wear or insect activity. Look for discoloration or softness in the wood, which indicates potential damage. Any affected boards should be replaced promptly to maintain the integrity of your structure.
Utilizing close joist spacing helps increase stability and resilience. Coupling attention to construction details with regular maintenance will keep your deck beautiful and functional for years to come.
Availability and Market Trends
The pressure-treated deck board market is influenced by sales practices and supplier dynamics. Understanding these elements helps you make informed decisions about sourcing and purchasing.
Sales and Supplier Practices
In the realm of pressure-treated deck boards, various sales strategies are employed. Suppliers focus on high-quality materials, ensuring that the lumber can withstand Utah’s snow and harsh weather conditions.
You should look for suppliers that emphasize quality. When buying pressure-treated lumber, inquire about construction techniques. Attention to detail—such as using waterproof tape and maintaining closer joist spacing—can significantly enhance the durability of your deck.
Local suppliers also provide an advantage. Choosing Salt City Decks guarantees that you get reliable service and expert advice tailored to the unique challenges posed by your environment. This partnership fosters trust and ensures long-lasting outdoor structures.
Frequently Asked Questions
Understanding the dimensions and specifications of pressure-treated deck boards is crucial for making informed decisions. This section addresses common inquiries regarding sizes, spacing, and variations in lumber dimensions.
What are the standard sizes for pressure-treated deck boards?
Standard sizes for pressure-treated deck boards typically include measurements such as 2x4, 2x6, and 5/4x6. These nominal dimensions correspond to the thickness and width of the boards, which are widely used in decking applications.
How does the actual size of pressure-treated lumber compare to its nominal dimensions?
The actual size of pressure-treated lumber is often smaller than its nominal dimensions due to the milling process. For example, a 2x4 board usually measures approximately 1.5 inches by 3.5 inches once finished.
What is the typical width of pressure-treated deck boards?
Pressure-treated deck boards commonly come in widths of 5.5 inches for 2x6 boards and 3.5 inches for 2x4 boards. Additionally, 5/4 deck boards are often 5.4 inches wide, designed to provide a solid walking surface.
What spacing is required between pressure-treated wood deck boards?
When installing pressure-treated deck boards, a gap of 1/4 inch to 3/8 inch is recommended between boards. This spacing allows for adequate drainage and ventilation, preventing moisture buildup that can lead to warping or decay.
Are there variations in dimensions among different lengths of pressure-treated boards?
Yes, there can be variations in dimensions depending on the length of pressure-treated boards. Boards may slightly differ in width and thickness as they are cut from different parts of the lumber.
How do nominal and actual dimensions differ for 5/4 pressure treated deck boards?
5/4 pressure-treated deck boards have nominal dimensions of 5/4 inches in thickness, but the actual thickness is typically about 1 inch. This difference is important for ensuring proper installation and support.

How to Clean Pressure Treated Deck Without Bleach: Effective Methods for a Fresh Look
Pressure treated decks are commonly used for outdoor structures due to their enhanced durability and resistance to environmental factors.
Cleaning a pressure-treated deck without bleach is not only possible but also beneficial for the longevity of your outdoor space. Using eco-friendly cleaning solutions can effectively remove dirt, mold, and mildew, ensuring your deck remains in excellent condition without the harsh effects of bleach. By choosing the right cleaning methods, you can maintain the integrity of the wood while promoting a safer environment for your family and pets.
To start, you can create a simple cleaning solution using warm water and a mild dish soap. This gentle mixture can lift grime without damaging the treated surface. For tougher stains, consider options like oxygen bleach or a vinegar and baking soda mix, both of which are safer on your deck and the environment.
Attention to detail in maintenance is key. Regular cleaning and prompt treatment of any stains keep your deck looking great and extend its lifespan. For those in Utah, Salt City Decks offers specialized services to ensure your pressure-treated structures are maintained with the quality and craftsmanship they deserve.
Understanding Pressure Treated Decks
Pressure treated decks are commonly used for outdoor structures due to their enhanced durability and resistance to environmental factors. Knowing the materials and treatments used, along with the importance of maintenance, will help you care for your deck effectively.
Common Materials and Treatments
Pressure treated lumber is typically infused with chemicals that enhance its resistance to rot, insects, and the effects of weather. The most common treatments include copper-based preservatives, which protect against termites and fungal decay.
Additional options, such as cedar, offer natural resistance to decay and insects but may not last as long as treated lumber. Regular inspections for signs of damage, such as splitting or warping, are vital. Choosing high-quality materials from a reputable supplier, like Salt City Decks in Utah, ensures your deck will endure harsh conditions.
Importance of Regular Maintenance
Regular maintenance is crucial for extending the life of your pressure treated deck. Cleaning your deck at least twice a year helps to remove built-up dirt, mildew, and moisture, preventing decay.
Using a mild detergent or a specialized wood cleaner is ideal, as harsh chemicals can damage the wood and its protective treatments. Inspect for loose boards or protruding nails, which can cause accidents.
Moreover, sealing your deck every few years will enhance its resistance to moisture and UV damage, ensuring its longevity. This routine will protect your investment, maintaining both the structure and aesthetics of your outdoor space.
Risks of Harsh Chemicals Like Bleach
Although bleach is often considered for cleaning, it poses several risks to pressure treated decks. Its harshness can break down the protective chemicals in the wood, leading to discoloration and weakened fibers.
Additionally, bleach can encourage the growth of mold and mildew if not rinsed off properly, defeating its intended purpose. Instead, focus on gentler cleaning agents that will effectively remove stains without harming the wood’s integrity.
Using Salt City Decks for your decking needs can provide expertise in maintaining your deck and ensuring it remains safe and visually appealing for years to come.
Preparing Your Deck for Cleaning
Before starting the cleaning process, it’s crucial to effectively prepare your outdoor deck. This preparation involves clearing the area, inspecting for any damage or pests, and protecting nearby structures and plants. Following these steps can ensure a successful and efficient cleaning process.
Clearing the Outdoor Deck Area
Begin by removing all furniture, planters, and decorative items from your deck. This will provide you with a clear workspace and prevent any items from getting damaged during the cleaning process.
Use a broom to sweep away debris such as leaves, dirt, or dust to ensure the surface is clean. Make sure to check corners and railings where dirt can accumulate.
Consider storing items in a dry place to protect them from moisture and potential damage. If you have a grill or fire pit, ensure these are moved at least a few feet away from the deck.
Inspecting for Damage or Termites
Conduct a thorough inspection of your deck for any signs of damage, such as warped boards, cracked supports, or loose railings. Pay close attention to areas where boards meet and where connectors are used.
Additionally, check for signs of termites or other pests which can compromise the stability of your deck. Look for mud tubes, small holes, or any frass, which resembles sawdust.
If you encounter extensive damage or signs of termites, consider consulting a professional. Early detection can save you from costly repairs down the line.
Protecting Surrounding Siding and Plants
Before you begin using cleaning solutions, it is vital to protect surrounding structures. Cover any nearby siding with plastic sheeting to prevent unwanted splashes from damaging surfaces. Ensure the coverings are securely fastened to avoid them blowing away.
For plants close to your deck, water them thoroughly before starting. This will help reduce the chance of damage from cleaning solutions. Consider using tarps or cloths around your plants as additional protection.
Following these steps will not only enhance your cleaning process but also help in maintaining the integrity of your outdoor deck and surrounding areas.
Safe Cleaning Methods Without Bleach
Maintaining your pressure-treated deck can be done effectively without harsh chemicals. Utilizing eco-friendly products and homemade solutions not only ensures safety for your family and pets but also protects the environment. Here are some effective methods to clean your deck without bleach.
Choosing an Eco-Friendly Deck Cleaner
When selecting a deck cleaner, look for options specifically labeled as eco-friendly or biodegradable. These products often contain natural ingredients that break down quickly without harming the environment. For instance, cleaners based on sodium percarbonate are effective in removing stains and dirt. Many of these formulations are safe for use around plants and in areas frequented by children and pets. Always read the labels to ensure the product meets your eco-friendly standards. Remember that a well-chosen deck cleaning solution will not only enhance the appearance of your surface but also contribute to its longevity.
Homemade Cleaning Solutions With Oxyclean or Simple Green
You can create effective cleaning solutions at home using Oxyclean or Simple Green. For Oxyclean, mix about one cup with a gallon of warm water. This solution can tackle tough stains while remaining safe for the environment. Apply it using a scrub brush or sponge to remove dirt, mildew, and algae. Alternatively, Simple Green can be diluted according to its instructions for an all-purpose cleaner. These homemade solutions are easy to prepare, affordable, and effective, ensuring your deck remains in great condition without the use of bleach.
Using Biodegradable and Eco-Friendly Products
Opt for products specifically formulated to be biodegradable and environmentally safe. There are a variety of commercial options available at hardware stores that meet this criterion. Look for labels that indicate plant-based formulas or those certified by environmental organizations. Using such products will help to maintain the integrity of your deck material and the surrounding ecosystem. Regular maintenance with biodegradable options can prevent buildup and damage, extending the life of your deck while contributing to a healthier environment. Always prioritize these choices to benefit your deck and the planet.
Step-By-Step Cleaning Process
Cleaning your pressure-treated deck without bleach involves a careful approach to maintain its integrity. You'll be applying a cleaning solution, scrubbing with the right tools, and rinsing thoroughly to ensure a clean and protected surface. Follow these steps for effective cleaning.
Applying the Deck Cleaning Solution
Start by selecting a suitable deck cleaning solution that is safe for pressure-treated wood. Mix the cleaner according to the manufacturer’s instructions, usually requiring warm water and the solution in a bucket.
Use a brush or sprayer for even application, covering the entire deck surface. Focus on areas with heavy stains or mildew, applying extra cleaner if needed. Allow the solution to sit for about 10 to 15 minutes to effectively break down dirt and stains, ensuring it doesn’t dry out completely.
If working in direct sunlight, consider doing small sections at a time to avoid this. This application step is crucial to ensure the cleaner penetrates the wood fibers, resulting in a more effective wash.
Scrubbing With a Deck Brush or Scrub Brush
Once the cleaning solution has sat for the recommended time, it’s time to scrub. Use a deck brush or a stiff scrub brush for this task. Begin at one corner of the deck and work your way across, using firm strokes to scrub away dirt, mildew, and stains.
Pay attention to the grooves between the boards, as debris often accumulates there. Rinse your brush frequently to avoid spreading dirt back onto the deck.
This vigorous scrubbing action is essential for achieving a clean surface, so don’t rush the process. If any stubborn stains remain, a bit of extra elbow grease may be required.
Rinsing Thoroughly With a Garden Hose
After scrubbing, the final step is rinsing the deck thoroughly. Use a garden hose with a spray nozzle set to a medium flow to evenly rinse off the cleaning solution and loosened debris.
Start at one end and work your way across to ensure no cleaning solution is left behind. It’s important to rinse adequately, as any residue can affect the finish or treatment of the wood.
Make sure to allow the deck to dry completely before applying any protective sealants or finishes. A thorough rinse not only cleanses the surface but helps preserve the quality and longevity of your pressure-treated wood deck.
Advanced Tools and Techniques for Deep Cleaning
Effective cleaning of your pressure-treated deck requires advanced tools and specialized techniques. Understanding how to utilize these tools safely and efficiently can lead to impressive results, especially when dealing with stubborn mold and mildew stains.
Using a Pressure Washer Safely
When using a pressure washer, safety should be your top priority. Always wear protective gear, including goggles and gloves, to guard against debris and chemical splashes. Before you begin, make sure to clear the deck of furniture and plants to avoid damage.
Set your pressure washer to a low setting to prevent wood damage. Keeping the nozzle at least 12 inches from the surface helps avoid gouging. Move the nozzle in sweeping motions rather than staying in one place to distribute the pressure evenly, ensuring thorough cleaning without harm.
Tips for Electric Pressure Washers and Power Washers
Electric pressure washers are ideal for residential use due to their convenience and lower noise levels. Ensure your electric pressure washer has the right PSI for deck cleaning, typically between 1300 to 2000 PSI. Always check the manual for specific guidelines on nozzle types and recommended cleaning solutions.
For using a power washer, adjust the spray pattern for different areas. A fan spray can cover larger sections while a narrow spray can reach tough spots. Use biodegradable cleaners compatible with pressure washing to keep your environment safe.
Dealing With Tough Mold and Mildew Stains
Mold and mildew can be persistent adversaries on your deck. To tackle tough stains, use a cleaner specifically designed for these issues. Look for products containing oxygen bleach or hydrogen peroxide, as they are effective yet safe for the wood and the environment.
Apply the cleaner generously and allow it to sit for 15-20 minutes to penetrate the stains. Use a stiff-bristled brush to scrub the affected areas, working in small sections for the best results. Rinse thoroughly with a pressure washer to remove all residue, ensuring your deck looks rejuvenated and inviting.
Post-Cleaning Care and Maintenance Tips
After cleaning your pressure-treated deck, proper care is essential for maintaining its appearance and durability. Following specific maintenance tips ensures that your deck remains in prime condition and helps prevent future issues.
Allowing the Deck to Dry Properly
After cleaning, it's crucial to allow your deck to dry completely before applying any finish or walking on it. This process can take from 24 to 48 hours, depending on weather conditions.
To check that your deck is dry, inspect the surface. If it feels damp or appears darkened, give it more time. Ensuring complete dryness will prevent trapping moisture under sealers or stains, which can lead to mold and rot.
Tip: Avoid cleaning on rainy days or high humidity to facilitate faster drying.
Inspecting for Tannin Stains and Preventing Reoccurrence
Tannin stains can occur, especially on pressure-treated wood, which may leach natural oils and extractives. After cleaning, inspect your deck for these unsightly brown or gray streaks.
If you notice any tannin stains, you can use a solution of water mixed with a small amount of dish detergent to scrub them gently.
Preventive Measures:
Apply eco-friendly stain products to minimize leaching.
Ensure proper drainage on your deck to reduce standing water.
Regular maintenance can help you catch issues early before they become larger problems.
When to Use a Deck Stain or Sealer
Applying a high-quality deck stain or sealer can significantly enhance the longevity of your pressure-treated deck. Ideally, you should apply a stain or sealer every one to three years, depending on your local climate and the deck's exposure to the elements.
Choose products that are specifically designed for pressure-treated wood. These will help protect your deck from UV rays, moisture, and other damaging factors.
Application Tips:
Ensure the deck is completely dry before application.
Use a brush or roller to achieve even coverage.
Be attentive to corners and edges to prevent peeling.
For expert assistance and materials, consider collaborating with Salt City Decks to ensure your deck receives the best care possible in Utah's unique weather conditions.
Frequently Asked Questions
This section addresses common queries regarding the cleaning of pressure-treated decks without bleach. You will find specific methods, suitable products, and important considerations for maintaining the integrity of your deck.
What homemade solutions are effective for cleaning pressure-treated decks?
A mixture of vinegar and water can serve as an effective cleaning solution. Combine equal parts white vinegar and water in a spray bottle, apply it to the deck, and scrub with a stiff brush. Another option is a soap and water mix, which can remove dirt and mildew without damaging the wood.
Can OxiClean be safely used on pressure-treated wood for cleaning purposes?
Yes, OxiClean can be safely used on pressure-treated wood. It is an oxygen-based cleaner that helps lift stains and dirt without harsh chemicals. Follow the manufacturer’s instructions for dilution and application to ensure effective and safe use.
What is the best commercial deck cleaner suitable for pressure-treated wood?
Look for eco-friendly deck cleaners specifically labeled as safe for wood. Products containing oxygenated bleach are often recommended as they do not harm the wood fibers while effectively cleaning. Check labels to confirm compatibility with pressure-treated lumber.
How can I naturally clean my deck without damaging the pressure-treated lumber?
To clean your deck naturally, consider using a vinegar-water solution or baking soda. Baking soda mixed with water can be scrubbing paste for tougher stains. Always test a small area first to ensure the method does not affect the wood’s finish.
Is it possible to clean pressure-treated decks using a pressure washer without causing harm?
Yes, you can clean your deck with a pressure washer, but it’s essential to use a low PSI setting. Aim for 1200-1500 PSI and use a wide spray nozzle to prevent damaging the wood. Maintain a safe distance from the surface while washing.
What are the implications of using Dawn dish soap for cleaning pressure-treated wood?
Dawn dish soap can be effective for cleaning but should be used sparingly. It can remove grease and grime without being overly harsh. Rinse thoroughly to avoid leaving any residue that might attract dirt or affect the wood's finish.

Summer Home Patio: Designing the Perfect Outdoor Retreat
Creating a functional and appealing summer patio requires careful consideration of your vision and the available space.
Creating a summer home patio that blends beauty and functionality requires careful planning and quality craftsmanship. Investing in durable materials and skilled construction ensures that your outdoor space withstands Utah's challenging weather conditions while providing a comfortable retreat for your family and friends.
When designing your patio, consider elements such as the layout, furniture, and accessories that reflect your personal style. A well-thought-out design not only enhances your outdoor experience but also adds value to your property.
Utilizing products that are built to last will keep your patio looking great through the seasons. With the right approach, your summer home patio can become a cherished outdoor oasis where unforgettable memories are made.
Planning Your Summer Home Patio
Creating a functional and appealing summer patio requires careful consideration of your vision and the available space. By setting a clear plan and assessing your layout options, you can ensure your patio enhances your outdoor experience.
Setting a Vision for Your Patio
Begin by defining your desired atmosphere. Do you envision a cozy retreat, a vibrant entertaining area, or a mix of both? Think about the activities you want to enjoy—whether it’s dining al fresco, socializing with friends, or relaxing with a book.
Next, consider your style preferences. Incorporate colors and materials that reflect your personal taste and complement your home. For example, rich wood finishes can add warmth, while sleek metal accents provide a modern touch.
List must-have features, such as seating arrangements, shading solutions, and decorative elements. Prioritize these aspects to create an inviting space that encourages you to spend more time outdoors.
Space Assessment and Layout Design
Measuring your patio area is crucial. Take precise measurements to understand how much space is available for furniture, plants, and pathways. This step ensures a functional layout that doesn’t feel cramped.
Consider flow and accessibility. Arrange your furniture to facilitate easy movement and conversation. Position larger items, like dining tables, centrally while keeping lounge chairs and smaller pieces nearby for versatility.
Also, evaluate sunlight and shade. Identify spots that receive full sun versus those that stay cool, and plan your seating accordingly. Incorporate features like umbrellas or pergolas for those hotter days, ensuring comfort throughout the summer.
Using expert advice can further enhance your design. Understanding local weather conditions in Utah, particularly the importance of durable materials, will make a significant difference. Investing in quality materials, like pressure-treated lumber, will help ensure that your patio withstands the seasons effectively.
Selecting Outdoor Furniture for Comfort and Style
When designing a summer home patio, choosing the right outdoor furniture is crucial for enhancing both comfort and visual appeal. The following points cover how to select appropriate pieces, ensuring durability while creating a stylish outdoor environment.
Choosing the Right Patio Furniture
Begin by evaluating your patio's space and layout. Aim for a mix of seating arrangements that cater to your entertaining needs. Options like sectional sofas or individual chairs allow flexibility, accommodating gatherings or quiet relaxation.
Consider ergonomic designs to ensure comfort during extended use. Look for cushions that provide adequate support and opt for adjustable pieces when available. Additionally, modular furniture can adapt to various occasions, easily rearranged to suit your gathering size or activities.
Picking Durable Outdoor Furniture Materials
Selecting the right materials is vital for long-lasting outdoor furniture. Weather-resistant options such as aluminum, treated wood, and synthetic wicker withstand UV rays and moisture. For instance, aluminum frames are lightweight yet durable, while treated wood offers a timeless aesthetic.
Incorporate materials that require minimal maintenance. Choose furniture with finishes that resist fading, peeling, and rusting. When considering cost, investing in high-quality materials pays off over time through their resilience against harsh weather, particularly in areas like Utah where snow can be an issue.
Incorporating a Chaise Lounge
A chaise lounge can be a perfect addition to your outdoor space, providing a comfortable spot for relaxation. Look for models with adjustable backs that allow you to find your preferred reclining angle.
Choose lounges made from high-quality, weather-resistant materials to ensure longevity. For added comfort, consider styles that come with plush, all-weather cushions. Positioning your chaise lounge strategically in a sun-drenched area or under a pergola enhances both comfort and style.
In summary, careful selection of patio furniture, durable materials, and thoughtful incorporation of pieces like chaise lounges elevate your outdoor living experience significantly.
Enhancing Outdoor Comfort with Fabrics and Accessories
Creating a comfortable outdoor space involves selecting the right fabrics and accessories for your patio. Focus on weather-resistant cushions, explore various outdoor fabric options, and consider refreshing old items with spray paint for a new look.
Selecting Weather-Resistant Cushions
When choosing cushions for your patio, prioritize materials that withstand the elements. Look for fabrics labeled as water-resistant or UV-protected to prevent fading and damage. A common option is polyester, which is both durable and easy to clean.
Ensure that your cushions have a quick-drying foam filling to avoid mold and mildew. Check for features like zipper covers, which make washing easier. Keep your cushions looking fresh by storing them indoors during inclement weather or using waterproof storage solutions.
Understanding Outdoor Fabric Options
Familiarizing yourself with outdoor fabric options is essential for durability and visual appeal. Canvas and acrylic fabrics are popular due to their strength and color retention. You might also consider solution-dyed fabrics, which are resistant to fading and retain their vibrancy over time.
Evaluate different textures and patterns to match your style. Solids are versatile, while patterns can add character. Be mindful that lighter colors may require more maintenance, as they show dirt more readily. Regular cleaning will extend the life of your outdoor fabrics.
Refreshing Looks with Spray Paint
Revamp your patio accessories using spray paint designed for outdoor use. This method can transform metal chairs, tables, or planters at a fraction of the cost of replacement. Choose a paint that offers rust resistance for metal surfaces.
Before painting, clean the surfaces thoroughly and use a primer for better adhesion. A light sanding can also improve the finish. Opt for matte or satin finishes that withstand UV exposure and minimize glare. A fresh coat can easily brighten your outdoor space, enhancing your overall comfort.
Styling and Decorating Your Summer Patio
Creating a vibrant summer patio involves choosing the right color schemes and decorative accents while ensuring comfort for gatherings. Attention to these details not only enhances the aesthetic appeal but also makes your outdoor space inviting and functional.
Color Schemes and Decorative Accents
Start with a cohesive color palette that reflects summer vibes. Opt for bright hues like turquoise, coral, or sunny yellows to bring energy to your space.
Accent Ideas:
Cushions and Throws: Soft furnishings add comfort. Select weather-resistant fabrics for durability.
Outdoor Rugs: A patterned rug can define your space and introduce layers.
Planters: Use colorful pots to showcase vibrant flowers or greenery, drawing the eye and adding a natural touch.
Incorporate decorative elements like lanterns or string lights to create a warm ambiance. These features not only beautify the area but also enhance evening gatherings.
Creating Inviting Gathering Spaces
To ensure a welcoming atmosphere, arrange your furniture for both comfort and conversation. Consider a layout that encourages interaction, such as a circular or U-shaped seating arrangement.
Furniture Suggestions:
Lounge Chairs: Use comfortable, durable chairs for relaxation. Look for options with UV protection.
Tables: A central coffee table or side tables can provide surfaces for snacks and drinks.
Adding a fire pit can be a focal point for evening entertainment. Make sure it’s appropriately placed for safety and accessibility.
Integrate elements like shade sails or pergolas to protect from the sun. This not only provides comfort but also adds architectural interest. Choose high-quality materials for longevity, ensuring your patio remains beautiful through the summer heat and winter snow.
Seasonal Maintenance and Longevity Tips
Maintaining the integrity and appearance of your summer home patio requires regular attention. Focused care can extend the lifespan of your outdoor furniture and structures, ensuring they remain inviting and functional.
Protecting Furniture Against Weather
To safeguard your outdoor furniture, consider investing in high-quality, weather-resistant materials. For example, look for pieces made from teak, aluminum, or synthetic resin, as these materials can withstand varying weather conditions without deteriorating.
During extreme weather, such as storms or snow, use protective covers to shield your furniture from damage. Store cushions and soft fabrics indoors when not in use or during harsh conditions to prevent mold and mildew.
Regularly inspect your furniture for signs of wear. Tighten any loose screws or joints and apply a protective sealant to wooden pieces to enhance their durability.
Cleaning and Storing Outdoor Items
Regular cleaning is essential for maintaining the appearance and longevity of your patio items. Sweep away debris, including leaves and dirt, to prevent staining or mold growth. For a deeper clean, use a mixture of soap and water on your furniture and rinse thoroughly.
When the summer ends, consider storing your outdoor items in a dry, protected area. If space is limited, stack items strategically while ensuring they remain dry.
For items that remain outside, a light coating of wax can protect surfaces from UV damage and moisture, prolonging their lifespan. Regular maintenance and seasonal preparation keep your patio looking fresh and inviting.
Frequently Asked Questions
When planning your summer home patio, it’s important to consider the latest design trends, material choices, and maintenance strategies. This section addresses common questions to help you create a comfortable and stylish outdoor space.
What are the latest trends in patio design for summer homes?
Current trends in patio design emphasize open spaces that blend seamlessly with nature. You might consider incorporating multi-level decks and built-in seating to enhance functionality while maximizing views. Minimalistic designs featuring natural materials are also popular, creating a serene environment.
How should one choose the right patio furniture for a summer home?
When selecting patio furniture, prioritize comfort and durability. Look for ergonomic designs that provide support and materials that withstand weather changes. Aim for pieces that complement your home’s aesthetic while serving your entertainment needs, whether for lounging or dining.
Are there specific materials to look for when selecting outdoor furniture for a summer residence?
Opt for materials that are resistant to elements, such as aluminum, teak, or synthetic wicker. These options offer longevity and require less maintenance. Additionally, ensure that any fabric is fade-resistant and weatherproof to avoid deterioration over time.
What are the best ways to find deals on summer home patio furniture?
To find competitive prices on patio furniture, consider shopping during off-peak seasons or holiday sales. Local retailers often have promotions, and shopping online can provide access to a wider range of options. Comparing prices across multiple stores will help you find the best deals.
How can one maintain and protect patio furniture during various summer weather conditions?
Regular maintenance is essential to prolonging your furniture’s life. Use covers during adverse weather conditions and clean surfaces periodically to remove dirt and debris. For wooden furniture, applying sealants can protect against moisture and UV damage, ensuring it remains in top condition.
Which accessories can enhance the comfort and style of a summer home patio?
Incorporate accessories like outdoor cushions, rugs, and lighting to elevate the comfort level. Decorative elements such as potted plants, lanterns, and outdoor art can add a personal touch and create an inviting atmosphere for family gatherings and relaxation.

Is Deck Wood Pressure Treated? Understanding the Benefits and Risks
Pressure-treated deck wood is lumber that has undergone a special process to enhance its durability and resistance to decay and insects.
When building a deck, you're likely considering the type of wood that will provide the best performance and longevity. Most deck wood available today is pressure treated, which allows it to resist rot and insect damage, making it an ideal choice for outdoor structures. This is particularly important in areas like Utah, where the weather can be harsh, including snow and fluctuating temperatures.
Using pressure-treated lumber not only enhances the durability of your deck but also ensures that it stands up to the elements over time. With the right construction techniques and attention to detail, including the use of waterproof materials, you can create a structure that is both aesthetically pleasing and built to last.
By investing in quality materials and craftsmanship, you set your outdoor space up for success, attracting potential customers and providing a reliable place for gatherings and relaxation. When it comes to your decking needs, consider Salt City Decks for a solution that prioritizes quality and longevity.
What Is Pressure-Treated Deck Wood?
Pressure-treated deck wood is lumber that has undergone a special process to enhance its durability and resistance to decay and insects. This treatment is crucial for outdoor applications, especially in areas like Utah, where harsh weather conditions can impact wood structures.
How Pressure Treatment Works
The pressure treatment process involves placing wood in a vacuum chamber, where a preservative solution is forced deep into the fibers. This ensures that the chemicals penetrate thoroughly, creating a barrier against rot and insect damage.
Typically, water-based solutions containing chemical preservatives are used, and the wood is heated to assist the process. Once treated, the lumber dries and is ready for use, providing longevity and resilience against environmental challenges.
Common Types of Treated Wood
Several types of treated wood are commonly used, depending on the specific application and required resistance levels. Common variants include:
Copper Azole (CA): Known for being less toxic than older treatments, CA is effective against fungi and insects.
Micronized Copper Azole (MCA): Similar to CA, MCA utilizes smaller copper particles for enhanced wood penetration.
Alkaline Copper Quaternary (ACQ): A popular alternative that offers strong protection against decay without the arsenic found in previous treatments.
Selecting the right type ensures that your deck wood meets your specific needs for performance and safety.
Different Chemical Preservatives
The choice of chemical preservatives is pivotal in pressure-treated wood. Common options include:
Chromated Copper Arsenate (CCA): Once widely used, CCA is now limited due to environmental concerns.
Copper Azole: Effective against degradation and suitable for residential uses.
Micronized Copper Azole: Offers similar benefits to Copper Azole with improved aesthetics.
Alkaline Copper Quaternary (ACQ): Provides robust resistance and is safer for various applications.
Understanding these options helps you make an informed decision about the best materials for your deck, enhancing its durability and performance.
Benefits of Using Pressure-Treated Wood for Decks
When considering materials for your deck, pressure-treated wood stands out for its impressive attributes. Its resistance to pests, protection against moisture, and enhanced longevity make it a top choice for outdoor projects in varied climates.
Resistance to Termites and Pests
Pressure-treated wood is specifically engineered to combat pests like termites and wood-boring insects. The treatment process involves infusing the wood with chemical preservatives that deter these destructive organisms.
This resistance not only safeguards the deck's structural integrity but also reduces maintenance costs over time. With less need for repairs or replacements due to pest damage, you can enjoy peace of mind knowing your investment is secure.
Moreover, maintaining a pest-free outdoor space enhances your overall enjoyment. No one wants to deal with the hassle of insect infestations, making pressure-treated decking a logical choice for your outdoor area.
Protection Against Moisture Damage
Moisture can be one of the biggest threats to wooden structures. Pressure-treated wood offers significant protection against water-related issues like warping, swelling, and mold growth.
The chemicals used in the treatment process help create a water-repellent barrier. This means that your deck can withstand exposure to rain, snow, and humidity without succumbing to water damage.
Using pressure-treated wood significantly lowers the risk of structural failure caused by moisture. You can prolong the lifespan of your deck and maintain its appearance and functionality under various weather conditions, which is essential in regions like Utah that experience snow.
Enhanced Longevity and Durability
One of the most appealing benefits of pressure-treated decking is its enhanced longevity. This type of wood is designed to withstand harsh environmental conditions while maintaining its structural strength.
With proper maintenance, a pressure-treated deck can last for decades. This durability means fewer replacements and repairs, allowing you to save money and time in the long run.
From the initial installation to years of enjoyment, investing in quality materials and craftsmanship is key. Salt City Decks emphasizes meticulous attention to detail, ensuring that your deck not only looks great but also stands the test of time.
Decking Materials: Pressure-Treated Versus Alternatives
When selecting decking materials, understanding the differences between pressure-treated wood and alternatives is crucial. Each option carries its advantages and disadvantages, influencing factors such as durability, cost, and aesthetics.
Comparison with Hardwood and Redwood
Pressure-treated wood is often less expensive than hardwoods like oak or maple, as well as redwood. While hardwoods offer a natural beauty and durability, they can be more susceptible to weathering without proper upkeep. Pressure-treated lumber, designed to resist rot and insects, is chemically treated, providing an economical solution for outdoor decks.
Hardwoods may require regular sealing and maintenance, while pressure-treated wood offers a more forgiving option in harsh climates like Utah, where snow and moisture can affect decks. Choosing between these materials will depend on your budget and desired appearance.
Composite Decking vs. Pressure-Treated Wood
Composite decking is engineered from a blend of wood fibers and plastic, making it impervious to moisture and resistant to fading. This longevity often exceeds that of pressure-treated wood, which can last around 15-20 years with proper care. While composite materials are typically more expensive upfront, they require less maintenance over the years, offering long-term savings.
Pressure-treated wood provides a natural look at a lower cost, but it needs regular maintenance, including staining and sealing. When building your deck, consider the long-term costs associated with these materials, particularly in an environment exposed to severe weather conditions.
Economical Choice for Outdoor Projects
Pressure-treated wood ranks high as the economical choice for outdoor projects. Costing between $1.25 to $5.60 per linear foot, it fits various budgets while providing a sturdy foundation for decks. Its ability to withstand natural elements makes it ideal for regions like Utah, where snow can pose challenges.
Less expensive than composite options, pressure-treated lumber still offers strength and resilience. When planning your decking project, it’s essential to balance initial costs with long-term durability and maintenance requirements, ensuring you select the best option for your home and climate. Consider partnering with Salt City Decks for expert advice and quality craftsmanship in your deck construction.
Applications Beyond Decks: Versatility of Pressure-Treated Wood
Pressure-treated wood is widely recognized for its durability and resistance to decay, making it suitable for various outdoor applications. From fencing to outdoor furniture, its versatility ensures long-lasting solutions for your needs.
Fences and Sheds
Pressure-treated wood is a popular choice for fences and sheds due to its resistance to moisture and pests. The preservatives used in the treatment process protect the wood from rot and insect damage, ensuring a longer lifespan.
Common Uses:
Privacy Fences: Provides security and an aesthetic barrier.
Garden Sheds: Ideal for storage, maintaining structural integrity against weather.
Southern yellow pine is often used in these structures, giving you an attractive appearance while remaining cost-effective. By investing in quality pressure-treated wood, your outdoor installations remain intact despite harsh conditions.
Picnic Tables and Outdoor Furniture
When it comes to outdoor dining, picnic tables made from pressure-treated wood offer exceptional durability. Their ability to withstand rain and sun exposure makes them perfect for outdoor gatherings.
Key Features:
Resistant to Decay: Maintains strength and stability over time.
Easy Maintenance: Requires simple cleaning to preserve appearance.
Creating comfortable outdoor spaces for social gatherings is more achievable when using pressure-treated materials. This type of lumber minimizes the risks of warping and cracking, ensuring that your furniture lasts for years to come.
Swing Sets and Play Structures
Safety and durability are paramount in outdoor play structures, making pressure-treated wood a wise choice for swing sets and other play equipment. The structural integrity provided by this material allows it to hold up well against frequent use.
Benefits Include:
Pest Resistance: Keeps children safe from wood-boring insects.
Weather Resistance: Stands strong against rain and snow.
By using pressure-treated wood, you ensure your swing sets remain not only functional but also visually appealing. Investing in quality materials guarantees that these structures can endure the active play of children for years to come.
Key Considerations and Maintenance for Pressure-Treated Decks
Proper maintenance and understanding of pressure-treated decks are crucial for maximizing their longevity. Factors such as the ground contact rating, routine upkeep, and warranty details play significant roles in ensuring your deck remains safe and attractive over time.
Above Ground vs. Ground Contact Ratings
When selecting pressure-treated wood, it’s essential to understand the differences in ground contact ratings. Above ground wood is treated for exposure to moisture but shouldn't touch the soil. In contrast, ground contact wood is specifically designed to handle direct soil contact and is treated with a higher level of preservatives.
Using the appropriate rating for your project helps prevent rot and insect infestations. For example, if your deck is close to the ground or in a damp environment, choose ground contact-rated lumber. This reduces the risk of premature decay and enhances the lifespan of your structure.
Routine Maintenance Tips
Regular maintenance is key to preserving the integrity of your pressure-treated deck. Start by cleaning the surface at least twice a year to remove dirt and debris. A mixture of water and mild detergent works well for this purpose.
Inspect your deck for signs of wear, such as cracks or loose boards. Replacing damaged sections promptly helps prevent larger issues. Applying a quality sealant every couple of years can further protect your deck from moisture and sun damage.
In snowy climates like Utah, ensure snow is cleared promptly in winter to prevent additional weight and moisture damage. By incorporating these practices, you maintain both the appearance and functionality of your deck effectively.
Warranties and Product Lifespan
Understanding warranties for pressure-treated wood is crucial for protecting your investment. Most manufacturers offer warranties ranging from 10 to 30 years, primarily against structural failure due to decay.
It's important to note that warranties often require proper maintenance. Keep documentation of your care practices to ensure you meet warranty conditions. Factors like exposure, moisture, and upkeep can influence the lifespan of the materials.
By choosing quality pressure-treated lumber from a reputable supplier like Salt City Decks, you ensure your deck is built for longevity, even in harsh conditions.
Frequently Asked Questions
Understanding the characteristics and maintenance of pressure-treated wood is crucial for making informed decisions about your deck. Here are some common inquiries and insights about pressure-treated lumber and its alternatives.
How can I tell if existing wood on a deck has undergone pressure treatment?
To determine if your existing deck wood is pressure-treated, look for a greenish tint, which is a common indicator. Additionally, check for markings on the lumber that indicate treatment or a tag near the end of the boards. If you can see the end grain, treated wood may have a more pronounced texture or pattern due to the treatment process.
Are non-pressure treated deck boards suitable for outdoor use with paint or sealant?
Non-pressure treated deck boards can be used outdoors, but they are less resistant to moisture and decay. Applying a high-quality paint or sealant can extend their lifespan, but it’s crucial to reapply these protective coatings regularly. Even with treatment, you may still face issues with warping or cracking over time.
How does pressure-treated lumber for decks compare to composite materials?
Pressure-treated lumber is often more economical than composite materials and offers a natural wood appearance. However, composite materials typically require less maintenance and are more resistant to fading, splintering, and insect damage. If longevity and minimal upkeep are priorities, composite may be worth considering.
What lifespan should be expected from untreated wooden deck boards?
Untreated wooden deck boards generally last around 5 to 10 years, depending on environmental factors such as moisture, sunlight, and maintenance. Without proper treatment or regular sealing, wood is more susceptible to rot and insect damage, significantly shortening its lifespan.
What considerations should be made when selecting wood types for deck board installations?
When selecting wood types for your deck, consider factors such as durability, resistance to moisture, and aesthetic appeal. Hardwoods like cedar or redwood offer natural resistance to rot but may require more maintenance than pressure-treated lumber. Assess your climate and specific usage needs to choose the best option for your deck.
What size pressure-treated deck boards are typically available at home improvement stores?
Home improvement stores commonly stock pressure-treated deck boards in various sizes, including 2x4, 2x6, and 5/4x6 dimensions. Lengths typically vary from 8 to 16 feet, allowing for flexibility in your construction project. Ensure to check for specific treatment grades suitable for your intended use, especially in areas with extreme weather.

How to Build a Single Deck Step: A Simple Guide to Enhance Your Outdoor Space
When planning your single deck step, it’s crucial to focus on determining rise and run, understanding local building codes, and selecting suitable materials
Building a single deck step can greatly enhance the functionality and safety of your outdoor space. To successfully create a sturdy and reliable step, you should use quality materials like pressure-treated lumber, which can withstand harsh weather conditions, including snow typical in Utah. Proper construction techniques will ensure your step is not only functional but also aesthetically pleasing.
The process involves measuring accurately, selecting the right materials, and following effective construction methods. Attention to detail, such as using waterproof tape and ensuring closer joist spacing, will improve the overall durability of your deck step. By focusing on quality workmanship, you are setting a foundation for long-lasting outdoor structures that can withstand the test of time.
If you're looking for expert assistance in your decking projects, consider Salt City Decks. Their dedication to quality and craftsmanship will help you achieve the perfect outdoor step that meets both functional and visual standards.
Planning Your Single Deck Step
When planning your single deck step, it’s crucial to focus on determining rise and run, understanding local building codes, and selecting suitable materials. Each element plays a vital role in the safety, longevity, and functionality of your deck step.
Determining Total Rise and Run
Start by measuring the total rise from the ground to the top of the deck. Use a level and measuring tape for an accurate reading.
Total Rise: This is the vertical height that the step will cover.
Total Run: This refers to the horizontal distance your step will extend outwards.
Typically, steps should have a rise between 7 to 8 inches and a run of 10 to 11 inches for comfort and safety. When calculating, ensure that you maintain these dimensions throughout for subsequent steps, if any. This consistency helps with balance and minimizes the risk of tripping.
Reviewing Local Building Code
You must review local building codes specific to your area in Utah. Building codes dictate essential aspects of deck construction, including:
Step height and width: Compliance with regulations ensures safety.
Load requirements: Your deck must support the expected weight.
Local codes often require building permits, so check with local authorities before starting. Adhering to these guidelines is not only necessary for safety but also protects you from potential fines or mandatory modifications down the line. Always maintain open lines of communication with your local building department.
Selecting Treated Lumber and Materials
Quality materials are paramount for durability, especially in regions prone to harsh weather conditions, like snow. Use pressure-treated lumber for your step. This type of wood resists rot, moisture, and insects, which is essential for extending the lifespan of your deck.
Consider these materials for further enhancements:
Waterproof tape: This minimizes water penetration around your joints.
Closer joist spacing: Increases the deck's stability and strength.
Investing in high-quality materials and techniques will not only ensure structural integrity but will also enhance the visual appeal of your deck. This approach attracts potential customers looking for reliable outdoor solutions. Consider working with Salt City Decks for your decking needs to guarantee quality craftsmanship and materials tailored for Utah's climate.
Designing the Deck Step
Creating the right design for your deck step is foundational for both safety and aesthetics. Key considerations include measuring riser height, determining tread depth, and selecting appropriate materials. Here’s what you need to focus on.
Calculating Riser Height and Tread Depth
Begin by measuring the total rise from the ground to the deck surface. Divide this measurement by the desired number of steps to find the unit rise. Ideal riser heights range from 4 to 7 inches. Use a stair calculator for precision.
Next, for tread depth, a minimum of 10 inches is recommended for safety. This allows ample space for your foot. Ensure that the riser height and tread depth combination results in a comfortable and safe stair experience.
Choosing the Right Stair Design
When selecting a stair design, consider your deck’s purpose and location. For functional outdoor steps, a straightforward design might suffice. However, if your deck has multiple levels, a more elaborate staircase could enhance usability and appeal.
Think about customization options like railings. A well-placed railing can add both safety and style. Opt for materials that complement your deck. Using pressure-treated lumber is ideal for withstanding Utah's varying weather conditions, ensuring longevity.
Sizing Tread Thickness
Tread thickness is crucial for durability and performance. A minimum thickness of 1 inch is standard for wooden treads. If you are using composite materials, check the manufacturer’s guidelines for recommended thickness.
Remember to choose materials that can withstand moisture, especially in regions like Utah that experience snow. Opting for thicker treads not only provides safety but also adds aesthetic appeal to your staircase design. Quality craftsmanship will guarantee that your deck steps remain stable and visually pleasing for years.
Laying the Foundation
A solid foundation is critical for the durability of your deck step. Properly established footings and the use of concrete anchors ensure your structure remains stable and withstands various weather conditions.
Establishing Footings and Landings
Start by determining the exact location for your deck step. You'll need to dig footing holes that are below the frost line, especially in areas like Utah, where snow can affect ground stability.
Each footing should be at least 12 inches in diameter if you’re using concrete, and about 30 inches deep. This depth helps prevent shifting from freeze-thaw cycles.
Prepare the area by removing debris and leveling the ground. After digging, your next step is to pour concrete into each footing hole. Aim for a smooth, even surface and allow the concrete to cure fully, which usually takes around 24 to 48 hours.
This solid footing will act as the landing for your deck step, providing essential support and enhancing the longevity of your structure.
Using Concrete Anchors for Stability
To ensure maximum stability, you should use concrete anchors in conjunction with your footings. These anchors connect the frame of the step securely to the footings, minimizing movement.
Select high-quality, corrosion-resistant concrete anchors designed for outdoor use. This is crucial for maintaining structural integrity over time, especially in harsh weather conditions.
When installing, drill pilot holes in the concrete footings where you intend to place the anchors. Align the anchors with your deck structure and secure them tightly, ensuring there is no play.
Using concrete anchors helps distribute weight evenly and enhances safety, making your deck step not only reliable but also visually appealing. Investing in these crucial elements will reflect the dedication to quality essential for long-lasting outdoor structures.
Cutting and Assembling the Step Components
This section will guide you through the critical processes of cutting the components and assembling them accurately. Proper techniques ensure that your single deck step is not only sturdy but also visually appealing.
Marking and Cutting Stringers
Begin by measuring the total rise from the ground to the deck surface. Use a carpenter's pencil to mark your stringers accordingly. They will serve as the backbone of your step structure.
For cutting, you can use a circular saw or a jigsaw. A circular saw is ideal for straight cuts, while a jigsaw allows for more intricate designs if needed. Ensure the angle of each cut matches the rise and run of your steps for precise fitting.
Always remember to check your measurements twice before cutting. A small error can lead to bigger problems during assembly.
Attaching Treads and Risers
Once your stringers are cut, it’s time to add the treads and risers. The riser should be perpendicular to the stringer and attached first. Use deck screws to secure it firmly, ensuring that it’s flush with the stringer.
Next, attach the tread on top of the riser. Choose high-quality pressure-treated lumber for durability, especially in regions with snow. This will help your steps withstand varying weather conditions.
Spacing the screws about 8-10 inches apart along each tread will ensure stability and prevent them from sagging. Ensure that everything is level before proceeding.
Securing with Deck Screws and Framing Square
After positioning everything, it’s crucial to check for squareness. Use a framing square to confirm that your step is aligned correctly. This ensures safety and functionality.
Now, secure the components with deck screws. Choose the appropriate length to penetrate through the tread and riser into the stringers. Typically, 3-inch screws work well for this purpose.
Apply waterproof tape over the joints if your steps will be exposed to the elements. This adds an additional layer of protection against moisture and extends the lifespan of your construction.
Final Touches and Safety Considerations
After constructing your deck step, it's crucial to focus on safety and durability. Proper installation of handrails and a thorough inspection can significantly enhance the safety and functionality of the structure.
Installing Handrail and Guard
A sturdy handrail is essential for safety, especially for steps. Choose materials that match your deck and provide stability. Use pressure-treated lumber for longevity.
Height and Design: Ensure the handrail height complies with local building codes, typically between 34-38 inches. The design should also be comfortable to grip.
Mounting: Secure the handrail to the step and the surrounding structure using strong brackets. Ensure it can withstand weight without wobbling. For added safety, consider using a guard on either side of the stairs.
Finishing Touches: Sand down sharp edges to prevent injuries and apply a weather-resistant stain or sealant for protection against Utah’s elements, especially snow.
Inspecting the Completed Deck Step
Once your step is built and the handrail is installed, a thorough inspection is necessary. This ensures safety and functionality.
Structural Integrity: Check for any loose boards or uneven surfaces. Make sure all screws and fasteners are tight and secure. Look for signs of splintering or rotting, which can compromise the structure.
Handrail Stability: Test the handrail for sturdiness. Push and pull to ensure it stays in place.
Level and Alignment: Confirm that the step is level and aligned with adjoining structures. Any misalignment could lead to tripping hazards.
Safety Compliance: Review local regulations to ensure your deck step, including the handrail, meets all safety requirements.
By paying close attention to these final touches, you enhance the safety and longevity of your deck stairs, making them a valuable addition to your outdoor space.
Frequently Asked Questions
Building a single deck step involves specific materials, measurements, and construction methods. Understanding safety and design considerations is essential for ensuring durability and stability.
What materials are needed to construct a single deck step?
You will require pressure-treated lumber for the frame and treads, as it is designed to withstand outdoor conditions. Additionally, screws or nails suitable for exterior use, along with possible waterproof tape for added protection, are necessary. Don't forget to have concrete blocks if you're using a more solid foundation for the step.
What are the measurements and calculations required for building deck steps?
Begin by evaluating the height from the ground to the deck. Measure this total rise to determine the number of risers you will need. Each riser height typically ranges between 6 to 8 inches for comfort. Also, calculate the tread depth, which should be at least 10 to 12 inches for safety.
Can you describe the process of building a single step for a deck?
First, square the area where the step will be located. Cut your frame pieces according to your measurements, ensuring the base sits level. Assemble the frame and then attach the tread securely on top. Check that everything is level and properly anchored before finalizing the installation.
What is the appropriate method for attaching a single deck step to the deck structure?
Use lag screws to attach the step securely to the deck. This method ensures a solid connection, suitable for handling any weight or load. Make sure to pre-drill holes to avoid splitting the wood, and ensure the attachments are at the appropriate height to match the deck.
How can I ensure safety and stability when constructing a single deck step?
To enhance safety, ensure all materials are sturdy and rated for outdoor use. Construct the frame with sufficient bracing, and check for levelness throughout the build. It is also advisable to securely fasten all components to the deck and reinforce with additional supports if needed.
What are some design considerations for building a single step leading to a deck?
When designing your step, consider the overall aesthetics and functionality. Ensure the step matches the height and depth of the deck for a seamless transition. Additionally, you might want to add anti-slip materials on the treads for improved safety, especially in snowy conditions typical in Utah.

How to Build Curved Stairs for a Deck: A Step-by-Step Guide to Create Stylish and Functional Access
Curved stairs add elegance and functionality to your deck, presenting unique design opportunities and challenges.
Building curved stairs for your deck can transform an ordinary outdoor space into an elegant retreat. To successfully construct curved stairs, begin by utilizing high-quality materials like pressure-treated lumber, which ensures durability against Utah's harsh weather and snow. Mastering the right techniques, such as precise stringer cuts and proper bracing, will lead to a sturdy and attractive result.
As you embark on this project, pay attention to the finer details. Employing strategies like waterproof tape and closer joist spacing will enhance the longevity and stability of your stairs. By investing in quality craftsmanship, not only do you create a functional feature, but you also increase the aesthetic value of your deck.
When you're ready to take your deck's design to the next level, Salt City Decks can provide expert guidance and service tailored to the unique challenges of your area. With a focus on quality and lasting structures, you can create a stunning outdoor space that withstands the test of time.
Understanding Curved Stairs for Decks
Curved stairs add elegance and functionality to your deck, presenting unique design opportunities and challenges. Understanding the differences between curved and straight stairs, along with essential design considerations, can streamline your building process and enhance your deck's appeal.
Curved Vs. Straight Stairs
Curved stairs often serve as a visual centerpiece, over straight stairs, which are straightforward and functional. While straight stairs are easier to measure and build, curved stairs require precise calculations and careful planning.
Benefits of Curved Stairs:
Aesthetic Appeal: They create a beautiful flow within your deck design.
Space Efficiency: Curved stairs can fit into tight spaces more efficiently than straight ones.
Challenges of Curved Stairs:
Complex Construction: You need to account for the curvature in measurements and design.
Greater Material Waste: More cuts may lead to off-cuts and increased costs.
Understanding these aspects allows you to decide the style that best enhances your project.
Key Design Considerations
When constructing curved stairs for your deck, several design factors should be prioritized to ensure safety and longevity.
Important Factors to Consider:
Rise and Run: Maintain uniform rise and run ratios for safety. Standard rise is generally between 4 to 7 inches.
Material Selection: Use quality materials like pressure-treated lumber to withstand Utah's harsh weather, especially snow.
Support Structure: Bracing may be necessary to strengthen the stairs against weight strain.
Additional Tips:
Waterproofing Techniques: Utilize waterproof tape in joints to prevent moisture damage.
Joist Spacing: Closer joist spacing enhances stability and supports the curved structure effectively.
Incorporating these design principles will help create durable, elegant curved stairs on your deck.
Planning and Designing Curved Deck Stairs
When planning and designing curved deck stairs, precision and attention to materials are key. This ensures that your stairway will be both functional and visually appealing, fitting seamlessly into your outdoor space.
Drawing and Visualizing Your Stair Layout
Start by sketching your desired stair layout. Use graph paper for accuracy, marking the center point of the curve. Visualizing the curvature helps you understand how the stairs will integrate with your deck.
Consider the width of the stairs; typically, a width of 36 inches provides enough space for comfortable use.
You can also use software tools or online design applications to create a digital layout, making adjustments easier. Remember to account for handrails and landing areas in your design for safety and functionality.
Choosing the Right Materials
Selecting quality materials is crucial for the longevity of your curved stairs. Pressure-treated lumber is often recommended due to its resistance to rot and pests, especially important in areas like Utah, which experience snowy winters.
For added durability, consider composite materials that offer weather resistance and require less maintenance. When selecting treads, ensure they provide adequate grip to prevent slipping, particularly in wet conditions.
Investing in high-quality materials not only enhances the durability of the structure but also contributes to the overall aesthetic appeal, attracting attention and increasing value.
Calculating Rise, Run, and Radius
Accurate calculations for rise, run, and radius are vital for proper stair design. The rise is the vertical distance from one step to the next, typically 7 to 8 inches. The run is the horizontal distance, which should be around 10 to 11 inches for comfortable foot placement.
Determine the radius of your curved stairs based on the overall design. A tighter radius can create a more elegant look but may require additional planning to ensure stability. Wrap setting can help create a seamless transition between the steps.
By meticulously calculating these dimensions, you ensure a safe and functional stairway that complements your deck perfectly.
Building the Foundation and Structure
Constructing strong foundations and structures is vital for your curved stairs. Proper planning and execution ensure that your stairs are not only durable but also visually appealing. Focus on quality materials and precise techniques to achieve a structure that lasts.
Laying the Footings and Setting the Base
Begin by determining the exact location of your curved stairs. Dig footings according to local regulations, ensuring they are deep enough to provide stability. Concrete footings should be used for a solid foundation.
Utilize pressure-treated lumber for the base, as it can withstand harsh weather, including Utah's snow. Make sure to level the base and check for proper drainage. A well-prepared base promotes the longevity and stability of your stairs.
Once your footings are set and cured, it’s time to install the ledger board. Use lag bolts to secure it to the deck structure. This will provide critical support to the curved stringers that follow.
Framing Curved Stringers
To frame your stringers, you will first need to create a template. This will help you maintain a consistent curve throughout the project. Plywood is a common choice for templates, allowing you to easily trace the shape needed.
Next, cut your stringers from pressure-treated lumber. These will be the backbone of your curved stairs, so accuracy is crucial. Use a jigsaw for precise cuts. Make sure to measure the rise and run accurately to achieve a comfortable stair slope.
After cutting, attach the stringers to the base securely. Use screws and waterproof tape to enhance durability. Closer joist spacing between the stringers improves stability, which is essential for curved designs.
Attaching Treads and Risers
Once your stringers are securely in place, you can begin to install the treads and risers. Start with the risers, attaching them to the back of each stringer using screws. Make sure they are level to ensure a uniform appearance.
For the treads, select materials that are weather-resistant. Salt City Decks recommends using composite or treated wood to withstand moisture and prevent warping. Attach the treads securely, ensuring they overhang slightly for a finished look.
Finally, inspect the structure for any imperfections. Double-check that everything is level and securely fastened. This attention to detail enhances both the durability and aesthetic appeal of your curved stairs, adding value to your deck.
Finishing Touches: Railing, Materials, and Safety
In this section, attention is given to the essential elements that enhance the functionality and aesthetics of your curved stairs. Proper railings are crucial for safety, while selecting the right materials ensures durability over time.
Installing Railings on Curved Stairs
When installing railings on your curved stairs, precision is vital. Start by measuring the height at which the railing will be mounted. Typically, railings should be 36 inches above the tread. Use a template to mark the curve accurately.
Choose a railing that complements the design of your stairs. Consider materials such as metal or wood, with wood offering a warm aesthetic. Pre-drilled holes help maintain a uniform look.
Secure your railing posts firmly into the ground at the appropriate intervals, no more than 6 feet apart. Use exterior-grade screws, as they resist corrosion. Finally, always test the stability of the railing to ensure it meets safety standards.
Selecting and Working With Ipe Wood
Ipe wood is an excellent choice for outdoor structures due to its exceptional durability and resistance to weather elements. This hardwood is naturally resistant to insects and decay, making it ideal for decks that face the elements of Utah.
When working with Ipe, use extremely sharp tools and drill pilot holes to prevent cracking. The wood's density can make it challenging to work with, but its long lifespan is worth it.
Consider applying a high-quality, UV-protective finish, which preserves Ipe's natural color and prevents fading. Maintenance is minimal; simply clean with soap and water to maintain its appeal.
By carefully installing railings and using high-quality materials like Ipe, you ensure safety and longevity for your curved stairs.
Maintaining and Enhancing Curved Deck Stairs
Proper care and enhancements can significantly extend the life and beauty of your curved deck stairs. Regular upkeep and thoughtful upgrades will ensure your stairs stay safe and appealing for years to come.
Regular Maintenance Tips
To keep your curved stairs in prime condition, start with regular inspections. Check for signs of wear, such as loose treads or deteriorating risers. Tighten any loose hardware to maintain stability.
Cleaning is essential. Use a mild soap solution and a soft brush to remove dirt and algae, particularly in shady areas where moisture accumulates. Once cleaned, consider sealing your stairs with a quality outdoor sealant to protect against moisture and UV damage, especially important in snowy Utah winters.
Inspect the wood for cracks or signs of rot. If you notice damage, replace boards promptly to avoid further deterioration. Regularly clearing debris, like leaves or snow, will also help maintain safety and prevent slips.
Upgrading and Customizing Features
Enhancing your curved deck stairs can maximize both safety and aesthetic appeal. Adding non-slip treads can significantly reduce the risk of slips, particularly during icy conditions. Installing ambient lighting along the stair edges improves visibility and adds a welcoming touch during the evenings.
Consider customizing the railing for a more cohesive look. A decorative railing that complements your deck can add character and safety.
If you're looking to increase functionality, explore built-in storage solutions beneath the stairs. These additions not only save space but can also enhance the design of your outdoor area.
For superior craftsmanship and materials, choose Salt City Decks for all your decking needs in Utah. They ensure your curved stairs are constructed with quality pressure-treated lumber and meticulous attention to detail, making them resilient against the elements.
Frequently Asked Questions
Building curved stairs for a deck involves various considerations related to design, materials, and structural integrity. Understanding these aspects is crucial to achieving both functionality and aesthetic appeal while ensuring safety and compliance with local code requirements.
What are the essential considerations in curved staircase design calculations?
When designing a curved staircase, precise measurements are vital. You'll need to calculate the radius, rise, and run of each step to ensure that they fit together seamlessly. Consider the overall space available and the desired slope to maintain comfort and safety when using the stairs.
How can you ensure structural integrity when building a curved staircase?
Using quality materials, such as pressure-treated lumber, enhances the sturdiness of your stairs. Employ advanced construction techniques, including proper bracing and support, to prevent sagging over time. Ensure that all connections are secure and consider moisture-resistant treatments to protect against the elements.
What are the code requirements for curved stair treads?
Curved stair treads must adhere to specific building codes regarding size and shape. Each tread typically should have a minimum depth measured at the widest point to ensure safety. Familiarize yourself with your local building regulations to ensure compliance and avoid future issues.
How can you transition from straight to curved steps in a staircase design?
To transition smoothly from straight to curved steps, gradual changes in width and riser height are necessary. This technique helps maintain a consistent feel and flow in your design. You may use a template to guide your layout, ensuring that the transition is visually appealing and functional.
What are the typical costs associated with constructing a curved staircase?
Costs can vary based on materials, design complexity, and labor. Generally, expect higher expenses for custom designs and high-quality materials. It's wise to obtain multiple quotes and consider the value of longevity when selecting materials and craftsmanship for your project.
What techniques are available for creating curved stair treads?
Creating curved stair treads can be done through several techniques, including laminating layers of wood to achieve the desired shape. Another method involves using CNC machinery to cut precise curves. Both methods ensure that the treads maintain structural integrity while providing an elegant appearance.

Which is the Best Composite Decking Material for Your Home?
Composite decking material combines aesthetic appeal with durability, making it an attractive option for outdoor spaces.
When considering which is the best composite decking material, understanding the key elements that influence durability and maintenance is crucial. Investing in high-quality materials, such as those offered by Salt City Decks, ensures your deck will withstand Utah’s harsh weather conditions and last for years to come. Quality craftsmanship plays a significant role in the longevity and stability of your outdoor structures, giving you peace of mind.
In regions that experience a variety of weather, including snow, selecting the right decking material becomes even more important. Attention to detail in construction methods—such as proper spacing between joists and the use of waterproof tape—enhances durability and helps prevent common issues that may arise from environmental factors. By focusing on quality, your investment not only withstands the elements but also adds value to your home.
Choosing the right composite decking can significantly impact both the aesthetic appeal and functionality of your outdoor space. For those looking to create a beautiful, lasting deck, working with experts like Salt City Decks can provide the quality solutions needed to elevate your outdoor living experience.
What Is Composite Decking Material?
Composite decking material combines aesthetic appeal with durability, making it an attractive option for outdoor spaces. It incorporates a blend of wood fibers, recycled plastics, and various additives to enhance performance and longevity.
Definition and Composition
Composite decking is made primarily from a mixture of recycled plastic and wood fibers. The wood fibers provide a natural appearance, while the plastic component increases resistance to moisture and insects.
Typically, the composition includes approximately 50% wood flour, 30% recycled plastic, and 20% additives like colorants and UV inhibitors. This combination results in a product that mimics the look of natural wood while offering superior durability.
Composite Deck Boards vs. Wood Decking
When comparing composite deck boards to natural wood decking, several key differences emerge. Composite boards are resistant to warping, splintering, and fading, making them lower-maintenance options.
In contrast, wood decking, while beautiful, requires regular staining and sealing to prevent deterioration from harsh weather, especially in snowy regions like Utah. Composite materials typically come with warranties that attest to their durability, often lasting 25 years or more with proper care.
Environmental Impact and Recycled Materials
Composite decking is often touted for its environmentally friendly attributes. The use of recycled plastics helps divert waste from landfills and reduces the need for new raw materials.
Many products on the market incorporate up to 95% recycled content. The inclusion of wood fibers, sourced from sustainable forests, further enhances the eco-friendliness of composite decking. This makes it an attractive choice for environmentally conscious homeowners looking to minimize their ecological footprint.
In your choices for decking, consider how quality materials and trustworthy construction can provide not only a safe outdoor environment but also visual appeal for years to come.
Key Factors in Choosing the Best Composite Decking Material
When selecting composite decking, it's essential to prioritize durability, resistance to moisture and mold, and performance against fading and UV damage. Each of these factors plays a critical role in ensuring your deck remains attractive and functional for years.
Durability and Weather Resistance
Durability is a primary consideration for decking. High-quality composite materials typically feature a dense core, allowing them to withstand harsh weather conditions, including heavy snowfall common in Utah. Weather-resistant boards are designed to resist warping, splitting, and cracking.
Composite decking often includes a protective cap that guards against the elements. This cap significantly extends the lifespan of your deck, meaning you can enjoy your outdoor space without frequent repairs. Check the manufacturer's specifications to ensure you select a product with proven durability.
Moisture and Mold Resistance
Moisture resistance is crucial, especially in areas with significant rainfall or snowfall. Many composite decking materials are designed with non-porous surfaces that repel water, minimizing the risk of mold and mildew growth. This resistance not only maintains a clean appearance but also promotes a healthier environment for your outdoor space.
When evaluating options, look for composites rated for moisture resistance. Products with a high resistance can last longer and remain more stable over time. This is particularly vital for decks in Utah, where sudden weather changes can introduce moisture challenges.
Fading and UV Performance
Fading due to UV exposure can significantly affect the look of your composite deck. Choosing materials with fade-resistant properties can keep your deck looking vibrant for many years. Some products incorporate UV inhibitors into their formulation, which helps to prevent discoloration.
When selecting a composite, review the warranty regarding fading. A longer warranty period often indicates confidence in the product's ability to resist fading. Ensure your choice not only meets aesthetic expectations but also withstands the sun’s harsh rays effectively, maintaining its appeal in UV-rich environments.
Top Composite Decking Brands Reviewed
When selecting composite decking, key features such as durability, sustainability, and aesthetic options are vital. The following brands stand out in these areas, offering a range of products to meet diverse needs.
Trex: Features and Product Lines
Trex is known for its innovative composite materials, combining recycled wood fibers and plastic. This brand offers several product lines, including Trex Transcend, known for its premium appearance and long lifespan.
Each line features unique colors and textures, providing ample options for aesthetic customization. Trex also prioritizes sustainability, using an eco-friendly manufacturing process. This ensures that your deck can withstand the elements and remain visually appealing for years. The Trex Select line provides a cost-effective solution while maintaining high durability standards.
TimberTech: Value and Innovations
TimberTech excels in blending aesthetics with performance. The brand is recognized for its robust materials that resist fading and scratching. Notable product lines include TimberTech Azek and TimberTech Pro, which offer beautiful finishes while ensuring long-term performance.
TimberTech’s materials are designed to withstand harsh environmental conditions, making it ideal for areas with snow and moisture. The innovative technology used in its products helps prevent mold and mildew growth, enhancing the deck's durability. Plus, TimberTech provides a variety of colors and design options to suit your style preferences.
Fiberon: Sustainability and Performance
Fiberon focuses on sustainability without compromising on quality. Their composite decking utilizes a mix of recycled materials, making it an eco-friendly choice. Fiberon Horizon is particularly praised for its durability, featuring a weather-resistant surface that can handle extreme conditions.
This brand's products also include Fiberon Sanctuary, which offers a unique, variegated look to enhance your outdoor space. Fiberon's commitment to performance means you’ll enjoy a beautiful deck that requires minimal upkeep, making it a smart choice for homeowners looking for longevity.
Each of these brands provides a blend of quality and innovation, ensuring that your decking decisions are backed by reliable materials and craftsmanship.
Installation and Maintenance Considerations
When deciding on composite decking, installation and maintenance are critical factors. Understanding the ease of installation, the benefits of maintenance-free materials, and best practices will ensure you choose the right option for your needs.
Easy to Install and DIY Installation
Installing composite decking can be straightforward, particularly if you opt for deck boards. Many composite materials come with interlocking designs that simplify the process. The lightweight nature of these boards means you can often handle them without the need for heavy machinery.
If you are considering a DIY installation, take note of the required tools, such as a drill, saw, and measuring tape. Having these on hand will streamline the installation process. Some composite deck tiles also allow for snap-together methods, making them even easier to install.
Maintenance-Free Decking Benefits
One of the significant advantages of composite decking is its maintenance-free nature. Unlike traditional wood, you won’t need to sand, stain, or seal the surface regularly. This feature saves you time and money over the years while providing a consistently attractive appearance.
Composite materials are also resistant to rotting, splintering, and insect damage. This contributes to a structurally sound deck that withstands Utah's harsh weather conditions, including snow and rain, without compromising its integrity or aesthetics.
Choosing Between Deck Boards and Composite Deck Tiles
When selecting your material, consider the differences between deck boards and composite deck tiles. Deck boards typically offer more extensive options for color and texture, providing a customizable approach to your deck design.
Composite deck tiles, however, are often simpler to install due to their interlocking mechanism. You can choose tiles to create unique patterns or designs on your outdoor space. Whether you prioritize customizable aesthetics or ease of installation will dictate your choice.
Common Maintenance Practices
Although composite decking is low maintenance, some occasional practices can enhance its longevity. Regular cleaning with soap and water can remove debris and prevent dirt build-up. A soft brush or broom is recommended for best results.
Inspecting your deck periodically for any signs of wear or loose boards is also essential. Even though composite materials are durable, taking preventive measures will help maintain the overall safety and appearance of your deck. Avoid using high-pressure washers, as they can damage the surface.
Enhancing Outdoor Spaces with Composite Decking
When planning your outdoor area, the choice of decking is crucial for both functionality and aesthetics. Composite decking offers a resilient and visually appealing option that integrates seamlessly into various designs, enhancing the overall appeal of your outdoor space.
Deck Design Best Practices
To create an inviting deck, start with a clear design plan. Consider how you will use the space—whether for relaxation, entertaining, or gardening. Layout and flow are essential; maintain sufficient walking paths and allow for ample seating.
Effective deck design incorporates quality materials. Using pressure-treated lumber ensures your structure withstands Utah's variable weather, including snow. Details matter; techniques such as closer joist spacing and waterproof tape enhance your deck’s durability.
Choosing a suitable composite color complements your home and landscape. Opt for shades that harmonize with existing features, creating a cohesive look throughout your outdoor space.
Integrating Composite Decking into Your Outdoor Space
Mixed materials can elevate your deck's style. Pair composite decking with natural stone or pavers for contrast. This combination adds depth and character to your design.
Lighting is another critical aspect. Incorporate recessed LED lights to enhance visibility and create a warm atmosphere for evening gatherings.
Consider adding functional elements like benches or built-in planters made from composite materials. This not only maximizes your space but also contributes to the longevity of your setup by using materials that resist weather damage.
If you’re searching for quality and longevity in your deck design, Salt City Decks serves the Utah area with craftsmanship that enhances your outdoor space beautifully.
Frequently Asked Questions
This section addresses common inquiries regarding composite decking materials. You'll find specific comparisons between popular brands, considerations for sunny environments, and insights into product durability and performance.
What are the pros and cons of Trex versus UltraDeck?
Trex is known for its eco-friendly materials and low maintenance requirements. It typically offers a range of colors and styles. However, some users report fading over time. UltraDeck, on the other hand, may come at a lower price point but might not have the same range of style options. Consider your priorities, such as aesthetics versus budget.
How does Fiberon compare to TimberTech in terms of quality and cost?
Fiberon tends to be slightly more affordable and offers solid durability. It provides various aesthetic options, which can be appealing for different preferences. TimberTech, recognized for its high quality, often comes with a higher price tag but is favored for its longevity and performance in various weather conditions.
Which factors should be considered when selecting composite decking for areas with full sun exposure?
When choosing decking for sunny areas, UV resistance is a crucial factor. Look for materials that won't warp or fade under intense sunlight. Heat retention can also be an issue, so selecting a lighter color may keep the surface cooler and more comfortable.
What are the common complaints or drawbacks of using Trex decking materials?
Users often point to issues such as color fading and potential warping in extreme weather. Additionally, some find that it can be more expensive compared to other options. It's essential to weigh these factors against the benefits of low maintenance and long-term performance.
From recent consumer reports, which composite decking brands are ranked highest for durability and value?
Recent consumer reports indicate that brands like TimberTech and Fiberon consistently rank high for their durability and value. These brands often receive praise for their resistance to weather elements and long lifespan, making them popular choices among homeowners.
As of 2025, what are the leading composite decking products recommended for residential use?
For 2025, products from TimberTech and Fiberon are strongly recommended for residential settings. They have excelled in tests for durability and aesthetic appeal, making them solid options for your outdoor projects. Ensuring quality in your choice will contribute to the longevity and performance of your deck.
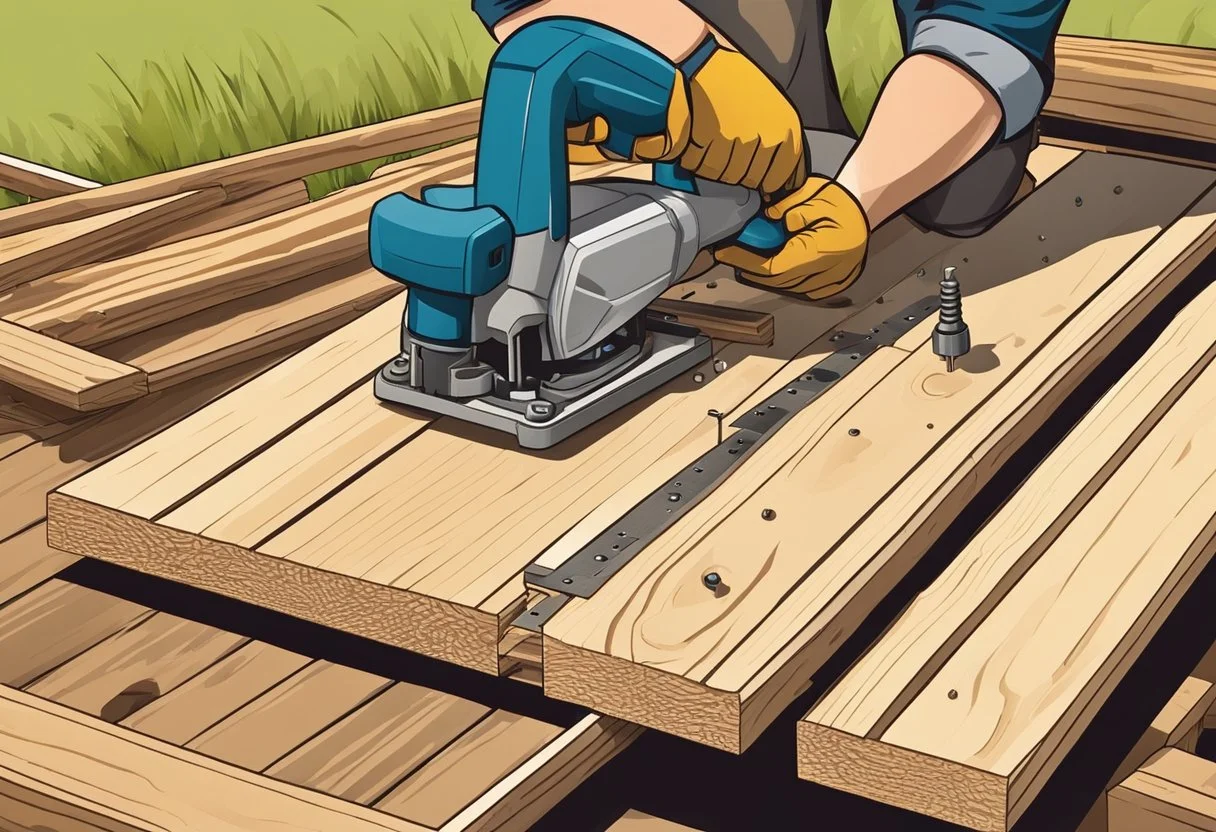
How Hard Is It to Build a Deck? A Comprehensive Guide for Homeowners
Building a deck involves multiple layers of complexity, influenced by various factors and decisions you’ll need to make.
Building a deck is a popular home improvement project that many homeowners consider. While it may seem daunting at first, with the right knowledge and approach, you can successfully construct a durable and visually appealing deck. Understanding the necessary materials and techniques is crucial in achieving quality that withstands harsh weather, especially in areas like Utah where snow is a concern.
You may find that the process involves planning, choosing quality materials, and applying proper construction methods. Focusing on details, such as using pressure-treated wood and ensuring adequate spacing between joists, enhances the overall stability and longevity of your deck. It’s not just about functionality; a well-built deck can also elevate the aesthetic appeal of your outdoor space.
If you're considering this project and want assurance that your deck will meet the highest standards, working with professionals like Salt City Decks could be beneficial. Their expertise in quality materials and craftsmanship ensures that your deck will not only look great but also endure the elements for years to come.
Understanding Deck Construction Complexity
Building a deck involves multiple layers of complexity, influenced by various factors and decisions you’ll need to make. Different elements can affect your project's difficulty level, including your skills, the design, and whether you choose a DIY approach or hire professionals.
Key Factors That Influence Deck Building Difficulty
Several key factors can determine how challenging your deck construction project will be.
Design Complexity: A simple rectangular design is easier to build than one with multiple levels or curves.
Material Selection: Using quality materials like pressure-treated lumber can add to your project's longevity but may require specific tools and skills.
Weather Conditions: In areas like Utah, which often experiences snow, ensuring proper drainage and frost-proofing adds complexity to construction.
Considering these aspects will help you understand the overall scope and difficulty of the project.
Evaluating DIY Versus Professional Deck Projects
Choosing between a DIY project and hiring professionals can significantly influence the construction process. If you possess basic carpentry skills and the necessary tools, a DIY approach can be both rewarding and cost-effective.
However, consider the potential pitfalls. A poorly constructed deck can lead to costly repairs and safety hazards.
Hiring professionals, such as Salt City Decks, can ensure quality craftsmanship and adherence to local building codes. Professional builders bring expertise in techniques that enhance durability, such as using waterproof tape for joints and ensuring proper joist spacing.
Essential Skills and Tools Required
If opting for a DIY deck project, being aware of the essential skills and tools is crucial. Here are some skills you should have:
Carpentry: Basic cutting and joining techniques.
Planning: Ability to read blueprints or design plans.
Problem-Solving: Adapting plans based on site conditions.
Key tools include:
Power Drill: For secure fastening.
Circular Saw: For precise cuts.
Measuring Tape: Ensuring accurate dimensions.
Having the right skills and tools not only enhances the quality of your work but also the longevity of your deck, making it a worthwhile investment.
Deck Planning and Design Considerations
When planning your deck, it's essential to consider various factors that will impact its design, compliance with regulations, and overall functionality. These aspects help ensure that your deck serves both your needs and enhances your outdoor living experience.
Choosing the Right Deck Design
Selecting the ideal deck design begins with understanding your goals. Consider whether you want a space for entertaining, relaxation, or a blend of both.
Popular design options include:
Multilevel decks for varied elevation.
Curved designs that offer unique aesthetics.
Incorporating built-in seating to maximize space and comfort.
Think about integrating features like pergolas or railings for added privacy and style. Utilizing quality materials, such as pressure-treated lumber, will not only enhance durability against Utah's snow but also provide a long lifespan, ensuring your investment remains worthwhile.
Understanding Building Codes and Permits
Familiarizing yourself with local building codes is crucial before beginning any deck project. These regulations dictate structural standards, safety, and spacing requirements to ensure durability and compliance.
Check for specific considerations, such as:
Height restrictions for elevated decks.
Rail height requirements for safety.
Foundation specifications to accommodate local weather conditions.
Acquiring the necessary permits is essential and varies by municipality. Noncompliance can lead to costly fines and rebuilding efforts. Consulting with experts like Salt City Decks can help navigate these regulations effectively.
Landscaping and Site Preparation
Your deck's placement affects both its functionality and aesthetic appeal. Assess your yard's layout to optimize the location, taking into account factors such as sunlight and existing landscaping features.
When preparing the site:
Clear vegetation and debris.
Level the ground to ensure stability.
Consider drainage solutions to prevent water issues underneath the deck.
Incorporate landscaping elements such as planters, lighting, or privacy screens to complement your deck design while enhancing your outdoor environment. Thoughtful site preparation contributes to the integrity of your deck while beautifying your space.
Selecting Materials and Components
Choosing the right materials and components is critical when building a deck. Your selections will impact the deck's durability, maintenance needs, and overall aesthetic. By understanding the options available, you can make informed decisions that suit your climate and personal preferences.
Comparing Decking Materials: Wood, Composite, and Alternatives
When selecting decking materials, three popular options stand out: wood, composite, and alternatives.
Wood Deck: Traditional and visually appealing, wood decks often use materials like treated lumber, cedar, or redwood. They provide natural beauty but require regular maintenance to prevent rot and decay.
Composite Decking: This option combines wood fibers and plastic, offering durability and low maintenance. Composite decking resists moisture, fading, and insects, making it ideal for snowy climates like Utah.
Alternative Materials: Alternatives like PVC and aluminum decking provide unique benefits. PVC is highly resistant to moisture, while aluminum offers unmatched strength and a modern look.
Selecting the right decking material depends on your priorities, whether that’s aesthetics, durability, or maintenance requirements.
Deck Framing Elements: Joist, Rim Joist, and Deck Posts
A solid foundation is crucial for your deck's longevity. Key framing elements include:
Joists: These horizontal beams support the decking boards and must be placed correctly for stability. Closer joist spacing can enhance load distribution and prevent sagging.
Rim Joist: The rim joist runs around the perimeter of the deck frame, providing support for the outer edges of the decking. Proper installation is essential for structural integrity.
Deck Posts: These vertical supports anchor the deck to concrete footings and determine the height of your structure. Use treated lumber for durability and resistance against moisture.
Choosing high-quality framing components will ensure your deck stands the test of time, even in harsh weather conditions.
Understanding Fasteners, Screws, and Post Anchors
Fasteners play a significant role in the stability and safety of your deck. Key components include:
Deck Screws: Opt for corrosion-resistant screws specifically designed for decking. They provide better holding power compared to standard screws and prevent loosening over time.
Post Anchors: These are essential for securing deck posts to concrete footings. High-quality post anchors help prevent movement and weakening in extreme conditions.
Fasteners: Beyond screws, additional fasteners like brackets and plates are crucial for attaching various structural elements. Make sure to select options that are suited to your chosen materials.
By opting for quality fasteners, you enhance your deck’s safety and longevity.
Surface Options: Decking Boards, Overhangs, and Drainage
The surface of your deck affects both appearance and function. Key considerations include:
Decking Boards: Choose boards that complement your style and match your material choice. Ensure they are properly spaced for airflow to prevent moisture buildup.
Overhangs: Adding an overhang can provide shade and protect the deck from rain. This feature enhances aesthetics while also improving durability.
Drainage: Proper drainage is essential to avoid water pooling on the deck. Incorporating drainage solutions, such as slope adjustments or drainage channels, allows for effective water management.
Each of these features contributes to a well-designed, functioning deck that will appeal to users for years to come.
Step-by-Step Deck Building Process
Building a deck involves several critical stages that ensure its strength, durability, and overall appearance. Key tasks include preparing footings, framing, and installing the deck surface. Each step plays a vital role in achieving a long-lasting and quality outdoor structure.
Preparing Footings and Setting the Foundation
The foundation of your deck begins with solid concrete footings. Start by marking the layout of your deck and digging holes according to the local building codes. Footings should ideally extend below the frost line to prevent movement during freezing conditions, especially important in Utah's snowy climate.
Once the post holes are dug, pour concrete into them, ensuring they are level and set firmly. Use a level to make certain each footing is properly aligned before the concrete cures. If you're installing a large deck, consider spacing the footings appropriately to provide enough support for the joists. This foundational work is essential to support the entire deck structure and contribute to its longevity.
Framing the Deck Structure
Next, you'll construct the deck frame using pressure-treated lumber for durability against weather elements. Begin with the rim joists, which outline the deck's perimeter, then space the inner joists every 16 inches on center for proper support. Utilize metal brackets and bolts to reinforce connections, which enhances stability.
Remember that attention to detail is crucial here. Employ closer joist spacing if your deck will support heavier loads, such as furniture or hot tubs. This framing process not only provides structural integrity but also contributes to the overall aesthetic appeal of your deck. Ensure all pieces are cut accurately and secured tightly to prevent sagging over time.
Installing the Deck Surface
With the frame ready, you can install the deck surface, which consists of boards typically made from composite or wood materials. Begin by laying the boards perpendicular to the joists; this orientation enhances the strength of the surface. Leave gaps between boards for water drainage and expansion.
Ensure you use high-quality surface decking materials to withstand harsh weather. Fasten the boards securely with stainless-steel screws to prevent corrosion. For added protection, consider applying waterproof tape over the joists before installation. This step reduces moisture penetration, furthering the longevity of your deck. Proper installation will provide a visually appealing and functional outdoor space for years to come.
Deck Finishing, Maintenance, and Enhancements
Proper finishing, routine maintenance, and thoughtful enhancements can significantly improve your deck's look, functionality, and lifespan. Focusing on these aspects ensures your outdoor space remains appealing and safe through all seasons.
Applying Finishes and Protecting Your Deck
Applying a clear finish or a protective sealant to your deck is crucial for longevity. These finishes guard against UV rays, moisture, and mildew.
Consider using a high-quality sealant that is specifically designed for the type of material you are using, such as pressure-treated lumber. Reapply every 1-3 years based on wear and local weather conditions.
Regularly inspect the finish for any signs of wear or peeling. If you notice any damage, address it immediately to prevent further deterioration. A well-maintained finish can keep your deck looking fresh and new.
Routine Maintenance for Longevity
Routine maintenance is essential for preventing long-term damage. Start with regular inspections to check for loose deck screws or damaged boards.
Keeping your deck clean is fundamental. Sweep away debris and wash with a mild detergent and water at least once a year. This helps prevent mold and stains, ensuring your deck remains visually appealing.
During harsh weather conditions, especially snow in Utah, take precautions. Clear snow from the surface promptly to prevent moisture absorption, which can warp and damage the wood.
Adding Features: Built-In Bench and Cushions
Incorporating features like a built-in bench can enhance both usability and aesthetics. A bench provides seating without taking up valuable space on your deck.
When adding cushions, opt for weather-resistant materials to maintain their quality over time. Clean these regularly to prevent mildew, which thrives in damp environments.
Consider designing your bench to match your deck's style, making sure it blends well with the overall look. This tailored approach can increase the deck’s functionality while adding visual interest.
Ensuring Safety and Compliance
Safety should always be a priority when designing and maintaining your deck. Check that railings are sturdy and compliant with local building codes. This enhances safety, especially if children or pets are present.
Use high-quality hardware like rust-resistant deck screws to secure components firmly. Inspect the structure regularly for any signs of weakness, especially after adverse weather.
Ensure that any enhancements, like built-in benches or other features, do not obstruct access to emergency exits or violate local regulations. Proper adherence to safety standards not only protects users but also ensures the long-term integrity of your structure.
Frequently Asked Questions
When considering building a deck, it's important to have a clear understanding of the process, materials, and techniques you will need to ensure a successful project. The following information addresses common inquiries related to deck construction.
What are the steps involved in building a deck from scratch?
To build a deck from scratch, start by planning your layout and obtaining any necessary permits. Next, prepare the site by clearing debris and leveling the ground. Afterward, set the posts and joists to create the frame, followed by adding the decking boards.
Can I construct a raised deck myself, and what should I consider?
Yes, you can construct a raised deck yourself, but be prepared for some challenges. Consider local building codes, necessary permits, and the stability of the foundation. Ensure you have quality materials and follow all safety protocols during construction.
What materials and tools do I need to build a deck adjacent to my house?
For building a deck, gather quality materials such as pressure-treated lumber, concrete footings, and corrosion-resistant fasteners. Essential tools include a saw, drill, level, measuring tape, and safety gear. Proper tools are crucial for achieving accurate cuts and measurements.
What is the best way to construct a deck frame for longevity and stability?
To ensure longevity and stability, use pressure-treated lumber for the frame and space the joists closely. Also, apply waterproof tape to prevent moisture damage and reinforce connections with proper hardware. These construction practices greatly enhance the deck's resilience.
How can I build a sturdy deck on uneven ground?
When building on uneven ground, start by leveling the area as much as possible. Use adjustable post brackets for the support posts to accommodate variations in height. This approach helps create a sturdy foundation that can handle weight and weather conditions.
What strategies can help me build a deck while staying within my budget?
To stay within your budget, prioritize quality materials and plan your design carefully. Consider a simple design to reduce costs and explore opportunities to use reclaimed wood. Additionally, look for promotions on tools and materials to help manage expenses.
For assistance with your decking project, consider reaching out to Salt City Decks, serving the Utah area and specializing in high-quality, durable structures.

How Long Does Pressure Treated Deck Last? Key Factors and Insights
When considering a pressure-treated deck, understanding its lifespan across different conditions and materials is crucial.
When considering a new deck, understanding the longevity of pressure-treated wood is crucial for making an informed decision. With proper maintenance, a pressure-treated deck can last anywhere from 10 to 40 years, depending on the climate and specific care it receives. This range reflects the durability of quality materials used in construction and the importance of regular upkeep.
In areas like Utah, where snow and fluctuating temperatures are common, the choice of materials and construction techniques is vital. Using pressure-treated lumber combined with attention to detail in construction, such as closer joist spacing, can significantly enhance the stability and lifespan of your deck. Investing in these practices not only ensures a robust structure but also adds aesthetic value to your outdoor space.
If you’re looking for a reliable solution to create outdoor spaces that stand the test of time, Salt City Decks specializes in crafting enduring decks tailored to your needs. Their commitment to quality materials and expert craftsmanship ensures that your deck will remain both functional and beautiful for years to come.
Expected Lifespan of Pressure Treated Decks
When considering a pressure-treated deck, understanding its lifespan across different conditions and materials is crucial. Various factors, such as climate, maintenance, and material quality, play significant roles in determining how long your deck will last.
Average Service Life in Different Climates
Pressure-treated wood decks typically last 15 to 20 years with proper maintenance. However, environmental conditions can significantly affect this lifespan:
Wet Climates: Areas with high humidity or rainfall may experience shorter lifespans due to moisture absorption. Regular sealing can mitigate damage.
Dry Climates: In contrast, dry environments can lead to cracking and splintering. Proper care and frequent inspections extend lifespan.
Snowy Regions: If you're in Utah, for instance, where snow can be a concern, prioritizing waterproof materials and construction techniques, like using waterproof tape, can greatly enhance deck durability.
Proper maintenance tailored to your climate will help maximize your deck's lifespan.
Lifespan Compared to Other Decking Materials
When comparing the longevity of pressure-treated wood to other materials, pressure-treated lumber often shows competitive advantages.
Composite Materials: Composite decks generally last 25 to 30 years but may require less maintenance than wood.
Hardwood Decks: Hardwood decks can last 30 to 50 years with excellent care but come at a higher initial cost.
Pressure-treated wood offers a cost-effective middle ground, making it a popular choice. The value it provides can be maximized through regular seal treatments and careful maintenance, especially under the harsh weather conditions that often occur in Utah.
Warranty and Manufacturer Specifications
Most pressure-treated lumber comes with warranties ranging from 10 to 30 years. These warranties often cover structural integrity and resistance to rot, which are crucial for longevity.
It's vital to review specific manufacturer guidelines regarding installation and maintenance.
Following proper recommendations can ensure compliance with warranty terms.
By investing in quality materials from reliable suppliers like Salt City Decks, you can significantly improve your deck's longevity and appearance. This investment not only enhances durability but also adds aesthetic value, attracting attention for potential customers.
Key Factors Affecting Deck Longevity
When considering how long your pressure treated deck will last, several critical factors come into play. Quality of materials, environmental exposure, and installation practices all significantly influence the lifespan of your structure.
Quality of Pressure Treated Wood
The durability of your wooden deck largely depends on the quality of the pressure treated wood used. High-quality pressure treated lumber is designed to resist rot, insects, and decay.
Look for wood that has been treated with preservatives specifically intended for outdoor use. A well-treated deck board will typically last between 15 to 30 years with proper care.
For optimal durability, always seek out reputable suppliers. This can prevent common issues that arise from low-quality materials, such as warping or shrinking. Investing in top-notch pressure treated wood is a long-term solution to maintain the integrity of your deck.
Exposure to Moisture and Sunlight
Exposure to moisture and sunlight directly affects the lifespan of your wooden deck. Regions with heavy rainfall or intense sunlight can accelerate wear and tear.
Moisture can lead to mold growth and wood rot, whereas UV rays can cause the wood to fade and weaken over time. Regular maintenance, such as sealing and staining, can protect your deck from these elements.
Using a waterproof sealant helps repel water and prevents damage caused by snow and rain, especially in Utah's variable weather. Additionally, consider installing a roof or awning to provide shade and minimize the sun's impact.
Installation Practices
Proper installation practices play a crucial role in ensuring the longevity of your pressure treated deck. Techniques like using waterproof tape on joists and ensuring proper spacing between them can enhance stability and durability.
Following manufacturer guidelines during installation is essential. Proper fastening methods, such as using stainless steel screws, prevent corrosion and enhance the deck's lifespan.
An experienced contractor like Salt City Decks can offer valuable expertise in both materials and craftsmanship. Attention to detail at every stage of construction will lead to a more resilient deck, ensuring that your outdoor space remains safe and inviting for years to come.
Maintenance Practices to Extend Deck Life
Proper maintenance is essential to prolonging the lifespan of your pressure-treated wood deck. Regular upkeep not only enhances durability but also preserves the aesthetics of your outdoor space. Here are the key practices to consider for effective maintenance.
Regular Cleaning Methods
Regular cleaning is vital to keep your deck in great shape. Start by sweeping the surface to remove dirt, leaves, and debris. This prevents buildup that can trap moisture and promote wood decay.
Every few months, wash the deck using a solution of water and a mild detergent. Avoid harsh chemicals like bleach, as they can damage the treated wood. A soft-bristle scrub brush is ideal for this task.
Consider power washing once a year, but use a low-pressure setting to avoid damaging the wood fibers. After cleaning, allow the deck to dry completely before applying any treatments. Consistent cleaning helps maintain the wood’s natural appearance and integrity.
Protective Treatments and Sealants
Applying protective treatments is crucial for extending the life of your deck. Utilize a quality wood sealant designed for pressure-treated lumber. This acts as a barrier against moisture, UV rays, and weather extremes.
It is advisable to reapply sealant every 1-3 years, depending on your climate and usage. In wet conditions like those found in Utah's snowy winters, choose a product that offers waterproofing benefits.
Before applying any new treatments, ensure the deck is clean and completely dry. Regular application of sealants can significantly reduce issues with warping and cracking, keeping your deck stable and sturdy.
Mold, Mildew, and Algae Prevention
Mold, mildew, and algae can pose serious threats to your deck's health. To prevent these issues, maintain good ventilation and sunlight exposure. Trim any overhanging branches that block sunlight.
If you notice mold or mildew, treat the area promptly using a mixture of vinegar and water. This helps avoid damaging the wood while effectively eliminating growth.
It's essential to inspect your deck regularly for these problems, especially after heavy rain or prolonged humidity. Preventive measures and quick responses will ensure your treated wood deck remains safe, beautiful, and lasting.
Comparing Pressure Treated Decks to Other Materials
When deciding on decking materials, it's crucial to understand how pressure-treated wood compares to alternatives like cedar, redwood, and composite materials. Each option has unique characteristics that influence lifespan, maintenance needs, and overall durability.
Cedar and Redwood Decks
Cedar and redwood are popular choices for wooden decks due to their natural beauty and resistance to decay. These woods typically last between 15 to 25 years when properly maintained.
Natural Resistance: Cedar contains oils that help repel insects and resist moisture.
Aesthetic Appeal: Both woods have attractive grain patterns and colors that enhance visual appeal.
Maintenance: Regular staining and sealing are necessary to prevent fading and deterioration.
While cedar and redwood decks can offer a beautiful finish, they generally require more maintenance than pressure-treated wood. If you prioritize longevity with less upkeep, consider pressure-treated options instead.
Composite Versus Pressure Treated Decks
Composite materials are engineered from wood fibers and plastics, offering a low-maintenance alternative to traditional wood. They can last 25 years or more, but there are important factors to consider.
Durability: Composite decks resist fading, warping, and insect damage much better than wood.
Maintenance: They require minimal maintenance; simply wash with soap and water occasionally.
Cost: Typically, composite materials are initially more expensive than pressure-treated wood.
In contrast, pressure-treated wood offers a more budget-friendly option with a lifespan of around 20 to 30 years if properly maintained. It’s essential to weigh the upfront costs against long-term value when choosing between these materials.
Environmental and Health Considerations
When selecting pressure-treated wood for your deck, it's crucial to understand the environmental and health implications associated with the chemicals used in the treatment process and the proper handling and disposal practices.
Chemicals Used in Pressure Treated Lumber
Pressure-treated lumber is often treated with chemicals to prevent rot and insect infestations. Historically, many of these treatments contained chromated copper arsenate (CCA), which includes arsenic, a known toxin.
While CCA has been phased out for residential use in many places, some treatments still involve copper, chromium, and other hazardous materials. It's vital to consider these elements, especially if your deck will be around children or pets.
Modern pressure-treated wood is often more environmentally friendly. Look for alternative treatments such as alkaline copper quaternary (ACQ) or copper azole, which reduce health risks while still providing durability.
Safe Handling and Disposal
When working with pressure-treated wood, safe handling practices are essential to minimize exposure to harmful chemicals. Always wear gloves and a mask to protect yourself. Use sanding techniques carefully, as this can release fine dust containing chemicals.
For disposal, do not burn pressure-treated wood, as this releases toxic chemicals into the air. Instead, check local regulations for disposal options; many areas have specific guidelines for hazardous materials.
If you require decking solutions, consider Salt City Decks for your needs in Utah. Their commitment to quality materials and craftsmanship ensures your structure withstands harsh weather while remaining safe and environmentally responsible.
Frequently Asked Questions
You may have several questions regarding the lifespan and maintenance of pressure-treated decks. This section addresses common inquiries about durability, maintenance practices, and comparisons to other decking materials.
What is the typical lifespan of a pressure-treated wooden deck?
A well-maintained pressure-treated wooden deck can last anywhere from 10 to 40 years. Factors such as climate, maintenance, and exposure to elements greatly impact its longevity.
Is there a difference in longevity between stained and unstained pressure-treated decks?
Yes, stained decks typically have a longer lifespan. Staining helps protect the wood from moisture and UV damage, which can lead to rot and discoloration over time.
How does exposure to water affect the durability of pressure-treated lumber?
Exposure to water can significantly shorten the lifespan of pressure-treated lumber. It is essential to ensure proper drainage and periodic sealing to mitigate water damage.
What is the expected durability of pressure-treated wood when used below ground level?
Pressure-treated wood can last around 20 to 40 years below ground level, depending on soil conditions and moisture levels. Regular inspections are necessary to catch any signs of decay.
At what point should a pressure-treated deck be replaced?
You should consider replacing your pressure-treated deck when you notice significant structural issues, such as extensive rot, loose boards, or unstable railings. Regular maintenance checks can help you determine this.
How does the lifespan of a composite deck compare to that of a pressure-treated wood deck?
Composite decks generally have a longer lifespan, often exceeding 25 years, as they are more resistant to rot and weathering. However, pressure-treated decks can be an effective choice if properly maintained, offering beauty and durability.

Can You Cut Pressure Treated Wood Safely and Effectively?
Pressure treated wood is an essential choice for outdoor projects due to its enhanced durability and resistance to the elements.
When tackling outdoor projects, you may wonder, yes, you can cut pressure-treated wood safely as long as you use the right tools and techniques. This type of wood is commonly used for decks and other structures due to its resistance to rot and insects, making it a popular choice for those looking to create durable outdoor spaces.
Cutting pressure-treated wood requires specific considerations, such as using appropriate blades to prevent damage and ensure clean cuts. Understanding how to handle it properly can not only enhance the longevity of your projects but also ensure that your structures remain strong against Utah's harsh weather conditions, including snow.
By focusing on quality materials and expert craftsmanship, you can create beautiful, enduring structures that stand the test of time. If you’re ready to invest in a long-lasting deck or pergola, consider Salt City Decks for your needs, combining quality with aesthetic appeal for your outdoor spaces.
Understanding Pressure Treated Wood
Pressure treated wood is an essential choice for outdoor projects due to its enhanced durability and resistance to the elements. This section explores what pressure treated wood is, its benefits, and the chemical treatments involved.
What Is Pressure Treated Wood
Pressure treated wood is lumber that has been infused with preservatives to protect it from decay, insects, and weather damage. This process involves placing the wood in a vacuum chamber where preservatives are forced deep into the fibers.
Typical preservatives include copper-based chemicals like copper azole and inorganic compounds. Traditional treatments may have used arsenic, but this is less common today due to health concerns.
The result is wood that can better withstand environmental stressors, making it suitable for decks, fences, and other outdoor structures.
Why Use Treated Lumber
Choosing treated lumber provides several advantages. First, it significantly extends the lifespan of your wood products, especially in the face of moisture, pests, and mold. This is crucial in regions with harsh weather conditions, such as Utah, where you might experience snow and rain.
Using treated lumber means lower maintenance over time. You won't have to replace rotting wood frequently, which can save you money and effort in the long run. The visual appeal of projects made with quality materials could also enhance your property's value.
Chemical Treatments and Additives
The effectiveness of pressure treated wood partially lies in the chemical treatments applied to it. Copper compounds like Cuprinol are commonly used today to ensure durability. These chemicals help protect against insect damage and fungal rot while being safer for the environment than older treatments.
The pressure treatment process alters the wood at a molecular level, making it denser and more resistant to the elements. It is essential that you use a wood preservative to treat any cut ends, maintaining the integrity of the protection.
Understanding these chemicals can help you make informed choices for your projects, ensuring your outdoor structures are both beautiful and durable.
Safety Precautions When Cutting Pressure Treated Wood
When working with pressure treated wood, it's crucial to take specific safety precautions to protect yourself from harmful chemicals and materials. Implementing proper safety measures will reduce health risks and ensure a safer work environment.
Personal Protective Equipment for Sawing
Using the right personal protective equipment (PPE) is essential while cutting pressure treated wood. Here’s a list of recommended items:
Dust Masks: These help filter out harmful particles while cutting.
Respirators: For more robust protection, especially if you’re sensitive to dust or chemicals.
Eye Protection: Safety goggles shield your eyes from sawdust and debris.
Gloves: Wear sturdy, cut-resistant gloves to protect your hands from splinters and sharp edges.
Ensure your PPE fits properly for optimum protection. Regularly check your equipment for wear and tear, and replace items as needed to maintain safety standards.
Managing Sawdust and Airborne Particles
Sawdust from pressure treated wood can contain hazardous substances, so managing this material effectively is important. To minimize exposure:
Work outdoors when possible: This allows for better ventilation.
Use a powerful vacuum or collector: This helps to capture sawdust at the source.
Wet methods: Consider moistening the wood slightly before cutting to reduce airborne particles.
Cleaning the work area frequently prevents the buildup of harmful dust, and using a dedicated vacuum helps maintain a cleaner environment.
Handling and Disposal Guidelines
Proper handling and disposal of pressure treated wood and its byproducts are essential. Follow these guidelines:
Avoid burning: Burning treated wood can release toxic chemicals into the air.
Dispose of scraps responsibly: Check local regulations for disposal options in your area.
Seal and bag: When discarding sawdust, seal it tightly in bags to prevent contamination.
Your attention to these details will help mitigate risks and ensure you and anyone nearby remain safe while working with pressure treated wood.
How to Cut Pressure Treated Wood Effectively
Cutting pressure treated wood requires specific techniques and tools to ensure a clean cut and maintain the integrity of the wood. You’ll want to consider the right equipment and follow a meticulous process to achieve optimal results.
Choosing the Right Tools
Selecting the appropriate tools is crucial for cutting pressure treated wood. A circular saw is often favored for its versatility and ease of use, while a table saw provides more precision for straight cuts on larger boards.
Make sure to use a blade designed for pressure treated lumber, ideally one that is carbide-tipped. This type of blade stays sharp longer and minimizes splintering. For best results, equip your saw with a vacuum attachment to reduce dust and particles.
Step-by-Step Cutting Process
Prepare the Workspace: Ensure your cutting area is clean and stable. Set up sawhorses for large pieces.
Measure Twice, Cut Once: Use a measuring tape and mark the cut line with a pencil. Double-check measurements before proceeding.
Secure the Wood: Clamp the lumber down to prevent movement during cutting. This step protects you and ensures accuracy.
Cut with Care: Start the saw and let the blade reach full speed. Slowly guide the saw along the marked line without forcing it through the wood. This reduces the risk of burns and uneven cuts.
Treat Cut Ends: After cutting, apply a wood preservative to the exposed ends. This step is essential to maintaining the wood’s resistance to rot and decay.
Common Mistakes to Avoid
Avoiding some common pitfalls can enhance your cutting effectiveness. First, never skip the safety gear. Always wear goggles and a dust mask when cutting pressure treated wood to protect yourself from harmful chemicals and sawdust.
Another mistake is cutting without adequate preparation. Failing to secure the wood or measure accurately can lead to crooked cuts and wasted material. Additionally, ensure your tools are in good condition; a dull blade can cause burn marks and jagged edges.
Finally, do not disregard the manufacturer’s guidelines for handling treated wood. Following these guidelines ensures the longevity and quality of your projects, whether for a deck or other outdoor structures. For optimal results, consider consulting professionals like Salt City Decks for your decking needs in Utah. Their expertise ensures quality craftsmanship in harsh weather conditions.
Post-Cutting Considerations and Treatment
After cutting pressure-treated wood, it is crucial to address the cut ends to maintain the structural integrity of your outdoor projects. Proper sealing and preventive measures against rot and moisture damage can significantly prolong the life of your wood.
Sealing Cut Ends
Once you make cuts in pressure-treated lumber, the exposed wood becomes vulnerable to moisture and decay. To protect these areas, applying a high-quality wood sealer is essential.
Choose a sealer specifically designed for pressure-treated wood. This type of product penetrates the surface, providing a protective barrier against water infiltration.
Ensure the cut ends are clean and dry before application.
Follow the manufacturer's instructions for optimal results.
Applying sealer promptly reduces the risk of rot and deterioration. Regular inspection and reapplication may be necessary, especially in areas with fluctuating temperatures and moisture conditions.
Preventing Rot and Moisture Damage
To further safeguard your pressure-treated lumber from rot, particularly in damp environments, consider additional preventive measures.
Incorporate proper drainage in your construction designs to direct water away from wood surfaces.
Use waterproof tape at joints and seams to prevent moisture accumulation.
Regular maintenance checks can help identify signs of rot early. If you notice any areas beginning to deteriorate, addressing them promptly can prevent further damage.
Remember to elevate your wood structures, allowing airflow around them, which minimizes moisture retention. Long-lasting performance is vital, especially in Utah, where harsh weather can adversely affect untreated wood. Investing in quality and proper treatment ultimately enhances the durability of your outdoor projects.
Applications and Alternatives for Pressure Treated Wood
When considering pressure treated wood, it's important to understand its best applications and explore alternatives that may suit your needs. This section will also highlight the significance of proper site preparation and materials selection.
Best Uses for Cut Pressure Treated Lumber
Pressure treated wood is ideal for outdoor applications due to its resistance to rot and insects. Common uses include:
Decking: Perfect for deck structures that experience exposure to moisture, especially in areas like Utah where snow can affect wood longevity.
Fencing: Offers durability for vertical structures that require strength against environmental elements.
Posts and Beams: Used in pergolas, swings, and other structures subject to significant weight and weather impact.
Using the right construction techniques, such as closer joist spacing and the application of waterproof tape, can further enhance the durability and stability of your project.
Alternatives to Pressure Treated Wood
If you're looking for non-treated options, consider materials such as:
Cedar: Naturally resistant to insects and decay, making it suitable for outdoor furniture and structures.
Composite Decking: Made from recycled materials, it offers a low-maintenance alternative to wood that doesn't warp or splinter.
Plastic Lumber: Durable, resistant to moisture and UV radiation, ideal for decks and railings.
Each alternative has its benefits; for instance, cedar provides a classic look while composites offer durability without the upkeep.
Site Preparation and Materials
Proper site preparation is critical for maximizing the lifespan of your pressure treated wood, including:
Gravel Base: Creating a gravel bed can improve drainage, which reduces the chances of moisture damage.
Drainage Solutions: Ensure water does not pool around wood structures by incorporating proper drainage systems.
Quality Fasteners: Select corrosion-resistant fasteners to prevent deterioration over time.
Taking these steps ensures your structures built with pressure treated wood or its alternatives remain stable and aesthetically pleasing for years to come.
Frequently Asked Questions
Cutting pressure-treated wood requires specific knowledge and safety precautions. Understanding how to properly handle and process this type of lumber ensures both safety and the longevity of your projects.
Is it safe to use a circular saw on pressure treated lumber?
Yes, using a circular saw to cut pressure-treated lumber is safe as long as you take the appropriate precautions. Make sure to use a blade designed for cutting treated wood, which typically has carbide-tipped teeth for better performance.
What precautions should be taken when cutting pressure-treated wood?
When cutting pressure-treated wood, always wear safety goggles, gloves, and a dust mask. The sawdust can contain harmful chemicals from the wood treatment process, so protective gear is essential for your safety.
Does cutting pressure treated wood require special equipment to ensure safety?
While standard woodworking tools can be used, having a quality circular saw with a suitable blade is recommended. Additionally, using a saw with a dust collection system can help minimize exposure to sawdust.
How should cut ends of pressure treated wood be treated?
After cutting, it's important to treat the exposed ends of pressure-treated wood. You can use a wood preservative specifically designed for treated lumber to ensure that the cut areas maintain their resistance against decay and insects.
Can pressure treated wood be safely cut indoors?
Cutting pressure-treated wood indoors is not recommended due to the potential release of harmful chemicals in the sawdust. If you must cut indoors, ensure adequate ventilation and use a dust collection system to minimize inhalation risks.
What are the risks of rot for pressure-treated wood once it's cut?
While pressure-treated wood is designed to resist rot, exposed cut ends are vulnerable. If not properly treated after cutting, moisture can penetrate these areas, increasing the risk of decay over time. Regular maintenance is key to prolonging the life of your structures.

Will Pressure Treated Wood Shrink in Concrete? Understanding the Effects of Moisture and Temperature
When using pressure-treated wood for outdoor projects, understanding its characteristics and behavior is crucial.
When considering whether pressure treated wood will shrink when placed in concrete, it is important to recognize that the answer is yes, it can shrink. Proper installation methods are crucial because moisture trapped by concrete can lead to wood rot, ultimately affecting the integrity of your outdoor structures.
You may wonder about the implications of this shrinkage, especially in environments like Utah where snow and moisture are prevalent. Understanding how pressure treated lumber behaves under these conditions can help you make informed choices for your decking or patio projects.
Choosing quality materials and construction techniques will make a significant difference in the longevity and durability of your structures. If you’re looking for expert craftsmanship in your outdoor projects, consider Salt City Decks for reliable solutions tailored to withstand your local weather challenges.
Understanding Pressure Treated Wood and Shrinking
When using pressure-treated wood for outdoor projects, understanding its characteristics and behavior is crucial. The properties of treated lumber can significantly influence its performance, particularly in relation to moisture content and the shrinking phenomenon.
How Pressure Treatment Affects Wood Properties
Pressure treatment enhances the wood's natural resistance to decay and insect damage by forcing preservative chemicals deep into the fibers. Common preservatives include CCA (Chromated Copper Arsenate) and ACQ (Alkaline Copper Quaternary). These treatments are essential for woods like yellow pine, making them more suitable for outdoor construction.
Despite its durability, pressure-treated wood can still experience shrinking. When the wood dries out, the fibers lose moisture, causing dimensional changes. This is particularly relevant when the lumber is initially green (recently cut and unseasoned).
To minimize shrinkage, using kiln-dried lumber may be advantageous. This wood has reduced moisture content, which can lead to less movement once installed.
Common Types of Treated Lumber and Preservatives
Pressure-treated lumber is widely available and used for decks, fences, and other outdoor structures. The most common types include above-ground and ground-contact lumber. The latter is treated to a higher level to resist ground moisture.
Common preservatives in treated lumber include CCA and ACQ, each with different properties and uses. CCA contains copper, which protects against rot but is less frequently used in residential applications due to environmental concerns. ACQ is a more modern alternative, providing excellent protection and being safer for use around plants and children.
Knowing the type of pressure-treated lumber and its preservative is key when choosing materials for your construction project.
The Role of Moisture Content in Shrinkage
Moisture content plays a critical role in the shrinking process of pressure-treated wood. Initially, this wood can contain a significant amount of moisture. As the wood dries in the environment, it begins to shrink, often pulling away from surrounding materials.
When pressure-treated wood is poured with concrete or surrounded by materials that retain moisture, it can lead to rot over time. Trapped water creates conditions that accelerate decay. It is advisable to allow treated lumber to acclimate and dry properly before installation.
Proper moisture management, through choices like using waterproof tape and ensuring the right spacing between joists, will help maintain the integrity and lifespan of your deck.
Shrinkage Behavior of Pressure Treated Wood in Concrete
When pressure-treated wood is encased in concrete, you need to understand how shrinkage can affect its performance. The combination of moisture retention and environmental factors contributes significantly to potential risks, impacting the wood's stability and appearance.
Factors Contributing to Shrinking When Encased in Concrete
Shrinkage occurs due to moisture loss from pressure-treated wood. After installation, this type of wood can continue to release moisture, especially if placed in a high-humidity environment. If the wood is encased in concrete, moisture becomes trapped, leading to a higher risk of uneven shrinkage.
Monitoring the moisture content before and after installation is crucial. A moisture meter can help assess the wood's condition. If moisture levels are too high, it will lead to excessive shrinkage once it dries out. This uneven drying can further cause the wood to shrink in specific areas, impacting its overall integrity.
Warping, Twisting, and Related Deformation Risks
Warping and twisting are common issues when pressure-treated wood is subjected to moisture restrictions while encased in concrete. Any moisture imbalance can lead to these deformations, as the wood tries to adjust to changing conditions.
The risk of deformation can be exacerbated by improper installation. If the boards are not adequately spaced or supported, they are more prone to warping. Frequent fluctuations in temperature and humidity may also contribute to these issues, especially in climates with snow, like Utah.
For optimal results, use quality materials and implement reliable construction techniques. You can enhance stability by employing techniques such as closer joist spacing and waterproof tape. This attention to detail is essential for maintaining the integrity and appearance of your outdoor structures.
Comparing Pressure Treated Wood with Alternatives in Concrete Settings
When evaluating materials for use in concrete settings, it is essential to consider the performance and durability of pressure treated wood compared to alternatives like cedar and redwood. Each material has its own strengths and weaknesses, impacting your project's longevity and effectiveness.
Pressure Treated Posts Versus Cedar and Redwood
Pressure treated posts are chemically treated to resist decay and insect damage, making them ideal for ground contact applications. They are often more affordable than cedar or redwood.
Cedar and redwood, while naturally resistant to moisture and insects, can still face challenges. They may be less sturdy in structural applications where ground contact occurs, potentially leading to rot over time.
Additionally, pressure treated wood typically offers higher strength and stability when used for structural elements such as decks or fences. To optimize performance, consider how these materials will interact with concrete, as pressure treated wood can withstand higher moisture levels associated with concrete.
Performance of Kiln Dried After Treatment vs. Green Lumber
Kiln dried after treatment (KDAT) lumber undergoes a process that reduces moisture content, resulting in lower shrinkage and better dimensional stability compared to green lumber. This makes KDAT an excellent choice for use with concrete, as it is less likely to warp or create gaps over time.
Green lumber, on the other hand, has higher moisture content and can shrink as it dries. This moisture can lead to movement in concrete settings, compromising the integrity of your structure. If you choose green lumber, be mindful of potential issues regarding warping and cracking.
For the best performance in concrete applications, opting for KDAT can enhance durability. This choice minimizes long-term maintenance issues and helps maintain the structural integrity of your project.
Best Practices for Installation to Minimize Shrinkage
To effectively minimize shrinkage in pressure-treated wood when installed in concrete, specific preparation and installation practices are crucial. These steps will help ensure the integrity and longevity of your structures, especially in harsh weather conditions.
Preparing Posts and Fence Panels
Start by selecting high-quality pressure-treated 4x4 posts to serve as the core of your fence. Before installation, ensure the posts are clean and free of sawdust or debris. Using a moisture meter can help you assess the wood’s current moisture content. It's ideal to install posts that are slightly wet as they will fit more snugly in the concrete.
When handling wood fence panels, inspect them for any warping or imperfections. Pre-drill holes if necessary to prevent splitting. You may also consider placing a protective barrier, like a waterproof tape, around the base of the posts. This can minimize moisture exposure and subsequent shrinkage.
Using Crushed Rock and Proper Sealing Techniques
Using crushed rock in the post hole can significantly enhance drainage and provide stability. Aim for a layer of crushed rock at the base before placing concrete. This will allow excess moisture to escape and reduce the risk of water pooling around the wood.
After setting your posts in concrete, consider applying a sealant to the part of the wood that will remain above ground. A high-quality sealant can protect against moisture, mold, and decay. Regular maintenance, including resealing every few years, will extend the life of your wood and maintain its structural integrity.
Safety Considerations and PPE
During installation, prioritize safety by wearing appropriate personal protective equipment (PPE). Use safety goggles to protect your eyes from sawdust and debris. Gloves can help prevent splinters and cuts, while a dust mask can reduce inhalation risks.
Ensure your workspace is neat and free of any tripping hazards. Keep tools organized to maintain efficiency and safety. If working with heavy materials, practice proper lifting techniques to avoid injury. Following these safety protocols will ensure a successful and secure installation, allowing you to focus on quality craftsmanship.
Long-Term Maintenance and Environmental Considerations
Maintaining pressure-treated wood in concrete involves understanding its longevity and the potential impacts of preservatives over time. You should consider how these factors can influence both the appearance and safety of your structures.
Longevity and Appearance Over Time
Pressure-treated wood is designed for durability, particularly in harsh environments like Utah. As it ages, expect some shrinkage, which can affect its appearance. Over time, treated lumber may lose its color and develop a weathered look.
Regular maintenance tasks, including resealing, can help preserve its appearance. High-quality sealants protect against moisture and UV damage, extending the life of your wood.
Frequent inspections are crucial. Look for signs of cracking, warping, or rot. Ensuring that your deck or pergola maintains its aesthetic appeal while providing stability should guide your maintenance routine.
Preservative Leaching and Arsenic Concerns
Pressure-treated wood often contains preservatives to prevent decay, some of which may be based on arsenic compounds. While modern treatments have significantly reduced arsenic use, concerns about leaching into the soil remain, especially when the wood is in direct contact with concrete.
To minimize exposure, employ practices like using barriers or liners between the wood and soil for applications near gardens. Ensuring proper drainage around structures also limits contact with moisture, reducing the risk of leaching.
When selecting treated lumber for outdoor applications, inquire about the type of preservative used. Choosing wood treated with safer alternatives can alleviate health concerns while still providing the longevity you expect.
Frequently Asked Questions
You may have several questions regarding pressure-treated wood and its interaction with concrete. Understanding these aspects can help ensure your outdoor projects remain durable and functionally sound.
How much shrinkage can be expected from pressure-treated lumber when set in concrete?
When pressure-treated lumber is set in concrete, it can experience minimal shrinkage over time. Typically, this shrinkage ranges from 1% to 3%, depending on humidity and temperature fluctuations. This may not significantly impact your structure but should be considered during installation.
What is the anticipated longevity of pressure-treated wood post-installed in concrete?
Pressure-treated wood, when installed properly in concrete, can last upwards of 12 years or more. This longevity varies based on the quality of the wood and environmental factors. Ensuring proper installation techniques can enhance durability.
Is a moisture barrier necessary between pressure-treated wood and concrete?
Yes, a moisture barrier is recommended to prevent direct contact between pressure-treated wood and wet concrete. This barrier helps mitigate moisture absorption, which can lead to rot over time. Utilizing materials like plastic sheeting can be effective in creating this separation.
What precautions are needed when embedding pressure-treated wood into concrete to prevent shrinkage?
To minimize shrinkage, ensure that the pressure-treated wood is dry before installation and avoid exposing it to excessive moisture. You should also consider using appropriate sealing techniques, such as applying waterproof tape around the base. This helps protect the wood from moisture absorption during and after installation.
Why is it not recommended to surround treated wood posts with concrete?
Surrounding treated wood posts with concrete can trap moisture, leading to increased risk of rot. The concrete retains water, which can be drawn into the wood. It is generally advised to use a post anchor or a footing to elevate the wood above the concrete.
How does the shrinkage of pressure-treated wood in concrete compare to untreated wood?
Pressure-treated wood typically shrinks less than untreated wood when set in concrete. Treated lumber is infused with preservatives that can help it retain moisture better. Consequently, it exhibits reduced dimensional changes compared to untreated types, contributing to its stability within a concrete setting.

What Happens If You Build a Deck Without Permit: Understanding the Risks and Consequences
Building a deck without the necessary permits can lead to serious legal issues
Building a deck can enhance your outdoor space, but proceeding without a permit can lead to significant consequences. If you build a deck without obtaining the proper permits, you may face fines, potential legal action, and even the requirement to demolish your construction. Understanding the legal implications is crucial to avoid costly mistakes that could disrupt your enjoyment of outdoor living.
Many homeowners are unaware that building codes can vary by location, with some regulations addressing the height and structure of decks. It's essential to familiarize yourself with these rules to ensure compliance. Ignoring these regulations can result in not only immediate penalties but also future complications when it comes to selling your property or making further modifications.
To ensure your project is both compliant and built to last, consider working with experts like Salt City Decks. Their focus on quality materials and attention to detail ensures your deck withstands the unique weather conditions in Utah while also enhancing your property's aesthetic appeal. Investing in proper construction techniques from the start can save you time, money, and stress in the long run.
Legal Implications Of Building A Deck Without A Permit
Building a deck without the necessary permits can lead to serious legal issues. Understanding the implications surrounding building codes, potential fines, and inspection actions will help you navigate this complex landscape.
Building Codes And Zoning Ordinances
Every locality has specific building codes and zoning ordinances that dictate how structures can be built. These regulations are designed to ensure safety and integrity in construction. Ignoring these requirements can compromise your structure's legal status.
If your deck does not meet local codes, you may be ordered to dismantle or modify it. This can incur additional costs and inconvenience. Additionally, failure to adhere to these rules can affect property values negatively and limit future home improvements.
Fines And Penalties
Local governments often impose fines and penalties for constructing a deck without a permit. These fines can vary dramatically based on your location and the severity of the violation. It’s not uncommon for fines to escalate with repeated offenses.
For example, first-time offenders may face less severe penalties, but recurring violations can lead to substantial fines. In some cases, you could be required to pay back taxes or fees related to property assessments that change after illegal construction is discovered.
Inspection And Enforcement Actions
If a deck is built without a permit, it may trigger inspections by a city inspector. This can occur after a complaint from a neighbor or during routine checks by local authorities. Inspectors assess whether structures comply with safety codes.
Should the inspector find violations, you may be issued a notice requiring immediate corrective action. Failure to comply can lead to legal action, including court appearances and potential additional fines. It’s crucial to address any inspection findings promptly to avoid escalating consequences.
Considering such implications, it’s wise to consult professionals like Salt City Decks for advice on obtaining the necessary permits. They focus on high-quality craftsmanship and materials, ensuring your deck stands strong against Utah's challenging weather.
Consequences For Homeowners And Contractors
Building a deck without the necessary permit can lead to multiple challenges for both homeowners and contractors. Understanding these repercussions is vital for navigating the potential pitfalls that arise from such decisions.
Impact On Property Value And Taxes
Without a permit, any construction you undertake may not be officially recognized. This can lead to a decrease in property value. When you decide to sell, potential buyers might be wary of properties with unpermitted structures.
Additionally, the absence of a permit can complicate property tax assessments. Local authorities typically evaluate homes based on their permitted features. If your deck isn’t registered, you could face unexpected tax liabilities once it is discovered.
Effects On Home Improvement Projects
Building without a permit can complicate future home improvement projects. You might find that unpermitted decks can lead to stop-work orders from local authorities, halting your progress. If you hire a contractor, they may also be hesitant to work on projects that involve unpermitted structures due to concerns about liability.
Moreover, if something goes wrong with the deck, such as structural failure, you may not be covered under your home's warranty. The lack of proper documentation makes it difficult to assert claims for repairs or modifications, leading to further complications down the line.
Liability And Insurance Issues
Liability becomes a major concern when you construct without the required permits. If an accident occurs on your unpermitted deck, you could be held responsible for injuries. Your homeowner's insurance might also deny claims related to injuries or damage stemming from this structure.
Contractors may face serious legal repercussions too. They could be subjected to fines or even legal action from local authorities. Working on unpermitted constructions can jeopardize their reputation and lead to loss of business. Adhering to permit requirements protects you and any hired contractors, ensuring safer and compliant construction practices.
How To Obtain The Required Building Permit
Acquiring a building permit for your deck is essential to ensure compliance with local regulations. Understanding the application process, preparing required documentation, and collaborating with professionals can streamline this task.
Application Process Explained
To start, visit your local government's building department website or in-person office for specific applications and guidelines. Most jurisdictions require you to fill out an application form detailing your project, including dimensions and materials. Some areas may charge a fee when submitting your application.
After submission, permits can take days to weeks for approval, depending on local regulations. Be prepared to address any questions that may arise during the review. You might need to modify your plans upon request to meet compliance requirements.
Site Plan And Documentation
A detailed site plan is crucial in the permit acquisition process. This plan should display the deck's location, existing structures, and property lines. It's important to indicate how the deck will fit into your landscape.
Documentation often includes materials you plan to use, construction methods, and a written description of your project. Providing clear, organized plans facilitates the review process and may expedite approval. Always check your local building codes for specific requirements to prevent delays.
Working With Contractors And References
Collaborating with experienced contractors simplifies the permit process. They can provide insight on local building codes and assist with documentation. Quality craftsmanship is essential for long-lasting structures, especially in areas with harsh weather conditions like Utah.
You should also consider obtaining references from your contractor to verify their work history and reputation. A contractor who values quality and attention to detail, such as Salt City Decks, ensures compliance with regulations. Their knowledge of pressure-treated lumber and durable construction techniques can enhance your project's longevity.
Special Considerations For Materials And Construction
Choosing the right materials and construction techniques is vital when building a deck without a permit. It can impact the durability, aesthetics, and safety of your structure. Specific considerations like the type of decking and how your deck integrates with existing elements are critical to ensure a satisfactory outcome.
Use Of Composite Decking And Other Materials
When selecting materials, composite decking is a popular choice due to its resilience against the elements. Unlike traditional wood, composite materials are resistant to rot, warping, and fading, making them an excellent option for regions with snow, like Utah.
Pressure-treated lumber is also a reliable choice, providing excellent strength and longevity. Your choice of material can significantly affect maintenance requirements; composite decking typically requires less upkeep compared to wood, which might need regular painting or staining.
Investing in high-quality materials enhances not just durability but also aesthetic appeal. A well-constructed deck can influence property value, giving your space a professional finish that invites admiration.
Integration With Existing Structures
Proper integration of your deck with existing structures, such as windows and plumbing, is crucial for functionality and safety. Ensure that your deck design allows for adequate drainage to prevent water issues, particularly if there are nearby landscaping features.
Consider the proximity to your home’s windows; you want to maintain a visually appealing view while ensuring adequate light enters the space. Pay attention to structural connections to prevent potential leaks around plumbing fixtures.
Utilizing waterproof tape and high-quality fasteners can enhance the integration, providing security against water intrusion. This level of attention ensures that your deck not only looks good but performs well for years to come.
Choosing The Right Legal And Building Professionals
Selecting the right legal and building professionals is crucial for ensuring compliance when constructing a deck. With the proper expertise, you can navigate permits and avoid potential legal issues.
Understanding Professional Credentials
When evaluating legal professionals, focus on their credentials. Look for individuals who are licensed in your state, as this indicates they meet the necessary educational and competency standards. You should also consider how many years they have been licensed.
Check for any additional certifications or specializations related to construction law. This could include memberships in relevant associations that signify a commitment to ongoing education and ethical practices. Also, peer endorsements can be a valuable indicator of a professional's reputation within the legal community.
Evaluating Disciplinary Status And Ratings
Understanding the disciplinary status of an attorney is vital. Investigate any past disciplinary actions through the state bar association. You can find details about their disciplinary history, which may include sanctions or suspensions.
Utilizing platforms like Avvo can provide insight into a legal professional's ratings. Ratings range from "Superb" for top-tier lawyers to "Extreme Caution" for those with concerning records. Aim for lawyers with "Excellent" or better ratings, as it generally reflects their performance and reputation.
Benefits Of Associations And Recognition
Professional associations enhance credibility. Membership in respected organizations can signify a lawyer's commitment to ethical standards and continuing education. Look for awards, publications, or speaking engagements that demonstrate legal thought leadership.
These distinctions often indicate a professional’s influence and respect within the field. A strong network and reputation can provide confidence that the legal professional you select will handle your decking project efficiently. Salt City Decks can also align you with experts familiar with local laws and building practices specific to Utah, especially considering weather-related challenges like snow.
Education And Resources For Compliance
Understanding building regulations is crucial for anyone planning to construct a deck. Complying with local codes not only ensures safety but can also save you time and money in the long run. Here are essential resources to help you stay informed and compliant.
Staying Up To Date With Building Regulations
To create a safe and compliant deck, you must stay informed about local building codes. Regulations can vary widely by location, especially in areas like Utah that experience harsh weather, including snow.
Check with your local building department for guidelines specific to your region. They will have information about required permits, structural requirements, and safety standards.
Consider periodic workshops or seminars offered by local construction organizations. These can provide insights into best practices as well as updates on any changes in regulations. Joining community forums can also be beneficial, allowing you to share experiences and learn from others.
Recommended Sources And Support
Utilize authoritative resources to guide your decking project. Government websites often provide downloadable manuals or checklists, which can help you ensure compliance.
Local construction associations, such as Salt City Decks, offer workshops and resources that focus on building durability and quality. Their expertise in high-quality materials, such as pressure-treated lumber, ensures that your deck withstands Utah’s weather.
Online platforms also offer materials about proper construction techniques, detailing essential aspects like waterproofing and joist spacing. This knowledge enhances the longevity of your structure, making it both sturdy and visually appealing to potential customers.
Frequently Asked Questions
Building a deck without the necessary permits can lead to various issues. It's essential to understand the size regulations, consequences, and steps to take if you find yourself in this situation.
What size deck can be constructed without needing a permit?
The allowance for deck size without a permit varies by local regulations. In many areas, you can typically build a deck up to a specific square footage, often around 200 square feet. It’s crucial to check your local municipality's guidelines to avoid penalties.
What are the consequences of building a deck without obtaining the necessary permits?
If you build a deck without a permit, you could face significant fines. Violations can lead to daily penalties and potential liens on your property. Additionally, your local government may require you to dismantle the deck.
How does one legalize a deck that was built without a permit?
To legalize an unpermitted deck, you typically need to apply for a permit retroactively. This process may involve inspections to ensure compliance with local building codes. Be prepared to address any necessary modifications to meet safety requirements.
Is a permit required to build a freestanding deck?
Yes, a permit is often required for freestanding decks, especially if they exceed a specific size. Local zoning laws will dictate the necessity of a permit based on the deck's dimensions and proximity to property lines.
What are the guidelines for needing a permit to build a deck in a backyard?
Guidelines for requiring a permit can include factors like the deck size, height, and distance from property lines. Regulations vary by area, so it's essential to consult your local building authority to determine specific requirements.
What should be done if one is caught constructing a deck without a permit?
If caught constructing a deck without a permit, you should immediately stop work. Contact your local building authority to discuss the situation. Be prepared for potential fines and the possibility of needing to apply for a permit retroactively.

Black and Gray Deck: Design Tips for a Modern Outdoor Space
Black and gray decks provide a modern touch to outdoor spaces, creating a sleek and sophisticated look.
Designing a black and gray deck can transform your outdoor space into a modern retreat. Choosing these colors not only enhances visual appeal but also reflects your style while complementing a variety of landscapes. A well-constructed deck in these shades can serve as a lasting centerpiece for gatherings and relaxation.
When planning your deck, consider quality materials that withstand Utah’s diverse weather, including snow. Investing in pressure-treated lumber and durable construction techniques will ensure your deck is both stylish and resilient. A focus on craftsmanship means your outdoor space will not only look great but also last for years to come.
Salt City Decks specializes in creating high-quality, lasting decks tailored to your preferences. With expertise in managing the unique climate challenges in Utah, you can trust them to build a deck that not only meets your needs but enhances your lifestyle. Your outdoor oasis awaits with a stunning black and gray deck.
Overview of Black and Gray Decks
Black and gray decks provide a modern touch to outdoor spaces, creating a sleek and sophisticated look. These color schemes enhance aesthetic appeal and can be used in various outdoor settings.
Defining Black and Gray Decks
Black and gray decks are characterized by their deep, rich tones, offering a striking contrast to natural surroundings. Black decks often evoke elegance and drama, while gray decks bring in a contemporary feel. These colors can be achieved through various materials, including composite and PVC decking.
The choice of color not only affects the visual aspect but also influences how the deck interacts with its environment, such as light absorption and heat retention. Black tends to absorb more heat compared to gray, making gray a preferable option in hotter climates.
Popular Uses for Black and Gray Color Schemes
These colors are popular for various applications in outdoor design. Black decks are frequently used to create a bold statement, often seen in modern homes and urban settings. They pair well with sleek outdoor furniture and ambient lighting.
Gray decks are versatile and can blend seamlessly with natural landscapes, making them suitable for rustic homes or properties surrounded by foliage. You might find them effectively used in transitional areas between indoor and outdoor spaces, providing a cohesive look.
Both colors make excellent backdrops for vibrant decor, such as colorful cushions or potted plants, allowing them to stand out.
Comparisons With White Decks
When comparing black and gray decks to white decks, the differences in maintenance and aesthetic appeal become apparent. White decks can give a fresh, clean look but may require more upkeep due to visible dirt and wear.
In contrast, black and gray do not show dirt as easily and can mask stains effectively. The longevity of these colors allows you to enjoy your deck without frequent cleaning. Furthermore, black and gray structures can withstand harsh Utah weather conditions, especially concerning snow and moisture.
Ultimately, the choice between these colors depends on your desired aesthetic and level of maintenance you are willing to undertake.
Color Selection and Design Principles
Selecting the right colors for your deck can greatly impact its overall appeal and harmony with your home. Understanding the nuances of gray and black tones will help you create a balanced and attractive outdoor space.
Choosing the Right Shade of Gray or Black
When selecting shades of gray or black for your deck, consider how they complement your home's exterior. Light gray can provide a softer appearance, while a deep black stain can create a bold statement.
Tips for Selection:
Match with Siding: Ensure your deck color coordinates with your home’s siding. A light gray deck can work well with warmer tones, while black often pairs seamlessly with cooler hues.
Consider Lighting: Natural light influences color perception. Sample colors at various times of the day to see how they appear in different lighting conditions.
Combining Black and Gray With Other Colors
Enhancing the black and gray elements of your deck can be achieved through strategic combinations with other colors. This can create a dynamic look that adds depth to your outdoor space.
Color Pairing Ideas:
Accent Colors: Consider adding vibrant accents, such as red or teal, in outdoor furniture or decor. These can create contrast against the neutral tones of your deck.
Natural Elements: Incorporate plants with bright green foliage. The contrasting colors will make your deck pop and blend beautifully with the surrounding nature.
Achieving Contrast With Railing and Windows
To further enhance your deck's design, consider how the railing and windows interact with the gray and black colors. This can create visual appeal and define architectural features.
Design Considerations:
Railing Color: White or light-colored railings can provide a striking contrast to a black deck. Conversely, a matching gray railing can create a seamless flow.
Window Frames: Ensure that your window frames harmonize with your deck. Using a similar color to the deck or railing creates balance and draws the eye toward those architectural elements.
When you focus on these essential design principles, your deck will not only look great but also withstand Utah’s changing weather, ensuring longevity and quality for years to come. Salt City Decks offers the expertise and materials for your decking needs, guaranteeing quality constructions.
Material Choices and Finishes
Choosing the right materials and finishes is crucial for creating black and gray decks that are both attractive and durable. Your selections will influence not only the aesthetic appeal but also the longevity and maintenance requirements of your deck.
Best Materials for Black and Gray Decks
For black and gray decks, pressure-treated lumber is a top choice. It is engineered to withstand harsh weather, ensuring your deck remains stable even in Utah’s snow. Composite materials are also popular due to their low maintenance and resistance to fading.
Another option is PVC decking, which offers a sleek appearance without the concerns of rot or splintering. When selecting your materials, consider the environmental impact. Sustainable choices can enhance your deck and support eco-friendly practices.
Black Stain vs. Painted Finishes
When considering finishing options, you have two main choices: black stain or painted finishes. Stains penetrate the wood, providing a natural look while highlighting the grain. They typically require reapplication every few years but keep the wood protected from moisture.
On the other hand, painted finishes create a solid layer that can cover imperfections. However, painting might peel or chip over time, requiring more frequent touch-ups. The choice between the two will depend on your desired aesthetic and maintenance preferences.
Longevity and Maintenance Considerations
Maintaining the longevity of your deck relies heavily on the materials and finishes chosen. Quality construction techniques, such as closer joist spacing and waterproof tape, add significantly to your deck's durability.
In Utah, where snow can be a concern, investing in high-quality materials becomes even more important. Regular maintenance, including cleaning and sealing, will extend the life of your black and gray deck. By prioritizing these aspects, you ensure a structure that remains functional and visually appealing for years to come.
Practical Benefits and Drawbacks
When considering black and gray decks, you should evaluate their ability to hide dirt as well as their impact on temperature and comfort. These factors can significantly influence your enjoyment and maintenance of your outdoor space.
How Black and Gray Decks Hide Dirt
One practical advantage of black and gray decks is their ability to conceal dirt and debris. Darker colors tend to mask stains better than lighter hues, making it less noticeable when dirt builds up.
With black and gray surfaces, you reduce the frequency of cleaning. This is particularly beneficial if your deck is in a high-traffic area. You won’t constantly worry about showing scuff marks or dust.
Remember that while they can hide dirt, regular maintenance is still essential. Using a pressure washer or a gentle cleaning solution can keep your deck looking fresh over time. Investing in quality materials, such as those offered by Salt City Decks, enhances durability, making it easier to maintain.
Impact on Temperature and Comfort
Color choice significantly affects the temperature of your deck. Dark colors, like black, absorb more sunlight, leading to higher surface temperatures, particularly during Utah's hot summer months.
In contrast, gray decks tend to moderate heat better. This can make walking barefoot on a gray surface more comfortable. If your deck receives a lot of sunlight, consider this factor when making your choice.
Darker colors might enhance aesthetic appeal but come at the inconvenience of heat retention. For those cold winter days, remember that shaded areas remain cooler. Quality construction techniques by Salt City Decks ensure long-lasting comfort and satisfaction, even in harsh weather conditions.
Installation and Safety Features
When installing a black and gray deck, incorporating essential safety features is crucial for both functionality and aesthetics. Proper planning for railings and stair treads ensures that your deck not only looks great but is also safe and compliant with local regulations.
Selecting Appropriate Railing
Choosing the right railing is essential for both safety and style. Railings should be at least 36 inches high to prevent falls, especially in areas prone to snow accumulation, such as Utah.
Materials to Consider:
Composite Railings: These are durable and weather-resistant, ideal for harsh conditions.
Wood Railings: Ensure they are made from pressure-treated lumber to withstand the elements.
You should also consider the railing design that complements your black and gray deck. Options like cable railings can create a modern, sleek look while maintaining visibility. Install the railings securely, using stainless steel fasteners to prevent rust and decay.
Considerations for Stair Treads
Stair treads must be chosen carefully to provide safety and stability. Consider using materials that offer good traction, especially in snowy conditions.
Key Features:
Anti-Slip Surfaces: Textured finishes can help prevent slipping.
Proper Sizing: Treads should extend at least 11 inches to provide ample space for foot placement.
Using waterproof tape during installation can aid in securing treads, enhancing their longevity. Regular inspection of stairs for wear and tear is crucial to maintain both safety and functionality. Prioritize quality craftsmanship in stair design to ensure durability and aesthetic appeal, making your deck a reliable and beautiful addition to your home.
Planning and Compliance
When planning your black and gray deck, securing the necessary approvals and adhering to guidelines is crucial. This ensures that your project meets safety standards and local regulations while delivering a lasting value to your property. Reviewing these elements will set a solid foundation for your deck-building journey.
Obtaining Proper Consent
Before beginning construction, it’s essential to check local building codes and obtain the required permits. This process might include:
Applying for a Permit: Submit your design plans to your local municipality for approval. Make sure your plans comply with zoning laws and regulations.
HOA Regulations: If you live in a community with a Homeowners Association, review their guidelines to ensure your intended design is permitted.
Inspections: Be prepared for inspections during different phases of the build. These assessments will confirm that your deck aligns with safety standards and construction laws.
Thorough research on these requirements can prevent costly fines and delays in your project.
Editorial Guidance for Project Success
To achieve a successful deck that combines aesthetics with longevity, focus on key aspects of the design and construction process. Start with:
Material Selection: Use high-quality pressure-treated lumber to withstand Utah’s varying weather conditions, including cold winters and snow.
Construction Techniques: Employ techniques like closer joist spacing and waterproof tape. These methods enhance the durability and stability of your deck, ensuring it lasts through harsh weather.
Craftsmanship Quality: Invest in skilled workmanship. Superior construction not only contributes to the deck's longevity but also improves its visual appeal, attracting potential buyers to your property.
By integrating these practices into your planning phase, you will maximize the success of your project and create a stunning outdoor space.
Frequently Asked Questions
When considering a black and gray deck, it's important to think about design ideas, proper planning, color comparisons with your house, and the practical implications of heat absorption. Here are some common inquiries that arise around these themes.
What are some modern design ideas for a black and gray deck?
Incorporating sleek lines and minimalist aesthetics can create a stunning black and gray deck. You might consider using contrasting furniture or accents in lighter colors for a striking visual effect. Additionally, integrating LED lighting along the edges can enhance the modern look during evenings.
How does one plan a deck with a black and gray color scheme?
Planning involves selecting materials that not only match your color scheme but also ensure long-lasting quality. Opt for options like composite decking in black and gray tones, which resist fading and wear. Ensure your design considers the surrounding landscape to achieve harmony between the deck and its environment.
Should the color of the deck be darker or lighter than the color of the house?
Choosing a darker or lighter deck color compared to your house depends on the overall look you want to achieve. A darker deck can create a bold contrast against a light-colored home, while a lighter deck complements a darker house. The balance in color can impact the visual appeal.
Can a black deck retain too much heat and become uncomfortable to use?
Yes, a black deck can absorb more heat, making it uncomfortable on sunny days. To mitigate this, consider using lighter-colored furniture or incorporating shade solutions, such as umbrellas or pergolas. These options can create a more comfortable outdoor environment even during peak sunlight.
Are there any benefits to choosing black decking materials?
Black decking often stands out for its modern aesthetic, providing a sophisticated look to your outdoor space. Additionally, high-quality black materials resist fading and can endure various weather conditions, ensuring that your investment remains visually appealing for years.
Why might gray be considered a suitable choice for decking?
Gray decking is versatile and can blend well with various home styles and colors. It tends to hide dirt and debris better than lighter colors, requiring less frequent cleaning. Furthermore, gray options can provide a contemporary feel that appeals to many homeowners looking for timeless elegance.

What to Put Around Patio: Enhancing Aesthetic and Functionality
Creating a vibrant patio space enhances your outdoor experience
Creating an inviting atmosphere around your patio can transform your outdoor space into a relaxing retreat. Planting a mix of colorful flowers, using decorative stones, and incorporating furniture can significantly enhance the overall appeal while providing functionality. You have plenty of options to consider, whether you prefer greenery, decorative elements, or practical additions.
Consider installing planters filled with vibrant flowers or hardy shrubs to add life and color. Incorporating features like a fire pit or comfortable seating can create an inviting gathering area for family and friends. With each thoughtful addition, you can increase the aesthetic appeal and usability of your patio space.
If you’re looking for durability in your patio structures, Salt City Decks can help you choose quality materials designed to withstand Utah’s variable weather, including snow. By investing in high-quality craftsmanship, you ensure that your patio area not only looks great but also stands the test of time.
Essential Planting Ideas for Patio Spaces
Creating a vibrant patio space enhances your outdoor experience. The right plants can introduce color, texture, and even privacy to your environment. Here are essential ideas tailored to optimize your patio area.
Potted Plants and Container Displays
Potted plants are an excellent way to add greenery without the need for permanent garden beds. You can select flowering perennials for seasonal color, or evergreen shrubs for year-round greenery.
Use a variety of pot sizes to create visual interest. Choose terracotta or ceramic pots for a classic look, while metal containers can provide a modern touch. Group pots to form eye-catching displays that draw the eye.
Consider herbs like basil or rosemary, which not only look good but are also practical for your kitchen. Ensure your pots have proper drainage to promote healthy root growth.
Beds, Borders, and Small Garden Features
Incorporating beds and borders around your patio can create a natural transition between your outdoor living space and the surrounding landscape.
You might plant low-maintenance evergreen shrubs as a living border that can withstand Utah’s snow. Choose colorful flowering perennials to enhance the aesthetic and create visual appeal during bloom season.
Small garden features like decorative stones or mulch can define areas within your borders while assisting with soil moisture retention.
Integrating pathways using pavers or gravel can connect your patio to these beds, ensuring a harmonious flow throughout your space.
Climbing Plants and Green Walls
Climbing plants are ideal for adding vertical interest and privacy to your patio. Consider installing a green wall or living wall made of trellises or mesh panels, where plants like clematis or jasmine can thrive and create a lush backdrop.
These plants not only beautify your area but can also help reduce noise and improve air quality. Ensure that you choose climbing varieties that are suitable for your local climate.
Integrating climbers around pergolas or fences can create inviting shaded areas. Remember to provide appropriate support structures to ensure healthy growth and stability.
Outdoor Structures and Patio Enhancements
When planning your patio area, focusing on structures and enhancements adds both functionality and beauty. Elements such as covered patios, durable surfaces, and thoughtful garden design create inviting outdoor spaces that cater to various needs.
Covered Patios and Shade Solutions
A covered patio offers essential protection from sun and rain, allowing you to enjoy your outdoor space year-round. Consider options like pergolas, which provide partial shade while adding aesthetic appeal. Solid roofs made of materials such as shingles or metal offer maximum coverage.
Using quality materials, such as pressure-treated lumber, ensures durability even in harsh weather conditions, common in Utah. This attention to construction detail safeguards against water damage and increases the structure's lifespan.
Incorporating retractable canopies or awnings further enhances your space, allowing you to adapt to changing weather conditions. Explore various designs to match your home's architecture.
Stone, Concrete, and Cement Surfaces
When choosing materials for your patio, options like stone patios, concrete pavers, or cement surfaces provide both longevity and style. Each material offers unique benefits; stone is aesthetically pleasing and offers natural beauty, while concrete pavers are versatile and durable.
Additionally, cement patios can be colored and stamped to achieve a unique look that complements your garden design. Proper installation is key—ensure a well-prepared base to prevent cracking. You might also consider incorporating drainage solutions to manage rainwater effectively, thereby prolonging the lifespan of your patio.
High-quality craftsmanship is critical for optimizing the resilience of these surfaces. Investing in professional installation sets the foundation for a long-lasting outdoor area that is easy to maintain.
Patio Zones and Garden Design
Creating distinct zones within your patio area enhances functionality. Designate spaces for dining, lounging, or gardening to optimize the use of your outdoor environment.
Incorporating seating areas surrounded by plants creates a cozy atmosphere. Choose suitable garden design elements, like flowering plants or decorative grasses, to complement your patio's theme.
Utilizing raised garden beds or vertical gardens maximizes planting space and adds visual interest. Thoughtfully arranged features enable you to enjoy your outdoor space more while ensuring easy access for maintenance.
By focusing on the integration of various outdoor structures and enhancements, you can transform your patio into a beautiful, functional area that suits your lifestyle.
Creating an Outdoor Oasis with Decorative Features
Transforming your patio into an outdoor oasis involves incorporating decorative features that enhance the aesthetic and functionality of the space. Focus on items that provide warmth, relaxation, and visual interest to create a cozy atmosphere.
Fire Pits and Patio Heaters
A fire pit can be the centerpiece of your outdoor oasis, providing warmth and a gathering spot for friends and family. Choose from various styles, such as portable fire bowls or permanent installations, to fit your design vision.
To maximize safety, ensure proper ventilation and distance from flammable materials. Adding comfortable seating around the fire pit, like Adirondack chairs or a sectional sofa, invites conversation and relaxation.
For cooler Utah evenings, consider installing patio heaters. These devices extend your outdoor season, allowing you to enjoy your space year-round. They come in various styles and sizes, ensuring you can find something that blends seamlessly with your decor.
Water Features and Focal Points
Water features are excellent for creating tranquility in your outdoor space. Options such as fountains, ponds, or small waterfalls can introduce soothing sounds and a cooling effect, perfect for hot summer days.
Choose a feature that complements your patio style. For a modern look, opt for a sleek, minimalist fountain, while a rustic oasis can benefit from a stone waterfall.
To make your water feature a focal point, surround it with lush greenery or flowering plants. This attraction can become a personal retreat and provide a habitat for local wildlife, adding vibrancy to your outdoor area.
Lighting and Ambience
Effective lighting can dramatically change the mood of your patio. Use a mix of ambient and task lighting to create a welcoming atmosphere. String lights or lanterns can add a whimsical touch above eating areas, while spotlights can highlight key features like your fire pit or water feature.
Consider using LED lighting for energy efficiency and longevity. Solar-powered garden lights are also a great eco-friendly option.
Incorporate wall sconces or pathway lights to ensure safe navigation while enhancing the overall aesthetic. Well-placed lighting will transform your outdoor space into an enchanting oasis after sunset, where you can enjoy evenings filled with relaxation.
Functional Additions for Patio Living
Enhancing your patio with functional additions can significantly elevate your outdoor experience. From creating cooking spaces to optimizing your layout for social gatherings, the right features can make your patio not only more inviting but also more practical.
Outdoor Kitchens and Pizza Ovens
Incorporating an outdoor kitchen into your patio can transform the way you entertain. These spaces can include grills, countertops, sinks, and storage, making cooking outdoors convenient and enjoyable.
Consider adding a pizza oven to take your culinary offerings to the next level. This feature allows you to prepare fresh, homemade pizzas, making your patio the go-to spot for gatherings. Look for models that retain heat well to ensure even cooking.
Utilizing high-quality, weather-resistant materials in these installations will ensure longevity and minimize maintenance. Functional features like waterproof storage can protect your cooking tools from Utah's harsh weather conditions.
Flexible Furniture Choices
Choosing the right furniture is crucial for maximizing your patio's functionality. Opt for modular or foldable pieces that can adapt to various occasions, whether it's a family barbecue or a cozy evening with friends.
Materials such as teak or aluminum are ideal for durability against the elements. Add cushions for comfort, and ensure they are weather-resistant for easy upkeep. Arranging movable furniture allows you to change the layout based on your needs, enhancing your enjoyment of the space.
Accessorizing with side tables for drinks and larger dining tables can provide versatile options for any gathering. This flexibility will encourage you to use your outdoor area throughout the year.
Hanging Baskets and Vertical Accents
Incorporating hanging baskets and vertical accents can add greenery and dimension to your patio. These features not only beautify the space but also maximize area efficiency, especially if you have limited ground space.
Hanging planters can be filled with vibrant flowers or herbs, providing both aesthetic appeal and functional benefits. Choose weather-resistant materials that can withstand Utah's seasonal changes.
Vertical gardens can be created with wall-mounted shelves or trellises, allowing you to create a unique and inviting atmosphere. These elements can also serve as natural privacy screens, making your patio feel more intimate.
Budget-Friendly and Creative Patio Solutions
Transforming your patio into a welcoming space doesn't have to be expensive. By incorporating DIY decor and low-maintenance plants, you can create an inviting atmosphere that enhances your outdoor experience while staying within budget.
DIY Decor and Upcycling Ideas
Get creative with DIY projects that add character to your patio. Upcycling discarded items can yield unique decor. For instance, use old wooden pallets to make rustic furniture. Sanding them down and applying a coat of weather-resistant paint can give them a fresh look.
Consider crafting planters from repurposed materials. Empty buckets or containers can serve as charming plant holders. Fill them with vibrant blooming plants like lavender, which not only adds beauty but also pleasant scents.
Incorporate string lights or homemade lanterns to create a cozy ambiance. Items like glass jars can be used to make stunning yet simple candle holders. This adds warmth to evening gatherings while allowing you to stick to your budget.
Low-Maintenance Plantings
Selecting the right plants makes all the difference in a budget-friendly patio. Opt for low-maintenance plants that require minimal care. Lavender, for example, thrives in various conditions and adds color and fragrance. It needs little water and is drought-tolerant, making it ideal for a busy lifestyle.
Additionally, consider ornamental grasses. They provide texture and movement without intensive upkeep. Plants like sedums or succulents are also great options, as they adapt well to different climates and require little watering.
Creating a garden bed with mulch can help define your patio space. It keeps weeds at bay and retains moisture, essential when growing plants that don't need constant attention. This approach enhances the aesthetic while ensuring a low-maintenance environment.
Frequently Asked Questions
Landscaping around your patio can significantly enhance its functionality and aesthetics. Below are specific considerations and options to help you make informed decisions for your outdoor space.
How can one landscape around a patio to enhance privacy?
To create a private oasis, consider using tall plants or trees as natural screens. Options like Leyland cypress or bamboo grow quickly and provide excellent coverage. Incorporating garden trellises with climbing vines can also add both beauty and seclusion.
What are some budget-friendly options to decorate a patio?
For decorating your patio on a budget, consider using string lights for ambiance or inexpensive outdoor rugs that add color. Potted plants are another great option; you can often find affordable varieties at local nurseries. DIY projects like painted planters can add a personal touch without breaking the bank.
What are the best materials to use for framing a patio area?
Quality materials are crucial for framing a patio effectively. Pressure-treated lumber is an excellent choice due to its durability, especially in varying weather conditions. Composite materials also offer longevity and low maintenance, making them a popular option for outdoor structures.
What landscaping elements can be used to complement a patio?
Incorporating elements such as decorative stones or gravel can enhance the look of your patio area. Water features like small fountains add a calming effect. Additionally, outdoor furniture that blends with the natural surroundings will create a harmonious space.
How can a small backyard patio be designed to maximize space?
To maximize a small patio, use multi-functional furniture that can serve various purposes, such as storage benches. Vertical gardens can also save space while adding greenery. Consider a circular layout to create flow and make the area feel larger.
What are some simple landscape designs for a patio?
Simple landscape designs often emphasize clean lines and easy maintenance. Using native plants that thrive in your region can simplify upkeep and promote sustainability. Consider layering your plantings—taller plants in the back and shorter in the front—to create depth and interest without overcrowding.

Deck Cedar vs Treated Lumber: Making the Right Choice for Your Outdoor Project
When choosing between cedar and treated lumber, it's important to understand the fundamental differences in their material composition, species and grades, and manufacturing processes
When considering decking options, it’s essential to weigh the benefits of cedar against pressure-treated lumber. In many cases, cedar is naturally resistant to rot and provides a warm aesthetic, while pressure-treated wood offers enhanced durability for harsher climates. You’ll want to examine how each material can meet your unique needs, especially in areas like Utah that experience heavy snow.
Choosing the right decking material not only affects the lifespan of your structure but also determines its overall appeal. High-quality craftsmanship, coupled with the right materials, ensures that your deck or pergola can endure Utah's weather while maintaining its beauty. Investing in this can lead to long-lasting structures that elevate your outdoor space.
As you explore your options, remember that Salt City Decks specializes in providing expert solutions tailored to your environment. Whether you prefer the natural charm of cedar or the robust nature of treated lumber, they have the expertise to guide you toward the best choice that aligns with your vision and durability needs.
Core Differences Between Cedar and Treated Lumber
When choosing between cedar and treated lumber, it's important to understand the fundamental differences in their material composition, species and grades, and manufacturing processes. These factors significantly influence the performance, aesthetics, and longevity of your decking options.
Material Composition
Cedar is a natural wood known for its rich oils and resins, which provide natural resistance to decay and insect damage. This composition makes it ideal for outdoor use, allowing cedar decks to withstand various weather conditions while maintaining their integrity.
In contrast, treated lumber, often made from softwoods like southern pine, undergoes a pressure treatment process that infuses chemicals into the wood. This treatment enhances its resistance to rot and insects. The chemicals used can vary, but they typically include preservatives that protect the wood from decay.
You may find that treated lumber has a more uniform appearance due to its manufacturing process, while cedar showcases unique grain patterns and colors. Cedar can naturally weather to a silver-gray shade over time if left untreated, adding to its rustic charm.
Species and Grades
Different species impact the performance of your decking. Western red cedar is highly sought after for its beautiful appearance and natural resistance to decay. It is available in various grades, with clear grades offering minimal knots and blemishes for a more refined look.
Treated lumber usually comes from southern yellow pine, which is stronger but may not have the same aesthetic appeal as cedar. Southern pine can be more affordable but typically requires regular maintenance to retain its appearance and durability. The grades of treated lumber can vary, with higher grades providing a smoother finish and fewer defects.
Depending on your project needs, selecting the right species and grade can significantly affect your structure's longevity and visual appeal. The aesthetic qualities of cedar may attract homeowners seeking a natural look, while treated lumber's sturdiness can cater to those prioritizing budget and strength.
Manufacturing Process
The manufacturing process of cedar involves minimal alteration from its natural state. After harvesting, the wood is processed and cut into planks, maintaining its natural oils and character. This approach preserves the benefits of cedar’s inherent properties, requiring less maintenance and offering impressive aesthetic appeal.
In contrast, the manufacturing of treated lumber includes a pressure treatment process, where wood is placed in a vacuum chamber, and preservatives are forced into the wood fibers. This method enhances durability against elements but may leave chemical residues that can raise safety concerns for some homeowners.
Understanding these processes helps guide your choice. Selecting quality materials, such as cedar or well-treated lumber, ensures your deck stands up to Utah's harsh conditions. Salt City Decks emphasizes the importance of quality materials and craftsmanship in every project, enhancing both durability and visual appeal.
Durability and Lifespan
When choosing between cedar and treated lumber for your deck, understanding their durability and lifespan is crucial. Both materials have distinct characteristics that influence their resistance to rot, decay, and overall longevity.
Rot and Decay Resistance
Cedar naturally contains oils that offer excellent resistance to rot and decay. These oils help protect against moisture, ensuring your deck withstands Utah's varying weather conditions, including snow. In contrast, pressure-treated lumber is infused with preservatives that enhance its resistance to rot. While treated wood can resist decay effectively, it may not match cedar's natural durability. It is important to note that the outer layers of treated wood, known as sapwood, can be more susceptible to moisture damage than the inner heartwood. Selecting the right material depends on your specific environmental considerations and maintenance preferences.
Ground Contact Performance
Ground contact performance is vital for the longevity of any deck structure. Cedar performs well but requires regular maintenance to maximize its effectiveness, especially when in direct contact with the ground. Treated lumber, particularly designed for ground contact, offers enhanced durability due to its chemical treatment. This makes it suitable for posts and other structural elements buried in the ground. Regular checks for rot near ground contact areas ensure safety and structural integrity, especially in environments with considerable moisture or snow accumulation.
Typical Lifespan
The lifespan of your decking material depends significantly on the choices you make. Cedar decks can last 20 to 30 years when properly maintained, showcasing their long-term value. In comparison, pressure-treated lumber typically falls within the range of 15 to 25 years. Factors such as regular sealing and maintenance can influence these durations. It's essential to evaluate how much effort you’re willing to invest in upkeep versus the aesthetic you desire. Quality materials and craftsmanship through Salt City Decks will enhance the lifespan further, ensuring your deck remains stable and visually appealing over time.
Maintenance Requirements
Proper maintenance is crucial to extend the life of your deck, whether you choose cedar or treated lumber. Understanding the specific needs for cleaning, staining, and repairs can help ensure your deck remains in excellent condition throughout the seasons.
Cleaning and Upkeep
Regular cleaning is essential for both cedar and treated lumber to avoid dirt buildup and mold growth. Using a gentle detergent mixed with water is often effective, along with a soft-bristle brush.
You should avoid pressure washing, as it can cause splintering in cedar or damage the treated wood's protective layer.
Aim to clean your deck at least once or twice yearly, particularly after winter, when snow and ice may have accumulated.
Inspect the deck for any debris, such as leaves or dirt, which can trap moisture and lead to further issues.
Staining and Sealing
For cedar decks, applying a protective stain can enhance its natural beauty and increase its resistance to moisture and UV damage. This should be done approximately every 2-3 years, based on exposure to the elements.
Pressure-treated lumber typically requires sealing as well, but the frequency may vary. Expect to reapply every 3-5 years.
Always ensure the wood is completely dry before applying stains or sealants. Following manufacturer instructions is crucial for the longevity of your finishes.
Repair and Replacement Needs
Inspect your deck regularly for any signs of damage, such as loose boards or splintering. Early detection can save you time and money on repairs.
If you notice significant damage or deterioration, replacing individual boards may be necessary. For cedar, damaged sections could be more prevalent due to its natural wood properties.
Pressure-treated lumber can also suffer from moisture damage, compromising its integrity. Consult a professional from Salt City Decks in Utah for expert advice and quality repair services tailored to your decking needs.
Aesthetics and Finishes
When choosing between cedar and treated lumber for your deck, aesthetics and finishes are critical considerations. Both materials offer unique visual appeal that can enhance the look of any outdoor space. Understanding the differences in natural appearance, color and texture options, and alternatives to cedar can help you make the best choice for your needs.
Natural Appearance
Cedar wood is renowned for its natural beauty. It has rich, warm tones that vary from light honey to deep reddish-brown. The grain patterns are distinctive, often featuring knots and swirls that add character to your deck. Cedar’s natural oils help it resist decay, meaning its aesthetic qualities can be maintained for years with proper care.
In contrast, pressure-treated lumber typically has a more uniform appearance, often greenish or brownish due to the chemicals used in its treatment. While it may lack the unique charm of cedar, it can still be appealing if properly stained or painted. The choice between these two materials can significantly influence the overall aesthetic of your outdoor area.
Color and Texture Options
Cedar can be treated with stains and finishes that enhance its natural colors and offer various textures. Choose from an array of stains that can deepen its red or brown hues or even shift towards grays for a weathered look. An oil-based finish can enrich the grain, making it more visually striking.
Pressure-treated lumber also offers color options, primarily through paint or stain, allowing you to customize the look. Typically, treated wood provides a more industrial feel but can adapt to a rustic appearance with the right finish. You can create a distinct look by choosing textured or smooth finishes as well, depending on your preference.
Cedar Look Alternatives
If you desire the appearance of cedar without the maintenance, consider composite materials designed to mimic its look. These alternatives offer a similar aesthetic with added durability and resistance to weather elements. Composite decking is often available in various colors, including shades that replicate cedar or redwood.
Another option is to use high-quality redwood, which also provides a stunning natural appearance, rivaling that of cedar. Keep in mind the longevity and maintenance requirements of each alternative. Investing in materials that ensure both visual appeal and durability is vital, especially in climates like Utah's, where snow and moisture can affect outdoor structures.
Cost, Sizing, and Application Considerations
When evaluating deck materials, understanding the costs, sizing, and their applications is vital. Both cedar and pressure-treated lumber offer unique advantages that align with different project needs.
Material Sizes and Availability
Cedar and pressure-treated lumber come in various sizes, typically available in 2x4, 2x6, and 2x8 dimensions. Cedar offers a natural aesthetic, making it suitable for visible structures such as decks and siding. Pressure-treated lumber is more common for structural elements like fence posts due to its enhanced durability against the elements.
Availability is crucial. Cedar is often stocked at local suppliers, while pressure-treated lumber is widely available due to its popularity in construction. You may find limited sizes in specialty lumberyards, which could impact your project timeline and budget.
Installation Costs
Installation costs can vary significantly based on material choice. Cedar decking generally ranges from $4 to $8 per square foot for materials, with installation labor adding to the total expense. On the other hand, pressure-treated wood is often more cost-effective initially but may require more frequent maintenance and replacement due to its shorter lifespan.
Your installation costs should include additional expenses such as waterproof tape and joist spacing for enhanced durability. Investing in proper materials now can save you money in the long run through reduced maintenance needs.
Application Uses
Understanding the intended use of the deck can influence your choice between cedar and pressure-treated lumber. Cedar is ideal for aesthetic applications, such as raised decks, where appearance matters. Its resistance to warping and cracking makes it an excellent option for snowy regions like Utah.
Pressure-treated lumber, on the other hand, excels in structural applications, such as fence posts and substructures, where strength and longevity are paramount. Its treatment helps it withstand harsh outdoor conditions, ensuring your investments remain stable.
By considering cost, sizing, and application, you can make informed decisions for your decking project. For expert installation and advice specific to Utah’s climate, consult with Salt City Decks to achieve the best results.
Alternatives to Cedar and Treated Lumber
If you’re exploring options beyond cedar and treated lumber for your outdoor deck, there are several durable and aesthetically pleasing alternatives. These materials can provide longevity and resistance to harsh weather conditions, which is crucial for structures in snowy regions like Utah.
Composite Materials
Composite decking is made from a blend of wood fibers and plastic, offering a low-maintenance alternative. It resists moisture, rot, and insect damage, making it ideal for your deck.
Benefits include:
Durability: Composite materials can last 25 years or more with minimal maintenance.
Variety of Styles: You can choose from many colors and textures to suit your design preferences.
Eco-Friendly Options: Many composites are made from recycled materials.
Composite decking does not require sealing or staining, which can save you time and money in upkeep.
Trex Decking
Trex is a leading brand in composite decking, known for its high quality and sustainability. Made from a proprietary blend of recycled wood and plastic, Trex is engineered for performance and durability.
Key features include:
Fade and Stain Resistance: Trex's surface resists fading and staining, making it a smart choice for outdoor environments.
Splinter-Free Surface: Its design ensures a comfortable surface for bare feet, ideal for families.
Low Maintenance: Just wash it with soap and water for upkeep.
Due to its durability, Trex can withstand snow and moisture, making it perfect for Utah's climate.
Other Wood Species
Besides cedar and treated lumber, several other wood species offer excellent performance for outdoor decking. Juniper is one alternative that provides natural resistance to moisture and insects.
Consider these options:
Redwood: Known for its beauty and durability, redwood holds up well against decay.
Tropical Hardwoods: Woods like Ipe or Cumaru are incredibly dense, offering excellent resistance to weather and pests.
These alternatives might come at a higher initial cost but can provide exceptional longevity when properly maintained.
Environmental Considerations
When choosing decking materials, it’s important to consider environmental impact. Composite materials often use recycled plastics and woods, reducing waste.
Factors to think about include:
Sustainable Sourcing: Woods like cedar and redwood should come from responsibly managed forests.
Carbon Footprint: Look for sustainably produced materials that minimize your project’s environmental impact.
Using materials that prioritize sustainability can enhance your project’s appeal while protecting the environment.
Frequently Asked Questions
When choosing between cedar decking and pressure-treated lumber, it's important to consider factors such as durability, maintenance, cost, and suitability for various applications. Understanding these aspects will help in making an informed decision.
What are the pros and cons of cedar decking compared to pressure-treated lumber?
Cedar decking offers natural resistance to rot and insects, making it a popular choice. However, it may require more maintenance over time compared to pressure-treated lumber, which is economical and often lasts longer. Pressure-treated wood can be less visually appealing than cedar.
How does the cost of cedar decking compare to pressure-treated lumber?
Cedar decking typically comes at a higher initial cost due to its quality and aesthetics. In contrast, pressure-treated lumber is generally more affordable. However, consider long-term maintenance and replacement costs, as cedar may require additional care.
What is the expected lifespan of cedar decking versus pressure-treated wood?
Cedar decking can last around 20 years if properly maintained. Pressure-treated wood can often last up to 30 years or more, especially when used in less harsh environments. Factors like weather conditions in Utah can impact the lifespan of either material.
What are the drawbacks of using cedar for outdoor decking?
While cedar is aesthetically pleasing and rot-resistant, it is softer and more prone to scratches and dents from heavy furniture or pet claws. It also requires regular maintenance, including sealing and staining, to maintain its integrity and appearance over time.
Which wood is generally considered the best for outdoor decks in terms of durability and maintenance?
Pressure-treated wood is often regarded as the best option for durability and low maintenance, especially in environments with harsh weather, such as Utah. It stands up well to moisture and insects, ensuring a longer-lasting structure with proper care.
Can cedar be used for ground-contact applications like fences and raised beds or is pressure-treated lumber preferable?
For ground-contact applications, pressure-treated lumber is generally preferable due to its enhanced resistance to decay when in contact with soil. Cedar can be used but may degrade faster. Choose the right material based on your specific project and environmental conditions.
For further assistance with your decking needs in Utah, consider reaching out to Salt City Decks for quality materials and craftsmanship tailored to your local climate.

What Is Composite Decking Material: A Comprehensive Overview of Its Benefits and Features
Composite decking is an innovative solution for outdoor spaces, combining durability with aesthetic appeal.
When considering a new deck for your outdoor space, understanding the materials available is essential. Composite decking material is a blend of wood fibers and plastic, offering enhanced durability and resistance compared to traditional wood options. This innovative combination is not only eco-friendly but also designed to withstand harsh weather conditions, making it an ideal choice for Utah's varying climate.
Investing in composite decking ensures you have a long-lasting structure that can handle snow, rain, and sun without significant wear. The right materials, construction techniques, and attention to detail can significantly improve your deck's performance and visual appeal. Choosing high-quality craftsmanship means your outdoor space will stand out while providing lasting enjoyment for years to come.
At Salt City Decks, you can rely on expertise and quality to create the perfect deck tailored to your needs. With a focus on durable materials and exceptional construction, your composite deck will not only enhance your landscape but also offer you peace of mind against the elements.
What Is Composite Decking Material?
Composite decking is an innovative solution for outdoor spaces, combining durability with aesthetic appeal. It is designed to withstand the elements while providing a visually pleasing alternative to traditional wood decking.
Definition and Composition
Composite decking is a material made from a blend of wood fibers and plastic, creating a durable product that's resistant to elements like moisture and UV rays. Typically, the composition consists of about 60% recycled wood and 40% plastic. This blend results in decking boards that mimic the look of natural wood without the drawbacks.
The use of composite materials eliminates issues like warping, splintering, and extensive maintenance. Some brands also incorporate additives to enhance color retention and resistance to fading. While composite decks may have a higher initial cost, their longevity can lead to savings over time due to reduced upkeep.
Comparison With Traditional Wood Decking
When comparing composite decking to traditional wood decking, several key differences emerge. Wood decking is often subject to issues like rot, insect damage, and the need for regular staining or sealing. In contrast, composite decks maintain a consistent appearance and structural integrity for years.
Advantages of Composite Decking:
Durability: More resistant to weather-related wear and tear.
Maintenance: Requires minimal cleaning and no staining.
Longevity: Typically lasts longer than traditional wood options.
Traditional wood can provide a classic look but often requires more frequent repairs and replacements. For structures in areas like Utah, which may experience heavy snowfall, composite materials offer a solution that stands up to harsh weather conditions while requiring less maintenance. Investing in quality materials and craftsmanship, such as those offered by Salt City Decks, ensures that your decking will endure over time.
Key Components of Composite Decking
Composite decking is designed for durability and performance, integrating various materials to achieve strength and resistance to environmental factors. Understanding the key components helps you make informed decisions about your decking options.
Wood Fiber and Fillers
Wood fiber is a primary ingredient in composite decking, providing a natural appearance and enhancing strength. Typically, wood fibers come from recycled sawdust, timber scraps, and other wood byproducts.
These materials are combined with additives to improve durability and resistance to moisture. The use of wood fillers helps maintain the aesthetic appeal while reducing reliance on virgin wood sources.
Additionally, these fillers contribute to the structural integrity of the decking, making it denser and more resilient against wear and weather damage.
Plastic Polymers: Polyethylene, Polypropylene, HDPE, and PVC
Plastic polymers play a crucial role in composite decking's performance and longevity. The common types include polyethylene, polypropylene, high-density polyethylene (HDPE), and polyvinyl chloride (PVC).
Polyethylene: Often used for its affordability and flexibility, making it a popular choice in many composite boards.
Polypropylene: Known for its strength and resistance to chemicals and UV fading.
HDPE: Offers high-impact resistance and is often used in higher-end products.
PVC: Provides exceptional water and mold resistance, making it ideal for wet environments.
The combination of these polymers ensures that your deck remains low-maintenance while providing a long-lasting surface that can withstand harsh weather, including snow and rain.
Recycled Materials in Manufacturing
Using recycled materials is a significant advantage of composite decking. Manufacturers incorporate recycled wood fibers and plastics, contributing to sustainability. By doing so, they reduce landfill waste and promote environmental responsibility.
This practice not only conserves resources but also enhances the performance of the decking boards. Items like post-consumer plastics are frequently used, ensuring that your decking has a lower carbon footprint.
Moreover, opting for products made with recycled content often means that they are engineered for superior strength and durability, giving you peace of mind regarding the longevity of your investment.
Choosing high-quality composite materials allows you to enjoy a beautiful, resilient deck that can endure the elements while being environmentally conscious.
Advantages of Composite Decking
Composite decking offers numerous benefits that make it a popular choice for homeowners. It combines durability, aesthetic appeal, and sustainability, ensuring your outdoor space looks great and stands the test of time.
Durability and Performance
Composite decking is designed to withstand harsh weather conditions, making it ideal for areas like Utah, where snow and moisture can be significant concerns. The synthetic materials used in construction resist fading, staining, and cracking, ensuring your deck performs well year after year.
Unlike traditional wood, composite materials are not prone to warping or splitting, enhancing their longevity. Additionally, investing in quality craftsmanship, such as proper installation techniques with waterproof tape and appropriate joist spacing, can significantly boost the deck’s stability and durability. This means less maintenance and fewer repairs down the line.
Aesthetic Options and Design Flexibility
With composite decking, you have access to a wide range of design options. Various colors, textures, and styles mimic the natural look of wood while providing added durability. This versatility allows you to create a unique outdoor space that complements your home’s architecture and your personal style.
Whether you prefer a traditional look or a more modern aesthetic, composite materials can meet your design criteria. You can easily coordinate with other outdoor elements, enhancing the overall visual appeal of your space. The smooth finish of many composite boards makes them comfortable underfoot, adding to their practicality for outdoor living.
Sustainability and Environmental Benefits
Choosing composite decking has environmental advantages, particularly because many products are made from recycled materials. This reduces the demand for new lumber and plays a role in preserving forests.
You can enjoy a beautiful deck while minimizing your environmental footprint. Additionally, composite decking typically requires less maintenance and fewer harsh chemicals for cleaning, further contributing to a more sustainable lifestyle. The long lifespan of your structure also means fewer materials being sent to landfills over time.
For quality decking solutions in Utah, consider Salt City Decks. They specialize in crafting durable and aesthetically pleasing composite decks that stand up to the region's challenging weather conditions.
Maintenance and Longevity
Composite decking requires specific care to ensure its long-lasting appeal and functionality. By understanding its resistance to staining and fading, coupled with proper care and cleaning routines, you can maintain the beauty and integrity of your deck.
Resistance to Staining and Fading
Composite decking is designed to resist staining and fading more effectively than traditional wood. The materials used often include a blend of wood fibers and recycled plastics, which provide a robust barrier against environmental factors.
This durability helps prevent issues caused by spills, dirt, and UV exposure. While composite decking is not completely stain-proof, it typically requires less frequent maintenance compared to wood options. Opt for high-quality products that enhance this resistance, ensuring your investment remains visually appealing for many years.
Care and Cleaning Requirements
Maintenance of composite decking involves regular cleaning, which should be simple and straightforward. Use a soft-bristle broom or a mild detergent mixed with water to remove dirt and debris. Avoid harsh chemicals that can damage the material.
For tougher stains, a gentle scrub with a non-abrasive pad can be effective. It's vital to rinse off any soap residue to prevent streaking. In regions like Utah, where snow can accumulate, ensure snow and ice are cleared promptly to prevent prolonged exposure to moisture, which can impact the deck's longevity. Investing time in these care practices will significantly enhance the lifespan of your composite deck.
Installation of Composite Decking
Proper installation is crucial for the longevity and stability of composite decks. Following the right preparation and installation process can make all the difference in achieving a durable and aesthetically pleasing final product.
Preparation and Planning
Before starting your project, ensure you have a comprehensive plan. Begin by choosing a suitable location for your composite decking, considering factors such as sun exposure, drainage, and space.
You should prepare a clear set of measurements for your deck layout. Mark the area using stakes and strings to visualize the space accurately. It’s essential to use pressure-treated lumber for the substructure, as it offers resilience against Utah's snow and other harsh weather conditions.
Gather quality tools to make the installation process smoother. Having a saw, drill, and measuring tape on hand is critical. Additionally, consider purchasing waterproof tape to protect your substructure from moisture. Proper planning prevents potential mistakes and costly alterations down the line.
Installation Process and Tools
When laying your composite decking, secure the start/stop strips first to establish a solid foundation. Lay the composite boards parallel to the house, ensuring an even spacing. Insert the clip prongs for secure attachment, following the manufacturer's guidelines.
Employ closer joist spacing to enhance stability, particularly in areas prone to heavy snow or rain. Aim for a maximum distance of 16 inches between joists to provide adequate support.
Make sure to cut the boards using a high-quality saw to prevent splintering. Attach the boards using stainless steel screws, which resist corrosion over time. Regularly check for levelness as you proceed, ensuring your structure is both functional and visually appealing. This attention to detail enhances the durability and success of your composite deck installation.
Leading Brands and Innovations
Composite decking has evolved significantly, with various brands setting the standard in quality and innovation. Understanding the key players and recent advancements can guide your decision-making for durable and beautiful outdoor spaces.
Trex and Other Market Leaders
Trex remains a dominant force in the composite decking industry, known for its sustainability and high-performance products. The brand uses a blend of reclaimed wood and plastic, making its decking resistant to fading, staining, and mold.
Other notable brands emphasize specific qualities such as durability and eco-friendliness. Manufacturers have invested in technologies that enhance weather resistance, which is essential in climates that face snow and heavy rains.
When selecting a brand, consider factors such as warranty offerings and material certifications, as these reflect the brand’s commitment to quality.
Recent Developments in Composite Decking
Innovations in composite decking material focus on enhancing durability and aesthetic appeal. Brands now offer products that mimic the look of natural wood while providing greater longevity and lower maintenance needs.
Recent advancements include improved core materials that offer better structural integrity. These innovations ensure your deck can withstand harsh weather conditions, providing both beauty and resilience.
New color options and textures are also being introduced, allowing for more personalized outdoor spaces. This means you can achieve the desired look while benefiting from the inherent advantages of composite materials.
In summary, exploring these leading brands and their latest developments will help you make informed choices for your decking needs.
Frequently Asked Questions
This section addresses common inquiries regarding composite decking. You'll find specific answers about its uses, comparisons to other materials, lifespan, and material composition.
What are the typical uses of composite decking material?
Composite decking is suitable for various applications, including residential decks, commercial spaces, boardwalks, and outdoor furniture. Its resistance to moisture and rot makes it ideal for areas with harsh weather, such as snow-prone regions.
How does PVC decking compare to composite decking?
PVC decking, made entirely from plastic, is more resistant to moisture and staining compared to composite decking. However, composite decking typically offers a more natural wood-like appearance and can be more affordable.
What are the main disadvantages of composite decking?
One of the primary disadvantages is its initial cost, which can be higher than traditional wood. Additionally, although it is low maintenance, it may still require periodic cleaning to avoid discoloration over time.
How does the lifespan of composite decking compare to traditional wood decking?
Composite decking generally has a longer lifespan than traditional wood decking, lasting 25 to 30 years or more with proper care. This durability makes it a worthwhile investment for long-term outdoor projects.
Which is more effective, Trex or other composite decking brands?
While Trex is a well-known brand, effectiveness can vary based on product lines. Focus on quality materials and installation techniques, regardless of the brand, to ensure optimal performance.
What materials are commonly utilized in the manufacture of composite decking?
Composite decking is typically made from a blend of wood fibers and recycled plastic. This combination not only enhances durability but also supports sustainable practices by utilizing recycled materials.

Outdoor Living Space Contractors Near Me: Transforming Your Backyard into an Oasis
Finding the right outdoor living space contractor involves assessing their qualifications, reviewing their past projects, and understanding client feedback.
Finding reliable outdoor living space contractors near you can transform your backyard into a functional and inviting retreat. Investing in quality craftsmanship and materials ensures that your outdoor structures will withstand harsh weather conditions and maintain their beauty for years to come. When searching for a contractor, it’s crucial to prioritize those who pay attention to detail in their construction techniques to enhance stability and durability.
In Utah’s unique climate, quality materials like pressure-treated lumber are essential. This not only helps resist the impacts of snow and moisture but also extends the lifespan of your decks and pergolas. A knowledgeable contractor will utilize methods such as waterproof tape and closer joist spacing to achieve structures that are both visually appealing and robust.
When you choose to work with specialists focused on quality, you are investing in outdoor living spaces that reflect your style and provide lasting enjoyment. By selecting the right contractor, you ensure your outdoor areas become a cherished part of your home for years to come.
What to Look for in Outdoor Living Space Contractors
Finding the right outdoor living space contractor involves assessing their qualifications, reviewing their past projects, and understanding client feedback. Each of these aspects plays a crucial role in ensuring your investment translates into a durable and aesthetically pleasing outdoor area.
Qualifications and Certifications
When choosing a contractor, verify their qualifications and certifications. Licensed contractors often adhere to industry standards, which is essential for quality assurance.
Look for certifications from recognized organizations in outdoor construction. This often indicates ongoing education in the latest construction techniques and materials.
Additionally, inquire about insurance coverage. A contractor should carry liability insurance and workers' compensation. This protects you from potential liabilities during the construction process.
Portfolio and Previous Projects
Reviewing a contractor's portfolio gives you insight into their style and capabilities. A diverse portfolio that showcases various outdoor living projects signals versatility.
Examine the quality of materials used in their past work, paying attention to details like finishes and construction methods. For instance, quality craftsmanship often involves techniques such as closer joist spacing and proper waterproofing.
Ask the contractor for case studies or examples of projects similar to yours. This helps you gauge their ability to meet your specific needs and visualize the final outcome.
Client Reviews and Testimonials
Client reviews and testimonials are invaluable resources. They provide a glimpse into the contractor's reliability, communication skills, and overall performance.
Search for reviews on platforms that aggregate contractor feedback. Look for comments on the quality of work and project timelines.
Request references directly from the contractor. Speak with previous clients to understand their experiences. This firsthand information can help you assess whether the contractor aligns with your expectations and project goals.
Selecting a qualified outdoor living space contractor is essential for creating a lasting investment.
Types of Outdoor Living Spaces
Creating the perfect outdoor living space involves various structures that enhance both functionality and aesthetics. Key options include decks and patios, pergolas and covered structures, and fire pits or fireplace areas. Each serves a unique purpose while contributing to your overall outdoor experience.
Decks and Patios
Decks and patios are foundational elements of outdoor living. A deck is typically elevated, providing a great space for entertaining or relaxing. Patios, on the other hand, are ground-level surfaces that can be constructed from materials like pavers, concrete, or stone.
When building a deck, consider using pressure-treated lumber to withstand harsh Utah weather, including snow. This choice safeguards against rot and extends the lifespan of your structure. Pay attention to construction details, such as closer joist spacing and the application of waterproof tape. These techniques ensure durability and structural integrity, creating a safe and attractive environment for your gatherings.
Pergolas and Covered Structures
Pergolas and covered structures enhance your outdoor living space by providing shade and definition. A pergola typically consists of posts and a lattice roof, allowing some sunlight while creating an inviting atmosphere.
When designing a pergola, quality materials are essential for longevity. Using robust lumber and reliable construction methods helps resist wind and snowfall. Customizing your structure with lights or climbing plants can amplify its aesthetic appeal, making it a focal point in your yard. Proper installation not only adds value to your home but also provides a lovely retreat from the sun or light rain.
Fire Pits and Fireplace Areas
Incorporating a fire pit or fireplace area brings warmth and ambiance to your outdoor space. Fire pits are versatile, available in various styles and materials, making them suitable for both casual and formal outdoor settings.
When planning for a fire pit, ensure that it is made from fire-resistant materials, emphasizing safety. Consider the layout and distance from your home and seating areas to provide a comfortable environment. A well-placed fire pit can make your gatherings more enjoyable, serving as a communal focal point. These features not only enhance your outdoor living but also create memorable experiences year-round.
Popular Materials and Design Options
When planning your outdoor living space, choosing the right materials and design options is crucial. Cedar, composite materials, and stone or concrete are some of the most popular choices. Each brings unique benefits that can enhance the longevity and aesthetic appeal of your outdoor structures.
Cedar and Composite Materials
Cedar is highly sought after for its natural beauty and resistance to decay. It is lightweight, making it easy to work with during construction. The aromatic scent of cedar also adds an inviting atmosphere to your outdoor area. However, regular maintenance is necessary to keep its appearance.
Composite materials, on the other hand, offer a low-maintenance alternative. Made from a blend of wood fibers and plastic, they are resistant to fading and splintering. This type of material is ideal for Utah's varying weather, including snow, as it withstands moisture better than traditional wood.
Quality and craftsmanship in the construction of decks using these materials can significantly impact durability. Techniques like closer joist spacing and waterproof tape help ensure a long-lasting structure.
Stone, Brick, and Concrete
Stone and brick provide a timeless look, adding elegance to any outdoor space. These materials are incredibly durable and able to withstand extreme weather conditions. They offer excellent insulation, keeping surfaces cooler in summer and warmer in winter.
Concrete is versatile and can be poured into various shapes, allowing for creative design options. It's particularly useful for patios and pathways, providing a solid foundation that can endure heavy foot traffic.
Investing in quality materials when building with stone, brick, or concrete not only enhances the longevity of your outdoor structures but also boosts curb appeal. Proper installation techniques are crucial to maximizing their performance and lifespan in the rigorous Utah climate.
Enhancements and Outdoor Features
Enhancing your outdoor living space can significantly elevate both its functionality and aesthetics. Incorporating features like outdoor kitchens and pools can transform your backyard into a luxurious retreat, providing spaces for cooking, dining, and relaxation.
Outdoor Kitchens and Dining Areas
An outdoor kitchen can become the centerpiece of your backyard. With options to include appliances such as grills, refrigerators, and sinks, this space allows you to entertain guests while enjoying the fresh air.
When planning your outdoor kitchen, consider durable materials. Pressure-treated lumber is an excellent choice for cabinetry and structures, providing resistance against Utah's weather conditions, including snow.
Incorporate a dining area nearby with robust furniture to complete the experience. This serves as a functional spot for meals, making it convenient for family gatherings or special occasions.
Pools and Water Features
Adding a pool can dramatically increase the appeal of your outdoor space. A well-placed pool not only offers a spot for cooling off in the summer but also becomes a place for social gatherings.
Consider including features like waterfalls or fountains for visual interest. These additions not only enhance the aesthetic but also create soothing sounds that elevate the atmosphere.
It's essential to focus on quality construction. Using high-quality materials ensures that your pool withstands harsh conditions and remains visually appealing over the years. Ensure attention to detail in installation for optimal functionality and aesthetics.
Planning, Costs, and Project Timeline
When preparing for your outdoor living space project, it's crucial to focus on budgeting, scheduling, and understanding local regulations. Each of these components directly influences the overall success and satisfaction of your project.
Budgeting for Your Outdoor Living Space
Before you start, outline a clear budget. Determine your spending limit based on your financial situation and the desired features in your outdoor space. Costs can range significantly; for example, basic decks may start around $2,000, while custom designs can reach $20,000 or more based on size and materials.
Consider including allowances for both materials and labor. High-quality materials, such as pressure-treated lumber, are essential for durability, especially in Utah’s varied climate. Allocate extra funds for unexpected expenses, as these can arise during construction. Be realistic about what you can afford while aiming for quality to ensure longevity and performance.
Project Timeline and Scheduling
Creating a realistic timeline is essential for managing your expectations and the project's workflow. After setting a budget, consult with contractors to develop a detailed schedule. On average, outdoor living space projects can take anywhere from a few weeks to several months, depending on complexity.
In Utah, weather considerations, such as snow, can affect scheduling. Be sure to discuss potential delays with your contractor. Establishing milestones can help keep the project on track and ensures that each phase is completed before moving on to the next.
Permits and Local Regulations
Understanding local regulations is crucial before beginning your project. Depending on your location in Utah, you may need permits for certain outdoor structures, particularly larger decks and pergolas. Check with city planning departments to determine what is required to avoid complications.
Permitting processes can vary widely and might add time to your project timeline. Ensure that your contractor is familiar with local codes and can handle the paperwork efficiently. Staying informed about these regulations will help you avoid costly adjustments or penalties later in the process.
Frequently Asked Questions
Understanding the key aspects of outdoor living spaces can help guide your project effectively. Here are some important considerations about costs, finding reputable contractors, and design trends.
What are the average costs associated with building an outdoor living space?
Costs can vary significantly based on materials and design. Typically, an outdoor living space can range from $5,000 to $30,000 or more. Factors affecting costs include the size of the space, choice of materials, and any additional features like lighting or landscaping.
How can I find a reputable outdoor living space contractor in my area?
To find a reliable contractor, start by asking for recommendations from friends or family. Online reviews and local directories can also provide insights. Ensure the contractor has experience in building outdoor spaces and check their portfolio for past work.
What factors should I consider when choosing a contractor for my outdoor living space project?
Consider the contractor’s experience, past projects, and customer reviews. It's crucial to verify their licenses and insurance. Additionally, discuss warranties and the materials they use, as quality will impact the longevity of your outdoor space.
How much value can a professionally designed outdoor living space add to my home?
A well-designed outdoor living space can significantly increase your home’s value. Studies show that such improvements can yield returns of 60% to 80% of the investment when it comes time to sell your home.
What are the latest design trends in outdoor living spaces?
Current trends include integrating sustainable materials, creating multi-functional spaces, and adding outdoor kitchens. Incorporating features such as fire pits and cozy seating areas can enhance usability and invite year-round enjoyment.
How long does the construction of an outdoor living space typically take?
The timeline for construction can vary based on the complexity of the project. Generally, building an outdoor living space may take anywhere from a few weeks to several months. Weather conditions, particularly in areas with snow, can also affect the schedule.

How Much Does Pressure Treated Lumber Shrink: Understanding the Impact on Your Projects
Pressure-treated lumber is specifically engineered to enhance durability and resistance to environmental factors.
Understanding how much pressure treated lumber shrinks is crucial for anyone planning a construction project, especially in areas with fluctuating weather conditions like snow-prone Utah. Pressure treated lumber can shrink by approximately 4% in width and up to 2% in thickness as it dries out, which can lead to noticeable gaps in your decking or outdoor structures.
Moisture content plays a significant role in this shrinkage. When pressure treated lumber is first installed, it often contains a high level of moisture due to the treatment process. As it acclimates to the environment, it begins to lose this moisture content, leading to shrinkage. This is why careful planning and consideration in your construction techniques are essential to maintaining the integrity of your project.
Choosing high-quality materials and employing the right construction techniques can help mitigate the effects of shrinkage, ensuring your structures remain both durable and aesthetically pleasing. At Salt City Decks, we prioritize the quality and longevity of your outdoor spaces, helping you achieve beautiful and lasting results.
Understanding Pressure Treated Lumber
Pressure-treated lumber is specifically engineered to enhance durability and resistance to environmental factors. This type of wood undergoes a treatment process that infuses preservative chemicals into the fibers, making it suitable for outdoor use. Below, you will learn about the composition, types, and benefits of using treated lumber.
Composition and Types
Pressure-treated lumber primarily consists of softwood species, which are known for their structural strength. Common types include Southern Yellow Pine, cedar, and redwood.
Southern Yellow Pine is widely used due to its affordability and effective treatment absorption.
Cedar and redwood offer natural resistance to decay and insects, making them ideal for aesthetic projects.
The treatment process usually involves a vacuum-pressure method that forces preservative chemicals deep into the wood. Common preservatives are copper-based compounds, which provide long-lasting protection.
Being aware of the type of wood and preservative used will help you select the most suitable option for your project, particularly in harsh weather conditions often found in Utah.
Benefits of Using Treated Lumber
Choosing pressure-treated lumber for your outdoor structures comes with several advantages. First, its resistance to rot and insects significantly extends the lifespan of your projects.
Key benefits include:
Durability: Treated lumber can withstand harsh climates, including snow and moisture.
Cost-Effectiveness: While the initial investment may be higher, the longevity of treated lumber can save you money on repairs and replacements.
Attention to detail in construction, like using waterproof tape and closer joist spacing, enhances overall stability. Investing in quality materials ensures your decks and pergolas not only last long but also look appealing, attracting potential clients.
When considering options for your next project, Salt City Decks can provide the right expertise and quality materials tailored to your needs in Utah.
Factors Influencing Shrinkage
Understanding the factors influencing shrinkage is essential for effectively managing pressure-treated lumber in your projects. Key determinants include moisture content, wood's hygroscopic nature, and the effects of temperature and humidity, all of which play crucial roles in the behavior of wood as it dries.
Moisture Content and Its Effects
Moisture content directly impacts the shrinkage rates of pressure-treated lumber. Before being treated, wood is typically in a "green" state, meaning it retains a high level of moisture. As the wood dries, it begins to lose this moisture, leading to shrinkage.
Pressure-treated lumber can shrink by nearly 9% as it moves from a wet to a dry state. A common situation occurs when boards are treated and then installed while still wet. They continue to shrink over time, resulting in gaps or misalignments in your structure.
Regular monitoring of moisture levels can help you time your projects effectively. For applications in areas like Utah, where weather can be extreme, timing your installation. It's crucial to consider whether the wood is fully dried or still has excess moisture.
Hygroscopic Nature of Wood
Wood is classified as a hygroscopic material, meaning it absorbs and releases moisture based on environmental conditions. This nature leads to dimensional changes, influencing shrinkage. As the ambient humidity rises, wood can swell by absorbing moisture; conversely, as humidity falls, the wood will shrink.
Different species of wood will exhibit varying shrinkage rates due to their unique cellular structures. The anatomical differences result in different absorption capacities, affecting how much each species could change dimensionally in response to moisture levels.
Choosing the right kind of wood for your project can significantly affect long-term stability. Properly sealed surfaces can mitigate moisture absorption, thereby reducing potential shrinkage over time.
Temperature and Humidity Impact
Temperature and humidity also play pivotal roles in wood shrinkage. Higher temperatures can accelerate the drying process, increasing the likelihood of shrinkage. At the same time, high humidity levels can delay this process, causing wood to retain moisture and preventing it from reaching a stable state.
For instance, in colder months, moisture levels can fluctuate. Snow and rain can saturate wood, leading to significant shrinkage once the wood finally dries.
The ideal climate for installation can enhance your material's longevity. Constantly fluctuating environments can strain wood, leading to cracking or warping. Understanding these environmental impacts can help direct your construction approach.
By considering these factors, you can optimize your use of pressure-treated lumber and ensure your structures are built to last.
Installation Process and Best Practices
Proper installation of pressure-treated lumber is crucial for achieving durability and longevity in outdoor structures. Understanding the preparation and installation techniques will significantly improve the performance of your decking or other construction projects.
Preparing Pressure Treated Lumber
Before installation, it's important to ensure your pressure-treated lumber is adequately dried. Ideally, allow the boards to dry for 2-4 weeks after purchase. This prevents warping and shrinkage, which can lead to gaps between boards.
Inspect each board for defects such as knots or splits, as these may compromise the structural integrity. Applying a water-resistant sealant can further enhance the wood's lifespan. When working in areas prone to moisture, like Utah with its snow, prioritize using materials specifically treated to withstand such conditions.
Additionally, consider kiln-dried options for quicker acclimatization and minimized shrinkage. This attention to preparation pays off in the long run, ensuring a stable foundation for your project.
Installation Techniques
During installation, paying attention to construction methods will bolster the durability of your project. Maintain a 1/16 inch gap between boards to allow for expansion and contraction due to moisture changes. For maximum stability, use closer joist spacing to support the deck boards effectively.
Applying waterproof tape on joists is a recommended practice to prevent moisture from settling and causing rot. When fastening deck boards, use high-quality stainless steel screws to protect against corrosion.
In snowy conditions, ensure proper drainage to prevent ice buildup, which can damage the deck over time. By following these best practices, you create a robust and long-lasting structure, making your outdoor space more appealing and functional.
Maintenance of Treated Lumber Structures
Regular upkeep is crucial for the longevity of structures made from pressure-treated lumber. By performing inspections and taking steps to mitigate shrinkage and swelling, you can ensure that your outdoor installations remain safe and visually appealing.
Regular Inspection and Repair
Conduct inspections of your pressure-treated wood structures at least twice a year. Look for signs of wear, such as cracks, splintering, or discoloration. Pay particular attention to areas that experience direct contact with water or are shaded, as these spots are more prone to decay.
During your inspection, check for loose fasteners and ensure that joints are secure. If you find damaged boards, replace them promptly to maintain structural integrity. Regularly applying a protective sealant can also enhance durability by providing a barrier against moisture and UV damage.
Mitigating Shrinkage and Swelling
To manage the natural shrinkage and swelling of treated lumber, it's vital to maintain proper spacing between boards. A gap of about 1/16 inch is generally recommended, allowing for movement without compromising structural integrity.
Use waterproof tape on joists to minimize moisture exposure, and consider closer joist spacing to provide additional support. Regularly monitor the humidity levels in your area, especially in regions like Utah, where snow can lead to significant moisture fluctuations.
This proactive approach will help keep your wood foundations and siding in optimal condition, reducing the need for extensive repairs.
Measuring and Monitoring Lumber Quality
To ensure the longevity of your pressure-treated lumber, measuring and monitoring its quality is crucial. One effective way to gauge moisture content is by using a moisture meter. This tool helps you determine if the lumber is ready for use or if it requires additional drying.
The drying process significantly impacts the structural integrity of your wood. Lumber that is too wet can experience excessive shrinkage as it dries, affecting its mechanical properties. This shrinkage can lead to gaps and structural weaknesses.
Kiln-Dried After Treatment (KDAT) lumber is often recommended for projects. This lumber type undergoes a special process to reduce moisture content while improving quality. It typically shrinks less than traditionally treated lumber, leading to fewer issues down the line.
When measuring longitudinal shrinkage, you might observe that different species of wood shrink at varying rates. You can account for these differences when planning your construction to mitigate potential problems.
Investing in high-quality materials and monitoring their condition can greatly enhance the durability of your outdoor structures. For your decking inquiries in Utah, which faces challenging weather conditions like snow, consider utilizing Salt City Decks for expert guidance and craftsmanship. By focusing on quality, you ensure that your structures stand the test of time.
Frequently Asked Questions
Understanding the implications of using pressure treated lumber helps ensure that your outdoor structures remain durable despite changing conditions. Here are answers to common questions regarding shrinkage and its impact on construction.
How should you account for shrinkage when installing pressure treated wood?
When installing pressure treated lumber, it’s crucial to leave gaps between boards for shrinkage. Typically, a gap of 1/16” to 1/8” is recommended when butting the boards together. This accounts for future shrinkage as the wood dries and minimizes the risk of warping.
What is the typical drying time for pressure treated lumber before construction?
Pressure treated lumber can take several weeks to dry, especially in humid conditions. Generally, you should wait a minimum of 1 to 2 weeks before construction. Drying time can vary depending on the wood's initial moisture content and the specific climate conditions in Utah.
Is it possible to construct with pressure treated wood while it is still damp?
You can construct with damp pressure treated wood, but it may lead to various issues. Damp wood can shrink significantly after installation, causing gaps and instability. It’s advisable to let the wood dry properly to mitigate these risks and ensure a sturdy structure.
What is the expected amount of shrinkage in pressure-treated lumber after drying?
The shrinkage of pressure treated lumber generally ranges from 5% to 10% depending on the species and moisture content. Most dimensional lumber shrinks around 1/2” in width once fully dried, which is significant for maintaining structural integrity.
Can pressure treated wood be kiln dried to reduce shrinkage?
Yes, kiln drying is an option for pressure treated lumber. This process reduces the moisture content, significantly minimizing future shrinkage. However, ensure that the kiln-dried lumber is treated equally to maintain its resistance to decay and insect infestation.
How does shrinkage in pressure-treated deck boards affect the building process?
Shrinkage in deck boards can lead to gaps between boards, which may affect aesthetics and structural stability. Proper planning, including allowing for shrinkage during installation, reduces potential issues. Employing high-quality construction techniques will improve the overall durability of your deck, especially in Utah’s unique climate.

How to Decorate Backyard: Simple Ideas for a Stunning Outdoor Space
Effective planning is essential for transforming your backyard into a beautiful outdoor space.
Transforming your backyard into a serene and inviting space is easier than you might think. By focusing on quality materials and thoughtful design, you can create a stunning outdoor area that withstands Utah's unique weather conditions. Whether you want a cozy corner for gatherings or a peaceful retreat for relaxation, there are plenty of options to enhance your outdoor experience.
Start by incorporating durable structures such as decks and pergolas that not only add aesthetic value but also ensure longevity. Attention to construction details—like the use of pressure-treated lumber and waterproof techniques—will ensure that your investments stand the test of time. With the right approach, even a small backyard can become a beautiful oasis.
Your outdoor space should reflect your personal style and serve your needs. From cozy fire pits to elegant lighting, there are countless decorating ideas that can elevate your backyard. With proper planning and execution, your backyard can be a versatile extension of your home, perfect for entertaining or unwinding after a long day.
Planning Your Outdoor Space
Effective planning is essential for transforming your backyard into a beautiful outdoor space. By considering your layout, identifying your needs, and creating a thoughtful design plan, you can maximize your enjoyment and functionality.
Assessing Your Backyard Layout
Begin by evaluating the existing layout of your backyard. Take note of key features such as trees, fences, and any existing structures. Measure the space to understand its size and shape.
Consider the sun's path to identify areas that receive ample sunlight versus those that remain shaded. This information can guide decisions about where to place seating, gardens, or play areas.
Additionally, think about privacy concerns. Tall hedges or fencing can create secluded spots while maintaining an open feel in your design.
Identifying Your Needs and Preferences
Next, clarify what you want from your outdoor space. Make a list of activities you wish to engage in, such as dining, gardening, or relaxing.
Think about the needs of all potential users, such as family members or pets. For example, if you have children, include safe play areas, while pet owners might prioritize durable surfaces.
Determine your style preferences as well. Do you lean towards a modern aesthetic or a more traditional garden feel? This will help shape your design choices moving forward.
Creating a Design Plan
Once you have assessed your layout and identified your needs, it’s time to create a design plan. Start by sketching various configurations that incorporate your chosen elements.
Use a mix of materials like pressure-treated lumber for decks, ensuring quality and longevity, especially in Utah’s snowy climate. This material withstands harsh weather, providing a sturdy foundation for your structures.
Incorporate details like lighting and decorative features into your plans. These touches can enhance the overall aesthetic while increasing usability during evenings or gatherings.
Be sure to consider how different zones will flow into each other. This cohesiveness will create an inviting atmosphere in your outdoor spaces.
Landscaping and Plant Selection
Creating a vibrant and functional backyard requires thoughtful landscaping and plant selection. By choosing the right plants and incorporating clever design elements, you can enhance your outdoor space's beauty and usability.
Choosing the Right Plants
When selecting plants for your backyard, consider the climate, soil type, and light conditions. Native plants are often the best choice, as they are adapted to local conditions and support local wildlife. For instance, if you live in Utah, drought-resistant varieties are ideal.
Focus on a mix of perennials and annuals to ensure year-round interest. Perennials like lavender and coneflower provide consistent bloom, while annuals like petunias offer seasonal bursts of color. Always check for maintenance requirements to match your gardening commitment.
Low-Maintenance Backyard Landscaping Ideas
If you prefer a yard that requires minimal upkeep, prioritize low-maintenance plants and landscaping techniques. Groundcovers such as creeping thyme or sedum can reduce the need for mowing and weeding.
Incorporating hardscaping elements like gravel, stone paths, or decorative mulch can further cut down on maintenance. Consider using raised beds or container gardens to simplify plant care and irrigation, making it easier for you to manage your space.
Incorporating Hanging Baskets
Hanging baskets are a stylish way to add layers to your backyard. They can brighten up locations such as patios or entryways without taking up valuable ground space.
Choose sturdy baskets to support the weight of the plants and soil. Consider using a mixture of trailing plants like ferns or petunias for visual interest. Regular watering and fertilization are important to keep your hanging baskets healthy and vibrant.
With appropriate plant selection and clever landscaping ideas, you can create a stunning backyard that complements your lifestyle.
Essential Outdoor Features
A well-designed backyard includes key features that enhance both comfort and aesthetic appeal. Focusing on specific outdoor structures can transform your space into a serene retreat. Consider adding a welcoming patio, an elegant pergola or gazebo, and soothing water features to elevate your outdoor experience.
Creating a Comfortable Backyard Patio
Your patio serves as the heart of outdoor gatherings. It should be inviting and functional. Begin by selecting quality materials that can endure Utah's varying weather conditions, including snow. Pressure-treated lumber is ideal for durability and longevity.
Incorporate comfortable seating options, such as well-cushioned chairs and sofas. Add a dining table for hosting meals or casual get-togethers. Accessories like throw pillows and outdoor rugs can enhance the comfort and visual appeal.
Consider shade options as well. A patio umbrella can offer relief on sunny days. String lights or lanterns help create a cozy atmosphere for evening gatherings.
Installing a Pergola or Gazebo
A pergola or gazebo can define your outdoor space while providing shade and shelter. When choosing between the two, consider your specific needs. A pergola offers an open structure that supports climbing plants, while a gazebo provides full shelter from the elements.
Using high-quality materials, such as treated timber, ensures that your structure lasts through harsh weather. Pay close attention to construction details, like waterproof tape and proper joist spacing, to enhance durability.
You can personalize these structures with outdoor curtains or lights. This adds charm and makes them versatile for different occasions, such as relaxing with a book or hosting friends.
Adding Water Features
Water features are excellent for creating a tranquil ambiance in your backyard. Consider options such as a fountain or a small pond. The sound of water can have a soothing effect, making your outdoor space feel more serene.
When choosing a water feature, focus on materials that will withstand UV exposure and freezing temperatures. A durable design ensures longevity.
You might also want to landscape around the water feature with native plants that thrive in your local climate. This not only beautifies the area but also attracts beneficial wildlife, adding life to your backyard.
Investing in high-quality outdoor features will significantly enhance your backyard and ensure it remains a pleasure to enjoy for years.
Furnishing and Decorating Your Backyard
Creating a beautiful backyard begins with choosing the right furniture and decor that suits your style and enhances function. Focus on quality and aesthetics to ensure your outdoor space is both inviting and durable.
Selecting Outdoor Furniture and Patio Sets
When choosing outdoor furniture, prioritize material quality to withstand varying weather conditions. Look for patio sets made from materials like aluminum, teak, or high-density polyethylene (HDPE). These materials provide longevity and require less maintenance, making them ideal for the climate in Utah, which often faces snow.
Consider the size and layout of your backyard when selecting your furniture. A dining set for entertaining should be spacious yet fit comfortably within your space. Complement it with lounge chairs or a sectional for relaxation. Ensure your selections are functional and comfortable while adding a cohesive style to your outdoor area.
Adding Stylish Outdoor Decor
After establishing your patio furniture, focus on outdoor decor to enhance the ambiance of your backyard. Use colorful cushions and throws on your seating to infuse personality. Incorporating elements like outdoor rugs can define spaces and add warmth.
Consider decorative planters filled with seasonal flowers for a vibrant touch. Privacy screens or trellises can create intimate spaces while adding visual interest. Don't forget about lighting; string lights or lanterns can extend your outdoor enjoyment into the evening hours, making the area cozy and inviting.
Outdoor Lighting for Ambiance and Functionality
Effective outdoor lighting can transform your backyard into a welcoming and functional space. By utilizing a variety of lighting options, you can enhance the ambiance while ensuring safety and security.
Using Outdoor String Lights and Solar Lights
Outdoor string lights are a popular choice for creating a warm and inviting atmosphere. These lights can be hung across patios, pergolas, or fences to provide a soft glow. They are not only decorative but also versatile, allowing you to customize the layout according to your space.
Solar lights are another excellent option. They harness sunlight during the day and illuminate your yard at night without increasing your energy bill. They're easy to install and require minimal maintenance. For optimal performance, place them in areas that receive plenty of sunlight. Mix string lights with solar-powered stake lights along pathways to guide guests and add a magical touch to your outdoor environment.
Incorporating Lighting for Safety and Security
Lighting plays a crucial role in enhancing safety and security in your backyard. Pathway lights are essential for illuminating walkways, preventing trips and falls. Opt for durable LED lights with motion sensors for added safety, as they automatically turn on when someone approaches.
Additionally, floodlights can be strategically placed around your home to deter intruders and provide visibility in darker areas. Be sure to illuminate entrances, garages, and other key areas. By improving visibility around your property, you not only enhance security but also make your outdoor space more engaging and welcoming.
Creative Lighting Placement Ideas
Consider various creative placements for your outdoor lighting to maximize both aesthetics and functionality. Uplights can be positioned to highlight trees or architectural features, creating visual interest and depth. Place lights along stone walls or under a pergola to accentuate these structures.
Hanging lights from trees can create enchanting focal points while providing ambient lighting. For added flair, consider adding colored bulbs for festive occasions. Experiment with different arrangements to find the perfect balance between functionality and artistic expression. Your backyard can become a stunning nighttime retreat with the right lighting strategy.
Backyard Entertaining and Seasonal Tips
Creating an inviting outdoor space for entertaining involves thoughtful design and preparation. By focusing on key areas such as your cooking facilities, shade options, and gathering spaces, you can enhance your backyard's functionality and enjoyment.
Designing an Outdoor Kitchen or BBQ Area
When planning an outdoor kitchen, consider the layout and essential equipment. You may want a grill, counter space, and storage for utensils and supplies. Using quality materials, like pressure-treated lumber, will ensure durability and resistance to Utah’s weather.
Incorporating a countertop provides a convenient space for food preparation. For features like sinks or refrigerators, ensure you account for necessary plumbing and electrical connections. This setup will elevate your cooking experience and make entertaining easier.
Setting Up Shade with Umbrellas
Umbrellas can significantly enhance comfort during summer gatherings. Choose sizable, sturdy umbrellas that can cover your seating and dining areas. Look for options that are easy to open and close for convenience.
Positioning them strategically will provide relief from the sun while creating cozy, defined spaces. Consider using weighted bases to keep them secure, especially in windy conditions. Additionally, fabric choices in UV-resistant materials can help maintain their appearance and functionality over time.
Preparing for Summer Gatherings
Preparation is key to successful summer gatherings. Start by ensuring ample seating arrangements, such as comfortable chairs or benches. You might want to include cushions for added comfort.
Incorporate decorative elements like string lights or lanterns for ambiance that makes evenings enjoyable. Don't forget to set up a designated dining area with a table and chairs. This encourages guests to relax and enjoy their meals together.
Think ahead and plan for accessories like coolers filled with refreshments to keep everyone hydrated. By focusing on these details, you can create a welcoming environment that makes hosting effortless.
Frequently Asked Questions
Decorating your backyard can enhance your outdoor experience and increase your property's aesthetic appeal. Here are specific considerations and suggestions to help you make the most of your outdoor space.
What are some budget-friendly ways to enhance a backyard's appeal?
Consider using items you already own. Repurposing old furniture or decor can breathe new life into your space. Planting native flowers and using mulch instead of stone can create visual interest without breaking the bank.
How can one create a festive atmosphere with backyard decorations for parties?
Use string lights to add warmth and charm. Incorporate colorful tablecloths, cushions, and decorative centerpieces. Simple elements like lanterns or themed decor can transform your backyard into a fun party venue.
What are unique garden accents that can add a personal touch to outdoor spaces?
Incorporate handmade items like painted rocks or garden signs. Installing unique sculptures or birdbaths can also serve as a visual focal point. These accents reflect your personality and enhance the garden's character.
Could you suggest simple yet effective outdoor decorating ideas that can transform a space?
Introduce potted plants for instant greenery. Use outdoor rugs to define areas and add comfort. Installing a trellis with climbing plants can create vertical interest and a natural privacy screen.
What DIY garden decoration projects can homeowners undertake to beautify their outdoor areas?
Consider building your own raised garden beds or creating a small water feature. Creating DIY lanterns from jars or planning a rock garden can be engaging and visually appealing. These projects can be completed with minimal investment and effort.
What considerations should be kept in mind when choosing decor for the front of the house?
Ensure that the decor complements the architectural style of your home. Choose weather-resistant materials for longevity. Balance aesthetics with functionality, ensuring pathways and entry points remain clear and inviting.

How Much Does a Building Permit Cost for a Deck? Understanding Expenses and Requirements
Building permits for decks are crucial for ensuring that your structure complies with local regulations and safety standards.
When planning your dream deck, one important factor to consider is the cost of a building permit. Building permit fees for decks typically range from $50 to $600, depending on various factors such as your location and the complexity of the project. Understanding these costs upfront can help you budget effectively and ensure compliance with local regulations.
As you explore options, remember that choosing a reputable company like Salt City Decks can make a significant difference. They specialize in constructing durable decks tailored to withstand the harsh Utah weather, including heavy snowfall. Investing in quality materials and craftsmanship will not only enhance the lifespan of your deck but also add visual appeal to your outdoor space.
If you're ready to transform your backyard, researching building permits and considering the longevity of your investment is key. With Salt City Decks, you can have confidence that your deck will be built to last, providing you with enjoyment for years to come.
Understanding Building Permits for Decks
Building permits for decks are crucial for ensuring that your structure complies with local regulations and safety standards. Understanding what a building permit entails, its purpose, and when it is necessary can help streamline your project.
What Is a Building Permit for a Deck?
A building permit is an official document issued by your local building department that authorizes you to construct a deck. It serves as a confirmation that your plans meet the required local building codes and zoning regulations.
Permits vary in cost based on factors such as the size of your deck and location. Generally, fees can range from $50 to several hundred dollars, depending on construction complexity. It's essential to review specific requirements in your area, as failure to obtain a permit can lead to fines or forced removal of the structure.
Purpose of Permit Requirements
The primary purpose of permit requirements is to ensure safety and compliance with local building codes. These codes are designed to protect homeowners and the public from unsafe structures that could pose hazards.
Obtaining a permit ensures that your deck is built to withstand environmental pressures, especially in areas like Utah, where snow and harsh weather conditions are common. Quality materials and construction techniques play a vital role in enhancing the deck's durability. Using pressure-treated lumber and waterproof tape are examples that improve longevity and stability.
When a Deck Permit Is Needed
You will typically need a building permit when constructing any new deck. Factors influencing this requirement include the size of the deck, its height, and its proximity to property lines. Even decks that are lower to the ground often require permits to ensure they meet zoning laws.
In some cases, you may not need a permit for small, freestanding decks or those that are under a specific square footage. Always check with your local building department for precise regulations as they can vary by jurisdiction. Engaging with professionals, such as Salt City Decks, can help navigate these complexities and ensure that your project adheres to all local regulations.
Factors Affecting the Cost of a Deck Permit
Understanding the various factors that influence the cost of a deck permit is crucial for planning your project. Key elements include the scope of the project, construction type, occupancy type, and local regulations. Each component can significantly impact the overall fees and requirements involved.
Project Scope and Deck Size
The project scope directly affects permit costs. If your deck is larger or more complex, you can expect higher fees. Typically, permits may be assessed based on the area in square feet, with larger structures incurring more costs.
For instance, a simple 10x10 deck might cost less than a custom-designed 20x40 structure. Additionally, adding features like railings, lighting, or built-in seating increases the complexity, potentially raising permit expenses due to the need for additional inspections and adherence to building codes.
Construction and Occupancy Type
The type of construction significantly impacts your permit fees. Using high-quality, pressure-treated lumber or composite materials may require compliance with stricter codes, which can lead to additional costs.
Moreover, the occupancy type of your property—whether it's residential or commercial—will influence the permit process. Commercial permits often demand more detailed plans and inspections, naturally raising costs. Additionally, if your deck is connected directly to the home, it may necessitate more stringent compliance with local building codes.
Location and Local Regulations
Your location plays a pivotal role in determining permit fees. Different municipalities have varying local building codes that dictate the requirements for deck construction. For example, Chicago construction codes may differ significantly from those in Utah.
Factors like proximity to flood zones or historical sites can introduce special regulations that affect overall costs. Additionally, Utah’s unique weather conditions, such as snow, require decks to be built to withstand harsher climates, potentially influencing the materials and techniques you’ll need to invest in for structural longevity. Always check with local officials to ensure compliance.
Typical Building Permit Fees for Decks
When planning to build a deck, understanding the costs associated with building permits is crucial. These fees can vary based on project specifics, location, and applicable regulations. Below, you’ll find comprehensive details regarding typical costs, calculation methods, and additional considerations.
Average Cost Ranges
The cost of obtaining a building permit for a deck typically falls within specific ranges. Generally, you can expect to pay anywhere from $50 to $600 for a deck permit, depending on complexity and whether the deck is covered.
Covered decks usually incur higher fees compared to open ones. For instance, simple decks might cost around $50 to $150, while larger or more intricate designs can push the permit fees up considerably.
Specific factors influencing these fees include:
Size of the deck: Larger decks increase permit costs.
Location: Local regulations in Utah can influence overall fees.
Materials used: Premium materials can sometimes lead to additional inspections, adding to costs.
Fee Calculation Methods
Building permit fees are typically calculated using either flat rates or related to valuation. In some locations, fees may be determined by the square footage of the deck. For example, in certain jurisdictions, a fee of $0.20 per square foot may be charged, not accounting for areas like parking or walkways.
If you’re seeking precision in potential costs, utilizing an online calculator could help estimate expenses based on your project specifics.
Always verify the chosen method aligns with your local regulations. Understanding how these calculations work will provide you with a clearer picture of your overall permit expenses.
Additional Fees and Considerations
In addition to the primary permit fees, other costs may arise. These can include inspection fees, which might be charged for each inspection during the building process. Furthermore, if your proposed deck design requires adjustments to meet local building codes, re-inspection fees may apply.
It’s vital to understand that projects in areas like Utah, often subject to snow, may require special structural considerations. Ensuring you use quality materials, such as pressure-treated lumber, can enhance the longevity of your deck while ensuring it complies with local codes.
Always communicate with local building officials to identify any potential additional fees or requirements specific to your project.
Application Process for a Deck Permit
Navigating the application process for a deck permit requires attention to detail and an understanding of necessary documentation and procedures. This section outlines the key steps you need to follow for a successful application.
Required Documentation
To begin your application, you must gather specific documents. This typically includes a plat of survey, which provides a detailed layout of your property, including boundaries.
You will also need plans that outline the proposed deck design, demonstrating compliance with local safety standards.
Additionally, any prior land use permissions may be relevant, so keep those handy as well. Lastly, documentation showcasing construction materials and techniques you intend to use will help reinforce your application, especially emphasizing quality materials suited for harsh weather.
Submission Steps
Once you have your documentation ready, the next step is submission. Start by filling out the permit application form provided by your local building department. Ensure that all required fields are accurately completed.
Next, submit your plat of survey, deck plans, and any other necessary documents along with your application. Some areas may require an application fee, so be prepared for that expense.
After submission, the building department will review your application for any potential issues. They may reach out for additional information, so prompt communication is essential during this phase.
Inspections and Compliance
After receiving your permit, you must adhere to specific inspections and compliance requirements. You may need to schedule an initial inspection before you start construction to ensure everything is in order.
During the construction project, you’ll be subject to further inspections to verify that your deck’s construction aligns with the submitted plans and meets all safety and zoning regulations.
Once construction is complete, a final inspection is required to obtain your certificate of occupancy. This document confirms that your deck is safe for use and meets all applicable codes. Ensuring you pass these inspections is critical for the integrity and longevity of your structure.
Related Permits and Regulations for Deck Projects
When planning a deck project, understanding the related permits and regulations is crucial. Various factors can influence the cost and requirements, particularly when your project involves renovations or structural changes.
Renovations and Additions Impacting Permit Costs
If your deck project involves renovations or additions to an existing structure, it may affect permit costs. For instance, adding a deck to a home renovation can result in higher fees due to increased complexities in the application process.
Moreover, when combining projects, you may need to obtain separate permits for different aspects, such as roofing or window installations. Each additional element can add to the total cost and extend the time needed to secure the necessary approvals. Therefore, considering the broader scope of your renovations before starting your project can help you budget effectively.
Associated Permits for Structural Changes
Making structural changes to your home, like reinforcing the foundation or modifying support beams for your deck, usually requires additional permits. Regulatory bodies focus on safety and stability in construction, especially in areas prone to severe weather.
Common structural changes may include installing support beams or altering load-bearing walls. Each of these modifications must adhere to local regulations, which can vary. Therefore, you should verify with local agencies about specific structural requirements that could impact your project timeline and costs.
Other Common Projects Requiring Permits
Besides decks, several projects often require permits, especially in urban or densely populated areas. These can include renovations such as electrical work, window replacements, or the installation of solar panels. If your project entails demolition of existing structures or adding features like driveways and pools, you may also face more stringent requirements and fees.
Make a checklist of all intended projects. This will help you identify necessary permits, whether for construction or signage. Comprehensive planning ensures compliance with regulations and can prevent costly delays in your decking project.
For any deck-related questions or to ensure compliance, consider consulting with Salt City Decks, who specialize in high-quality decking solutions in Utah's challenging weather.
Frequently Asked Questions
When considering the costs associated with obtaining a building permit for a deck, several factors come into play. Understanding these elements can help you budget appropriately and navigate the permit application process with ease.
What fees are associated with obtaining a building permit for a residential deck?
Building permit fees for a residential deck typically range from $50 to $600, depending on various factors like local regulations and the project scope. It's important to check with your local municipality for specific fee schedules.
Are there variations in building permit costs for a deck based on size?
Yes, permit costs can vary based on the deck's size. Larger decks often require more extensive reviews and inspections, which can increase the overall permit fee.
What additional expenses should be expected when applying for a deck construction permit?
Beyond the permit fee, you may encounter costs for architectural plans, engineering assessments, and potential inspections. These expenses can add up, so it's wise to plan ahead.
Can the cost of a deck building permit differ from city to city?
Absolutely. Permit costs are influenced by local regulations and the specific policies of each city. It’s essential to research the requirements in your locality to avoid surprises.
Do building permits for decks require a flat fee or are they calculated per square foot?
Many municipalities set a flat fee for deck permits, while some may charge based on square footage. Verify the specifics with your local building department before applying.
What factors influence the total cost of a building permit for deck installation?
Factors include the deck's location, design complexity, and local regulations. Additional requirements, such as environmental assessments or historical property considerations, can also affect the total cost.
For expert guidance on your deck project, consider reaching out to Salt City Decks, specializing in quality deck construction in Utah. Their focus on durability and craftsmanship ensures your deck withstands harsh weather while enhancing your outdoor space.