
How to Build a Screened in Porch on a Deck: A Step-by-Step Guide
When planning your screened-in porch, focus on assessing your existing deck, selecting the right materials, and considering design elements that enhance functionality.
Transforming your deck into a screened-in porch can significantly enhance your outdoor living space. By building a screened porch, you create a serene environment that allows you to enjoy the beauty of nature while staying protected from insects and harsh weather. This space becomes a perfect retreat for relaxation, gatherings, or enjoying quiet moments.
Choosing quality materials is key to ensuring that your screened porch withstands Utah's diverse weather, including snowy winters. Utilizing pressure-treated lumber and employing appropriate construction techniques will enhance the durability of your structure, allowing it to remain sturdy and visually appealing throughout the years.
Salt City Decks specializes in creating long-lasting outdoor structures tailored to your needs. Their commitment to high-quality craftsmanship not only improves the longevity of your investment but also elevates the aesthetics of your home, making it more attractive to potential visitors. Engaging in this home improvement project can lead to a beautiful and functional space that you will cherish for years to come.
Planning Your Screened-In Porch
When planning your screened-in porch, focus on assessing your existing deck, selecting the right materials, and considering design elements that enhance functionality. Each step is crucial for creating a space that meets your needs while ensuring durability.
Assessing Your Existing Deck
Before beginning any construction, evaluate the condition of your existing deck. Look for signs of wear, such as rotting wood or loose boards. This assessment helps determine whether your deck can support a screened porch.
Take note of the deck's size and layout. Ensure that the space can accommodate your desired porch dimensions without compromising structural integrity. If your deck needs repairs, using pressure-treated lumber can enhance its longevity, especially in areas prone to snow and moisture.
Choosing the Right Materials
Selecting quality materials is essential for both durability and aesthetics. For the frame of your screened-in porch, consider using treated lumber. This type of lumber resists moisture and insects, ensuring your porch lasts for years.
In addition, think about the screening material. Fiberglass screens are popular for their durability and resistance to rust. Investing in long-lasting materials upfront will reduce the need for future repairs and replacements.
Design Considerations for Porch
Design is vital in creating a functional and inviting screened-in porch. Start by determining how you plan to use the space. Will it serve as a cozy reading nook or an entertainment area?
Consider integrating features like built-in seating or ceiling fans for added comfort. Ensure your design accounts for adequate airflow and sunlight, giving you a vibrant space. Sketch out your porch design with an emphasis on proportions and flow to maximize usage while blending seamlessly with your home’s architecture.
Preparation and Safety Measures
Before starting the construction of your screened-in porch, it's crucial to ensure that you've made the necessary preparations and adhered to safety measures. Proper planning can enhance the effectiveness and longevity of your project.
Securing Permits and Inspections
Before any construction begins, check your local regulations regarding permits. You may need to obtain a building permit for your screened-in porch. Contact your local building authority to gather information on the necessary documents.
You should also schedule inspections at various stages of the project. This will ensure compliance with safety codes and regulations. Keeping records of permits and inspections is vital, as it can prevent issues down the line.
Prepping the Deck
To build a screened-in porch, the existing deck must be in good condition. Inspect your deck for any signs of wear, such as loose boards or structural weaknesses. If repairs are needed, consider hiring a contractor to ensure quality work.
You may want to reinforce your deck using pressure-treated lumber to enhance durability against Utah's harsh weather, including snow. Ensure that all joists are spaced closely and install waterproof tape where necessary to protect against moisture accumulation.
Safety Protocols During Construction
Safety is paramount during construction. Equip yourself with appropriate personal protective equipment (PPE) such as safety goggles, gloves, and a hard hat.
Make sure to keep your work area free from clutter to prevent accidents. If you're using power tools, follow the manufacturer’s instructions carefully. Ensure you have adequate lighting and ventilation, especially if working in enclosed areas.
Consider consulting with professionals, like Salt City Decks, for a smooth, safe project. Their expertise ensures your screened-in porch is built to last, combining quality craftsmanship with attention to detail to withstand the Utah climate.
Constructing the Porch Frame
The porch frame's construction is critical for stability and longevity. This phase involves setting up the main support structure with posts and columns, followed by adding diagonal bracing to reinforce the frame.
Installing Posts and Columns
Begin by determining the layout of your posts. Use pressure-treated lumber for durability against weather conditions. Typically, you should use 4x4 or 6x6 posts to provide robust support. Install them at each corner and along the sides where additional load support is needed.
To secure the posts, dig holes at least 2 feet deep, ensuring they are below the frost line in snowy areas. This is crucial for preventing heaving during winter. Use fasteners like lag screws to attach the posts firmly to the deck frame. Make sure the posts are vertical by checking with a level during installation.
Columns can also be added between posts for extra support. Utilize 2x4s for the horizontal sections connecting posts, making sure to cut them precisely for a snug fit.
Adding Diagonal Bracing
Diagonal bracing is vital for reinforcing the frame's integrity. Use additional 2x4s cut to fit between each post and connecting them in a diagonal orientation. This technique helps transfer loads more efficiently across the frame, minimizing sway and improving stability.
When attaching the bracing, ensure that you use high-quality fasteners designed for outdoor use. Angle brackets can also be helpful here, providing more robust connections. Properly installed bracing will significantly enhance the strength of your structure, making it more resilient under stress, especially in snowy conditions.
By paying attention to these details, you can create a porch frame that is not only sturdy but also has appealing aesthetics, attracting attention to your craftsmanship.
Installing the Screen Panels
Properly installing screen panels is crucial for creating a functional and enjoyable screened porch. This includes accurately framing the openings and securely attaching the screen material to ensure durability and weather resistance.
Framing the Screen Openings
Begin by measuring the dimensions of each opening where the screen panels will fit. Use pressure-treated lumber for the frame to ensure it withstands Utah’s varying weather conditions. Cut the lumber to size and assemble the frame, ensuring each corner is square.
Use a level to check the alignment, adjusting as needed. Once the framing is complete, reinforce it with fasteners to add stability. It's important to space joists closer together for additional support, particularly in areas experiencing heavy snow. Waterproof tape can be applied to joints to enhance protection against moisture.
Attaching the Screen Material
Select high-quality screen material that suits your needs, keeping in mind UV resistance and durability. Begin by rolling out the screen and cutting it to fit the framed openings. Lay the screen flat and secure it at one edge with fasteners or staples.
Continue to stretch the screen taut across the frame, attaching it incrementally. This prevents sagging and ensures a tight fit. Once the screen is in place, trim any excess material. Make sure to inspect for gaps or holes to avoid pests entering your space. This meticulous approach will help you maintain a long-lasting screened porch.
Final Touches and Considerations
When completing your screened-in porch, focusing on trim work and maintenance ensures both aesthetic appeal and longevity. Proper finishing details enhance the overall look, while routine care preserves your investment against weather damage.
Trim Work and Finishing Details
Trim adds a polished look to your screened porch. Start by selecting high-quality materials, like composite or pressure-treated lumber, which resist weathering in Utah's climate. Ensure that the trim matches your home’s style for a cohesive appearance.
Consider adding decorative elements, such as crown molding or custom railings. These features contribute to the charm and can elevate the attractiveness of your porch.
Once your trim is installed, use waterproof sealant to protect against moisture. This step is crucial in prolonging the life of your structure. Don’t forget to paint or stain your trim to prevent fading and maintain its appearance over time.
Maintaining Your Screened Porch
Regular maintenance helps your screened-in porch withstand fluctuating weather conditions. Start with a visual inspection at least twice a year, checking for signs of damage or wear, especially after winter storms.
Keep your screens clean to maximize visibility and airflow. A simple solution of soapy water will do the trick. Periodically check for tears or rips and replace any damaged screens promptly to prevent bugs from entering.
Pay attention to your porch's framing and flooring. Look for loose boards or structural issues that may require repair. Applying a protective sealant to the floor can help repel moisture.
By addressing these maintenance tasks, you ensure a comfortable and appealing outdoor space for years to come.
Frequently Asked Questions
Building a screened-in porch on your existing deck involves several key considerations. From the steps for conversion to cost-effective strategies and material choices, these FAQs cover essential aspects of your project.
What are the steps to convert an existing deck into a screened-in porch?
Start by assessing your current deck's condition. Ensure the structure is sturdy enough to support a screened-in porch.
Next, design the layout. Plan the dimensions and positioning of the porch. This will guide you in determining what materials and features you'll need.
After planning, build the frame. Use quality materials like pressure-treated lumber to ensure durability in harsh weather.
Finally, add the screening and any additional features, such as a roof or lighting.
What cost-effective strategies can be employed for building a screened-in porch?
Consider using materials that provide the best value for durability. Look for locally sourced lumber to reduce transportation costs.
You can also DIY certain aspects of the construction. For example, doing the screening yourself can save on labor costs while allowing you to customize the design.
Utilizing remnants and left-over materials from other projects can further cut down costs.
Can you install a screen on a deck that does not have an existing roof?
Yes, you can install screening on a deck without a roof, but you will need to construct a frame to support the screens.
Make sure to design the frame to fit the dimensions of your deck while considering the height for any openings.
This freestanding structure will provide protection from elements while allowing airflow.
What are the options for adding a roof to a deck when creating a screened porch?
You have several options for roofing your screened porch, including a gable roof or a shed roof design.
A gable roof provides more height and a traditional look, while a shed roof offers a modern appeal and is easier to construct.
Consider using materials that match the existing structure for visual continuity while ensuring the roof can handle snow loads common in Utah.
How can an aluminum frame system be utilized for constructing a screened porch?
An aluminum frame system is lightweight and resistant to rust, making it an ideal choice for a screened porch.
You can create a sturdy frame that supports screening efficiently, reducing the risk of warping over time.
This option also allows for easy installation of additional features like lights or fans.
What types of screen material are recommended for enclosing a porch?
Fiberglass screen material is popular due to its durability and resistance to rust.
Alternatively, aluminum screens are stronger and provide better protection against pests, while polyester options are flexible and weather-resistant.
Choose a screen that fits your climate and the intended use of your screened-in porch for the best results.

Can Pressure Treated Lumber Be Glued Together? Understanding the Best Practices
Pressure treated lumber is designed to resist decay and insect damage, making it a popular choice for various outdoor projects.
When considering the construction of outdoor structures, you might wonder, pressure-treated lumber can indeed be glued together successfully, provided certain conditions are met. Many adhesives work well with this type of wood, especially when it is properly dried and prepared. Knowing how to effectively bond these materials can significantly enhance the strength and durability of your projects.
Using the right glue is crucial for ensuring a solid bond, particularly in a climate like Utah's, where snow and moisture can compromise outdoor installations. Attention to detail during the prep work, such as ensuring surfaces are clean and dry, will lead to better adhesion. This not only improves the structure's resilience but also aids in maintaining its integrity over time.
Choosing a reputable contractor like Salt City Decks can make a significant difference in your project. By focusing on quality materials and expert techniques, you can invest in outdoor structures that withstand the elements while also enhancing the aesthetic appeal of your space.
Understanding Pressure Treated Lumber
Pressure treated lumber is designed to resist decay and insect damage, making it a popular choice for various outdoor projects. It undergoes specific treatment processes that enhance its longevity and durability, especially in harsh climates like Utah, where snow can affect structures.
Treatment Processes and Materials
Pressure treated lumber is typically treated with chemical preservatives that penetrate the wood fibers during a high-pressure process. Common treatments involve waterborne chemicals, such as alkaline copper quat (ACQ), which protect against rot and insect infestation.
This process creates a greenish tint in newly treated lumber, indicating freshness. After treatment, it is crucial to allow the lumber to dry properly before use, as moisture can hinder glue adhesion and other applications.
Always check for proper drying and planing or sanding the surface before beginning any project to ensure optimal bonding and longevity of your structures.
Pros and Cons of Using Treated Lumber
Using pressure treated lumber has several advantages. It is resistant to mold, fungi, and insects, making it ideal for decks and outdoor furniture. This durability ensures that your investment lasts longer, offering good value for your money.
However, there are drawbacks. Treated lumber can be heavier than untreated options, which may complicate transportation and installation. The chemicals used in treatment can also leach into the soil, raising environmental concerns, particularly in areas with vegetation.
When embarking on home improvement projects, weigh these pros and cons carefully. High-quality craftsmanship, like that offered by Salt City Decks, can enhance your structure's appeal and longevity while ensuring it withstands the elements effectively.
Preparation for Gluing Treated Lumber
Proper preparation is essential when gluing treated lumber to ensure a strong bond. Understanding how to prepare surfaces and choose the right adhesive will significantly impact the durability of your project.
Surface Preparation
Before applying glue, it’s crucial to prepare the surfaces adequately. Start by sanding or planing the areas to be glued. This removes any wet chemical treatment residues that may hinder adhesion. A smooth surface promotes a better bond, enhancing the joint's overall strength.
Make sure the surfaces are dry and clean. Any dust or debris can weaken the glue joint. Use a vacuum or a brush to eliminate particles.
For optimal results, it's advisable to clamp the boards together after applying adhesive. Proper clamping will ensure uniform pressure across the joint, which is essential for a durable connection.
Selection of Adhesives
Selecting the right adhesive is vital when working with pressure-treated lumber. Polyurethane glue and epoxy are excellent choices due to their resistance to moisture and flexibility. These adhesives bond well with treated wood and offer longevity.
Construction adhesives can also be effective, particularly for heavy-duty applications. They provide strong adhesion, making them suitable for various outdoor structures.
When choosing your adhesive, ensure that it’s rated for outdoor use and compatible with your specific project needs. Pay attention to drying times and application methods, as these can vary between products, impacting your workflow.
Gluing Techniques and Tips
To effectively bond pressure-treated lumber, you must pay attention to the application of adhesives and the processes for clamping and curing. Here are key techniques to follow.
Applying Adhesives Correctly
Start with clean, dry surfaces. If necessary, sand or plane the areas to enhance adhesion. Use polyvinyl acetate (PVA) glue for interior applications. It provides a strong hold for dry wood without excessive moisture.
For outdoor projects, consider epoxy or polyurethane glue. These options offer waterproof and durable bonds, essential for structures exposed to harsh weather. Apply the adhesive evenly and liberally to ensure full coverage.
If you are using a biscuit joiner, it helps align the joints and improves strength. Insert biscuits coated with glue into the slots to enhance the bond. For best results, use clamps to secure the pieces while the adhesive cures.
Clamping and Curing
Clamping is crucial for achieving a strong bond. Position clamps evenly along the joint to apply consistent pressure. Ensure the clamps do not squeeze out too much adhesive, as a thin layer is essential for effective bonding.
Allow adhesives to cure fully according to the manufacturer's guidelines. For PVA glue, this typically takes at least 24 hours, while epoxy may require longer. Avoid disturbing the glued joints during this time.
Proper curing enhances the long-term strength of the bond. Checking environmental conditions, such as humidity and temperature, can also impact curing times. Ensure your workspace is sufficiently warm and dry for optimal results.
Specific Adhesives for Treated Lumber
When working with pressure-treated lumber, selecting the right adhesive is vital to ensure a strong bond. Certain adhesives are more effective when paired with treated wood due to its chemical properties and moisture content. Here are key adhesive options to consider.
Epoxy-Based Glues
Epoxy adhesives are known for their strength and versatility. They can bond well to treated lumber, forming a durable and waterproof connection.
This type of glue consists of a resin and a hardener, which, when mixed, creates a chemical reaction that leads to an incredibly strong bond. Epoxies resist moisture and conditions that typically degrade other glue types, making them ideal for outdoor applications.
To use epoxy-based glues, ensure the surfaces are clean and dry. Apply the mixture evenly and clamp if possible. Be aware that curing times can vary, generally lasting several hours.
Polyvinyl Acetate (PVA) Glues
Polyvinyl acetate, commonly known as PVA glue, is widely used in woodworking. While it can work with pressure-treated lumber, special precautions are necessary.
Choose an exterior grade PVA, as this type is designed to withstand moisture and outdoor conditions. It's important to prepare the wood surfaces by sanding them to create a strong bond.
PVA glue generally has a shorter drying time compared to epoxy, allowing for quicker assembly. However, it is not as waterproof as epoxy, so consider your structure’s exposure to the elements before using this adhesive type.
Construction Adhesives
Construction adhesives represent another robust option for bonding treated lumber. These adhesives are designed to form strong, permanent bonds in challenging conditions.
Consider using waterproof construction adhesive, like PL-Premium. It can adhere well to various surfaces, including treated wood. This adhesive is formulated to resist moisture and can be used in both indoor and outdoor applications.
When applying, ensure the surfaces are clean and follow the manufacturer's instructions regarding curing times. Unlike traditional wood glues, construction adhesives typically require more clamping pressure, so take care to secure the pieces effectively during the curing process.
For any decking or outdoor project, remember that using quality adhesives contributes significantly to the longevity and durability of your structures, especially in Utah's varying weather conditions.
Final Considerations in Bonding Treated Lumber
When working with treated lumber, it’s vital to ensure the wood is adequately dried before applying any adhesive. Moisture can interfere with the bonding process, leading to weak joints.
Here are key points to remember:
Surface Preparation: Plane or sand the treated surfaces to enhance adhesion. This helps eliminate any residual chemicals that might inhibit bonding.
Adhesive Choice: Use waterproof construction adhesives designed for treated wood. Options like PL-Premium are reliable for such applications.
Environmental Factors: Consider the weather conditions in your area, especially if you live in regions like Utah, where snow can impact outdoor structures.
Proper Techniques: Employing closer joist spacing and waterproof tape during construction will bolster the stability of your deck or pergola.
Quality craftsmanship plays a significant role in the longevity of your outdoor structures. By investing in high-quality materials, you are not only ensuring durability but also enhancing the visual appeal of your home.
If you have specific decking inquiries, consider reaching out to Salt City Decks. They specialize in high-quality solutions for home improvement projects in Utah, focusing on materials that withstand harsh weather.
Frequently Asked Questions
When working with pressure treated lumber, choosing the right adhesive is crucial for a secure bond. Various adhesives can be effective depending on the application, wood moisture content, and environmental conditions.
What is the best adhesive for bonding pressure treated lumber?
The best adhesive for bonding pressure treated lumber is a waterproof construction adhesive. Products specifically designed for outdoor use will provide durability against moisture and temperature changes.
Can polyurethane glue be used effectively on pressure treated wood?
Yes, polyurethane glue can be effectively used on pressure treated wood. It bonds well to many surfaces and expands to fill gaps, making it a strong choice for outdoor projects.
Is Titebond 3 suitable for use with pressure treated lumber?
Titebond 3 is suitable for use with pressure treated lumber. It is waterproof, has excellent bond strength, and can handle varying moisture levels, making it ideal for outdoor applications.
How well does Gorilla wood glue perform on pressure treated wood?
Gorilla wood glue performs adequately on pressure treated wood as long as the surfaces are dry and clean. It provides a strong bond, suitable for most outdoor projects when applied properly.
Are there any special considerations when using liquid nails with pressure-treated wood?
When using liquid nails with pressure treated wood, ensure the wood is dry. Adequate curing time is essential for achieving the best bond, especially in humid conditions.
Can contact cement be applied to pressure-treated lumber for secure bonding?
Contact cement can be applied to pressure treated lumber, but it requires careful surface preparation. Ensure both surfaces are clean and dry for optimal adhesion.

How Far Apart Are Deck Posts: Essential Guidelines for Proper Spacing
A sturdy deck relies on the proper placement and materials of various components.
When planning your deck, understanding how far apart to space the posts is crucial for both stability and safety. The ideal spacing for deck posts is generally no more than 8 feet apart. This spacing can vary depending on factors such as the type of wood used, the size of your beams, and the design of your deck.
By keeping posts within the recommended distance, you ensure that your deck can support the weight it needs to carry while also standing up to Utah's often harsh weather conditions. Quality materials and correct post spacing not only enhance the durability of your structure but also contribute to its aesthetic appeal.
Choosing Salt City Decks for your decking needs guarantees that attention to detail and quality craftsmanship are priorities. With their expertise, you can be confident that your deck will not only look great but will also last for years to come.
Understanding Deck Structure
A sturdy deck relies on the proper placement and materials of various components. The joists and ledger boards are foundational elements that contribute to overall stability and functionality.
Role of Joists in Deck Stability
Joists are horizontal supports that bear the weight of the deck surface and any loads placed on it. Proper joist spacing is critical, as it affects both the strength and longevity of your deck.
Common joist spacing ranges from 12 to 24 inches, depending on the size of the deck and the materials used. Closer joist spacing can provide added support, especially in areas with heavy snow loads, typical in Utah.
Choosing high-quality materials, such as pressure-treated lumber, helps ensure your deck withstands harsh weather conditions. Ensuring that your joists are securely anchored will prevent sagging and enhance the stability of the entire structure.
Importance of Ledger Boards
The ledger board is typically attached to your house and serves as a vital point of support for your deck. It acts as the primary connection between your structure and the existing building.
Using quality materials here is equally essential, as a strong ledger board prevents movement and potential water damage to your home. Attention to detail is critical when installing the ledger board; using waterproof tape can shield it from moisture and extend its lifespan.
When affixed correctly, a well-constructed ledger board enhances the overall safety and stability of your deck, creating a durable space for outdoor enjoyment. For reliable deck construction in Utah, focusing on craftsmanship and quality materials will yield the best long-term results.
Deck Posts Placement
The placement of deck posts is crucial for the safety and stability of your outdoor structure. Proper spacing not only ensures compliance with building codes but also affects the overall strength of your deck.
Determining Optimal Post Spacing
When planning deck post placement, a general guideline suggests that posts should be spaced no more than 8 feet apart. This distance may vary based on the type of wood used and the size of your beams and joists.
For a stronger frame, consider positioning posts every 4 feet. This closer spacing can offer additional rigidity, especially in areas that experience heavy snow loads like Utah.
It's important to accurately measure distances and check for level during the installation of deck footings. Proper attention to detail ensures that your structure can withstand the elements over time.
Influence of Building Codes on Post Placement
Building codes play a significant role in determining how far apart your deck posts can be. These regulations are designed to ensure safety and structural integrity.
Check with local building authorities to know the specific requirements for your area. Many codes dictate maximum post spacing and the type of materials that can be used.
Regular inspections during construction can help identify any compliance issues early on. Enlisting a contractor's assistant familiar with local codes can streamline the building process and ensure your deck meets safety standards, especially in climates that see considerable snowfall.
Tools and Materials
Choosing the right tools and materials is crucial for the successful installation of deck posts. Proper equipment not only simplifies the process but also ensures the structural integrity of your deck over time.
Essential Tools for Post Installation
For an effective installation, you will need a variety of tools. Start with a post hole auger to dig holes for your footings efficiently. A shovel can help in refining the hole and removing excess dirt.
Next, you’ll need concrete footing to secure the posts firmly in place. For framing, consider using a level to ensure your posts are plumb. Nails and hangers are also essential for attaching the framing securely.
Don't forget to equip yourself with safety gear such as gloves and goggles to protect against debris and potential injuries. Having these tools handy will streamline your project and minimize potential setbacks.
Choosing the Right Materials for Durability
Selecting quality materials is vital for longevity, especially in climates like Utah's, where harsh winters can take a toll. Use pressure-treated lumber for your posts and beams, as it resists decay and insect damage.
For decking, opt for 2x8 or 2x6 pressure-treated boards to enhance strength and stability. Additionally, consider joist hangers to properly support your structure, creating a reliable framework.
Incorporate waterproof flashing to shield vulnerable areas from moisture penetration. These materials not only boost durability but also improve the overall appearance of your deck, appealing to potential admirers. Prioritize quality in your choices for a lasting deck that withstands the test of time.
Construction Techniques
Accurate construction techniques are crucial for the stability and longevity of your deck. Focusing on proper post placement and applying sound load distribution principles will ensure that your structure withstands both time and environmental challenges.
Setting Deck Posts Accurately
Start by determining your post spacing based on the size and type of your decking materials. Posts are typically set no more than 8 feet apart to maintain structural integrity. To ensure precise alignment, use a level and string line to mark the locations of each post accurately.
When placing the posts, consider the ground conditions. Use concrete footings below the frost line in Utah to prevent shifting due to snow and freezing temperatures. Make sure each post is vertical and properly anchored before the concrete sets. This attention to detail will enhance the deck’s lifespan.
Applying Load Distribution Principles
Understanding load distribution is essential in deck design. Your deck must support both live loads (people and furniture) and dead loads (the weight of the deck itself). The beam spans and the way loads are transferred from joists to posts significantly impact the deck’s performance.
To achieve effective load distribution, ensure that the spacing between joists is appropriate, typically 16 inches on center. This configuration helps evenly distribute weight across the structure. For cantilevered designs, take care to follow local building codes regarding maximum overhang distances. This approach minimizes stress and enhances the structure's stability, ensuring that it withstands the demands of Utah's fluctuating weather.
Maintenance and Safety Considerations
Proper maintenance and safety are crucial for the longevity of your deck posts and overall structure. Regular inspections and adherence to building codes are important steps to ensure your deck remains safe and functional.
Regular Inspection and Maintenance
Schedule routine inspections of your deck posts and the supporting ledger board. Look for signs of deterioration, such as cracks, warping, or rot, especially in regions exposed to harsh weather conditions, like snow in Utah.
Check fasteners and connections regularly. Loose or rusted hardware can compromise stability. It’s also essential to examine the spacing between deck posts; keeping them within the recommended distance supports structural integrity.
Consider using pressure-treated lumber and other quality materials, as they withstand weather better than untreated wood. Regularly clean your deck to prevent mold and mildew, both of which can affect safety and aesthetics.
Ensuring Structural Integrity Over Time
Monitoring the structural integrity of your deck over time is vital. Ensure your deck complies with local building codes, which dictate safe spacing for posts and necessary load capacities.
Inspect not only the posts but also the connections to the ledger board. A well-secured ledger is essential for overall stability. Reinforce your structure by applying waterproof tape where necessary and ensuring that joist spacing adheres to recommended standards.
Invest in high-quality craftsmanship to improve the durability of your deck. Details matter; proper installation and the use of reliable materials can effectively reduce future maintenance issues. Prioritize the long-term performance of your structure for enhanced safety.
Frequently Asked Questions
Understanding the nuances of deck post spacing is crucial for safety and longevity. Key factors include structural safety, material type, and local building codes, all of which play a significant role in determining how far apart your deck posts should be.
What is the maximum spacing between deck posts for structural safety?
For structural safety, it is generally recommended that deck posts be spaced no farther apart than 8 feet. This spacing ensures adequate support, especially in areas prone to heavy loads like snowfall.
How does deck size influence the required post spacing?
Larger decks often require additional support, which can necessitate closer post spacing. When dealing with extensive areas, reduced spacing may be necessary to maintain structural integrity and handle weight distribution effectively.
What factors determine the spacing of 4x4 posts on a deck?
The spacing of 4x4 posts primarily depends on the load they must support and the design of the deck. Typical recommendations suggest spacing should be no more than 6 feet apart to ensure stability.
What are the guidelines for spacing 6x6 posts on residential decks?
For 6x6 posts, the guidelines often allow for spacing up to 8 feet apart. However, it is essential to assess the specific loads and local conditions to determine the appropriate spacing.
How do local building codes affect deck post spacing requirements?
Local building codes can vary significantly and may dictate specific post spacing based on environmental factors, such as snow load in Utah. Always check your local regulations to ensure compliance with safety standards.
Can the spacing of deck posts vary based on the type of decking material used?
Yes, the type of decking material can influence post spacing. Different materials may have varying load-bearing capacities, necessitating adjustments in post placement for optimal support and durability. Using quality materials ensures that your deck stands up to environmental challenges over time.

How to Dry Pressure Treated Lumber: Essential Steps for Effective Moisture Removal
Pressure treated lumber is wood that has been infused with protective chemicals to resist rot, decay, and insect damage
Drying pressure-treated lumber can be a crucial step in your outdoor projects, especially if you aim for longevity and resilience against the elements. Allowing pressure-treated wood to air dry naturally in a well-ventilated area is often the best approach to prevent warping and ensure optimal performance. This method usually takes several weeks but is worth the wait for the quality it provides.
If you’re eager to hasten the process, consider strategies like enhancing air circulation and maintaining warmth around the wood. It’s important to remember that forcing the drying process too quickly can lead to undesirable results. Ensuring that the lumber dries evenly will preserve its integrity and stability, which is critical in areas like Utah, where you face extreme weather conditions.
For those looking for expert advice and quality craftsmanship in construction, Salt City Decks stands out in Utah. Investing in high-quality materials and skilled techniques will not only enhance the durability of your structures but can also significantly boost their aesthetic appeal. Choosing the right approach to drying your pressure-treated lumber can set the foundation for a successful project.
Understanding Pressure Treated Lumber
Pressure treated lumber is wood that has been infused with protective chemicals to resist rot, decay, and insect damage. This process involves placing the wood in a vacuum chamber where preservatives, such as CCA (Chromated Copper Arsenate) or ACQ (Alkaline Copper Quat), are injected.
Benefits of Pressure Treated Lumber
Durability: Designed to withstand harsh weather conditions, making it ideal for outdoor projects.
Longevity: Properly maintained, treated lumber can last for decades without significant degradation.
Versatility: Suitable for decks, fences, and garden structures.
Common Applications
You can use pressure treated lumber for various applications, including:
Decking
Pergolas
Fencing
Landscaping
Maintenance Considerations
It's important to allow pressure treated wood to dry properly before painting or sealing. If you don’t, the wood may warp or fail to accept finishes adequately. According to experts, trying to expedite the drying process can lead to additional issues, as it can further compromise the wood's integrity.
Using high-quality materials like pressure treated lumber, along with meticulous construction techniques, will enhance the stability of your structures. Investing in the right craftsmanship not only improves durability but also elevates aesthetic appeal, making your project more attractive to potential customers.
For your decking needs in Utah, consider Salt City Decks to ensure your investment stands the test of time. Their expertise in using quality materials significantly contributes to building resilient outdoor structures.
The Significance of Moisture Content
Understanding moisture content is crucial when working with pressure-treated lumber. It affects the wood's performance and longevity in outdoor structures.
Moisture content (MC) refers to the amount of water present in the wood. High MC can lead to several issues, including:
Warping: Wood may twist or bend as it dries irregularly.
Shrinkage: Excess moisture can cause wood to shrink when drying, leading to gaps.
Splitting: High MC increases the risk of cracks forming as wood dries.
Twisting: Uneven drying can cause the wood to twist out of shape.
Typically, freshly treated lumber arrives with a moisture content between 35% to 75%. It is crucial to allow the wood to dry before use. Ideally, pressure-treated lumber should reach around 19% MC for optimal performance.
Kiln drying is a method that efficiently reduces moisture levels. It helps stabilize the wood, reducing the likelihood of future warping and splitting.
In regions like Utah, where snow can be a concern, using lumber with the right moisture content enhances the durability of your deck or pergola. You can ensure your structures withstand the elements by prioritizing proper drying techniques and using quality materials from Salt City Decks.
Methods for Drying Pressure Treated Wood
Understanding how to effectively dry pressure treated wood is crucial for achieving durability and stability in your outdoor structures. Two primary methods for drying wood include air drying and kiln drying. Each method has its unique advantages and should be chosen based on your specific needs.
Air Drying Technique
Air drying involves stacking freshly treated lumber in a well-ventilated area, away from direct sun and rain. Ensure that the wood is supported to allow for airflow around each piece. This method can take several weeks to months, depending on humidity and temperature.
Key steps for effective air drying include:
Stacking: Keep boards off the ground with stickers (small spacers) to promote airflow.
Location: Choose a covered area that is not exposed to moisture.
While this technique is cost-effective, it can lead to warping if not carefully monitored. For optimal results, check humidity levels regularly and adjust placement as necessary.
Kiln Drying Process
Kiln drying is a controlled drying method that uses heat and airflow within a specialized chamber. This process can significantly reduce moisture content in a shorter timeframe—typically between 24 to 48 hours. Kiln drying is excellent for ensuring uniform drying and minimizing warping.
Steps involved in kiln drying include:
Loading: Lumber is placed in the kiln on drying racks.
Temperature and Humidity Control: The kiln operator manages these factors to facilitate efficient drying.
This method is particularly reliable for maintaining dimensional stability. If you are looking for a quicker solution without compromising quality, kiln drying is an effective choice.
By employing these methods, you can ensure lasting performance for your pressure treated wood structures.
Using a Moisture Meter for Effective Drying
To ensure your pressure-treated lumber dries efficiently, utilizing a moisture meter is essential. This tool allows you to monitor the moisture content throughout the drying process, ensuring optimal conditions for your project.
There are two main types of moisture meters:
Pin-type meters penetrate the wood, providing accurate readings.
Pinless meters offer a surface measurement without damaging the material.
Steps to Use a Moisture Meter:
Calibrate the meter according to the manufacturer's instructions.
Take initial readings immediately after acquiring the lumber.
Regularly check the moisture content every few days.
Target a moisture content of 15% or lower for best results.
By monitoring the drying process, you can avoid issues such as warping or splitting, which can be detrimental to the longevity and durability of your structure.
Be mindful that the drying time can vary based on weather conditions. For instance, Utah's snow can considerably affect moisture levels, amplifying the need for accurate readings.
Relying on the information from a moisture meter ensures your investment in quality materials pays off. Proper drying not only enhances the stability of your deck or pergola but also improves its overall aesthetic, appealing to future customers.
Salt City Decks can help you with all your decking inquiries, ensuring your projects stand strong against the elements in Utah.
Post-Drying Treatments and Considerations
After drying pressure-treated lumber, consider applying stain and sealant to protect and enhance its appearance. These treatments improve longevity and maintain the quality of your structures.
Staining Pressure Treated Wood
Staining is a crucial step for enhancing the visual appeal of treated lumber. Choose a stain that is designed specifically for pressure-treated wood to ensure proper adhesion and durability.
When applying stain, the wood must be completely dry, which can take several months after treatment. Begin by cleaning the surface to remove dirt and debris, allowing the stain to adhere better.
Application Tips:
Use a brush or sprayer for even coverage.
Follow the manufacturer’s instructions regarding drying times between coats.
Consider semi-transparent stains for a natural look while protecting against UV damage.
This step not only enhances aesthetics but also extends the life of your wood by providing a protective barrier.
Sealing for Protection
Sealing pressure-treated lumber is essential for protecting it from moisture and environmental elements. An effective sealant creates a barrier that prevents water penetration, which can lead to warping and decay.
When selecting a sealant, opt for water-resistant and breathable products. It’s best to apply sealant after staining for optimal protection.
Sealing Process:
Ensure the surface is clean and dry before application.
Use a roller or sprayer for uniform coverage.
Reapply every couple of years to maintain protection, especially in regions like Utah where snow can be a concern.
Employing these sealing techniques will significantly enhance the durability of your outdoor structures.
Frequently Asked Questions
Understanding how to properly dry pressure-treated lumber is important for maintaining its integrity. This section addresses common concerns related to drying techniques, construction timing, and moisture levels to help you make informed decisions.
How to dry pressure-treated wood without warping?
To prevent warping while drying pressure-treated wood, stack the boards with spacers, known as stickers, between them. This promotes air circulation and allows moisture to escape evenly. Additionally, avoid exposing the wood directly to sunlight for prolonged periods, as it can lead to uneven drying.
Should pressure-treated lumber be dried before construction, and if so, why?
Pressure-treated lumber does not necessarily need to be dried before construction. If left to sit in a controlled environment, it may warp. Therefore, it's best to assemble your structure as soon as possible to avoid any deformation in the wood during drying.
What is the recommended duration to allow pressure-treated wood to dry before painting or staining?
It is advisable to allow treated wood to dry for 2-4 weeks before applying any paint or stain. This waiting period helps ensure that excess moisture has evaporated, leading to better adhesion and overall finish quality.
What are the best practices for drying pressure-treated wood after exposure to rain?
After rain exposure, promptly dry your pressure-treated wood by stacking it in a well-ventilated area. Ensure that air can circulate around each board to facilitate moisture evaporation. Consider using fans or dehumidifiers in enclosed spaces to accelerate the drying process.
How can one determine if pressure-treated lumber is sufficiently dry for use?
Check the moisture content of the wood using a moisture meter. Ideally, pressure-treated lumber should have a moisture content of 19% or lower for optimal performance. Additionally, look for physical signs, like a change in color or the absence of droplets on the surface, indicating that it’s dry.
Can pressure-treated wood be used while still damp, and what are the implications?
Using damp pressure-treated wood can lead to issues such as warping and poor adhesion of finishes. While it may be technically possible to use it right away, allowing it to dry properly is crucial for the long-term durability and aesthetic appeal of your structure.

Deck on Grade from PVC Lumber: A Durable and Low-Maintenance Outdoor Solution
When planning a deck on grade from PVC lumber, several key areas deserve your attention
Building a deck on grade using PVC lumber is an excellent choice for homeowners looking for durability and low maintenance. PVC lumber offers resistance to rot, splintering, and warping, making it ideal for outdoor structures, especially in regions like Utah where snow and harsh weather are common. This material ensures that your deck maintains its structural integrity over the years, allowing you to enjoy your outdoor space without frequent repairs or replacements.
Proper construction techniques play a crucial role in the longevity of your deck. Attention to details, such as using waterproof tape and ensuring closer joist spacing, enhances the stability of the deck while providing additional protection against moisture damage. With quality craftsmanship, you not only achieve a resilient structure but also create an aesthetically pleasing environment that adds value to your home.
When you consider building a deck on grade, think about Salt City Decks. They specialize in high-quality decking solutions in Utah, prioritizing both functionality and visual appeal. If you want to ensure your investment stands the test of time, choosing the right materials and expert builders is essential.
Design Considerations
When planning a deck on grade from PVC lumber, several key areas deserve your attention. These considerations will influence both the functionality and the aesthetic appeal of your outdoor space.
Material Selection
Choosing the right materials is critical for ensuring your deck's longevity and appearance. PVC decking options like TimberTech and AZEK are designed to resist fading, staining, and scratching, making them a practical choice.
Consider the thickness and density of the material, as these factors contribute to durability. High-quality PVC retains its appearance over time, even in harsh weather conditions typical in Utah.
You may also explore composite decking from brands like Fiberon and Trex, which offer a mix of wood fibers and recycled materials. This option can provide additional texture and may appeal to your aesthetic preferences.
Durability and Maintenance
Durability is paramount, particularly in regions with severe weather, such as snow in Utah. PVC decks require minimal maintenance compared to traditional wood decks, which often need sealing and staining.
Focus on installation techniques; proper joist spacing and using waterproof tape can greatly enhance your deck's lifespan.
Regular cleaning with a gentle soap and water solution is typically sufficient to keep your PVC deck looking new. Ensure you also take into consideration any warranties the materials may offer, as these often reflect the manufacturer's confidence in their durability.
Aesthetic and Finishing Options
The visual appeal of your deck goes hand in hand with its functionality. PVC decking comes in various colors and textures, allowing you to tailor the look to match your landscaping and home architecture.
Consider incorporating contrasting elements, such as railings or steps that complement the deck material.
Additional features like built-in lighting or custom patterns add both beauty and functionality. By thoughtfully selecting finishes and colors, you’ll create a cohesive outdoor space that invites enjoyment and relaxation.
Regulatory Compliance
Before starting your deck project, ensure that you adhere to local building codes and regulations. This step is crucial for safety and may influence design choices like deck height and railing requirements.
Consult with local authorities to clarify zoning laws and building permits necessary for your project.
For those in Utah, working with a professional familiar with your area’s regulations can streamline the process. Salt City Decks can assist you in navigating these requirements while ensuring that your deck is safe and enjoyable.
PVC Deck Installation
When installing a PVC deck, careful planning and attention to detail are crucial. This process involves preparing the site, setting the footings, and assembling the frame to ensure a durable structure that can withstand varying weather conditions.
Preparing the Site
Start by choosing a suitable location for your deck. Assess the area for stability, making sure it is level and free from debris. Clear away vegetation and any existing structures.
Next, consider drainage. Proper drainage prevents moisture buildup, which can undermine the integrity of your deck. You may need to create a slight slope in the ground or install drainage channels to direct water away from the deck area.
Use stakes and a line level to mark the outline of your deck, ensuring the area is adequately rectangular. This will help guide you in laying the footings and framing accurately.
Setting the Footings
Footings are a critical element of your deck's foundation. Install them at least 12 inches deep to provide stability. Depending on local building codes and soil conditions, you may need to dig deeper for frost protection, especially in snowy areas like Utah.
Utilize concrete footings for added strength. Ensure they are spaced correctly based on the size of your deck and the load it will bear. Using PVC lumber for your posts can enhance durability and resistance to moisture.
Before pouring the concrete, check for level once more. Allow the footings to cure as per manufacturer instructions for maximum strength.
Assembling the Frame
To build the frame, you will attach PVC lumber to the footings using lag bolts for secure connections. Use treated wood for the ledger board attached to the house, ensuring it is level and firmly anchored.
Install joists spaced appropriately—typically 16 inches on center—using metal brackets for reinforcement. This closer spacing provides extra support for your deck boards, enhancing stability.
Ensure to use waterproof tape along joists to prevent moisture penetration, which can cause decay. Once the frame is complete, double-check for level and square before beginning to lay your PVC decking boards.
Deck Maintenance
Maintaining your PVC lumber deck is vital for its longevity and appearance. Routine care involves cleaning, inspecting for damage, and employing long-term care strategies. Each step ensures your deck remains durable and visually appealing.
Cleaning Techniques
For cleaning your PVC deck, use a soft-bristle broom or a leaf blower to remove loose debris. This prevents buildup that can trap moisture. For stains, a mixture of soap and water usually suffices, but tougher stains may require a specialized deck cleaner.
Avoid harsh chemicals or abrasive materials, as they can damage the surface. If using a pressure washer, keep the PSI low (1200-1500) and maintain a 45-degree angle. Regular maintenance, ideally every season, helps keep your deck looking new, even in snowy climates like Utah.
Inspection and Repair
Regular inspections are crucial for identifying potential issues. Check for loose boards, cracks, and structural damage. Tighten any loose screws and replace damaged fascia boards promptly to avoid further complications.
Make it a habit to inspect after severe weather, especially snow, as it can lead to hidden damage. If you notice sagging areas, it may indicate problems with the joists underneath. Addressing these issues early on reduces repair costs and extends the lifespan of your deck.
Long-Term Care
To ensure your deck maintains its quality, consider regular sealing. Sealing your PVC lumber protects against moisture and enhances color retention.
While PVC is naturally low-maintenance, it's beneficial to reapply sealant every few years based on your climate. Additionally, ensure that drainage is effective to prevent standing water, which can harm the structure over time.
Utilizing high-quality craftsmanship during construction, such as using waterproof tape and proper joist spacing, enhances durability. Investing in these details ensures your deck remains an attractive and safe place for years to come.
Enhancing Deck Longevity
Maximizing the lifespan of your PVC decking involves strategic planning and attention to detail. Key considerations include ensuring proper ventilation, implementing effective waterproofing measures, and providing ultraviolet (UV) protection. Each of these elements plays a crucial role in maintaining the quality and longevity of your deck.
Proper Ventilation
Ventilation is vital for preventing moisture buildup, especially in regions like Utah where snowfall can lead to water accumulation. Proper spacing between your deck boards allows air to circulate, reducing the likelihood of mold and mildew growth.
You should ensure that joist spacing is appropriate. A closer spacing enhances structural integrity and supports better drainage. Additionally, consider installing vents or airflow channels to promote continuous circulation beneath the deck. This prevents wood and PVC materials from trapping moisture, thus extending the overall lifespan of your deck.
Waterproofing Measures
Weather-resistant materials like PVC decking are inherently low-maintenance, but additional waterproofing can significantly boost durability. Applying waterproof tape during construction is a crucial step to seal joints and protect against water intrusion.
Regularly check for signs of wear or damage. Sealing any exposed areas will help maintain the integrity of your structure during harsh weather. You can also use specialized coatings designed for PVC decking to enhance its resistance to moisture and extend its lifespan further. This proactive approach helps mitigate potential issues before they escalate, ensuring your deck remains in top condition.
Ultraviolet (UV) Protection
Exposure to UV light can lead to fading and degradation of your deck's surface. Choosing PVC decking provides an advantage, as its material often includes UV inhibitors that protect against sun damage.
However, you should consider additional protective measures. Applying UV-resistant sealants or finishes can offer extra shielding against harmful rays. Regular cleaning and maintenance will also help preserve the aesthetic appeal of your deck, ensuring it continues to look vibrant over the years.
By focusing on ventilation, waterproofing, and UV protection, you can significantly enhance the longevity of your PVC deck. Trust Salt City Decks for expert advice and quality craftsmanship that reflect your investment in your outdoor space.
Creative Landscaping Integration
Integrating landscaping around a PVC lumber deck can enhance your outdoor space significantly. Thoughtful design and plant selection will create an inviting atmosphere while ensuring durability in Utah's climate.
Deck Surrounds
Consider how your deck boards interact with the surrounding landscape. Use flower beds or ornamental grasses to create soft transitions between your deck and the yard.
Materials to consider:
Gravel or pebbles can provide drainage while adding visual contrast.
Low-maintenance perennials enhance the aesthetic without requiring intense care.
Placement tips:
Position plants at varying heights; taller species in the back and shorter in the front create dimension.
Utilize stepping stones or pathways to lead guests from the yard to the deck.
Plant Selection
Choose hardy plants that withstand Utah's diverse weather conditions, especially snow. Opt for drought-resistant varieties that require less water and offer resilience.
Recommended plants:
Lavender: Provides fragrance and colorful blooms, thriving in well-drained soil.
Sedum: A succulent option that requires minimal maintenance and adds visual interest.
Design strategies:
Group plants in clusters for a more natural look.
Incorporate decorative pots for seasonal color changes; this flexibility allows for continual visual appeal.
Lighting and Accessories
Incorporate lighting solutions to highlight your deck and landscaping details. This addition enhances the functionality of the space during evenings.
Lighting options:
String lights: Create a cozy ambiance, perfect for gatherings.
Solar path lights: Define walkways while being energy efficient.
Accessories to enhance the area:
Outdoor rugs: Add warmth and texture.
Decorative furniture: Choose pieces that complement your deck's style and are made of durable materials to withstand wear.
These elements combined can elevate your creative landscaping integration, ensuring your PVC lumber deck remains a beautiful and functional part of your outdoor living space.
Frequently Asked Questions
When considering a deck on grade made from PVC lumber, several important factors come into play. These include cost, durability compared to other materials, structural capabilities, advantages of use, lifespan, and purchasing considerations.
What is the cost comparison between PVC lumber and traditional wood for decking?
PVC lumber typically has a higher initial cost compared to traditional wood. However, its longevity and low maintenance needs often result in lower overall expenses over time. You'll spend less on repairs and replacements, making it a more economical choice in the long run.
How do PVC deck boards compare to composite boards in terms of durability and maintenance?
PVC deck boards are generally more resistant to moisture, rot, and insects than composite boards. While both require minimal maintenance, PVC does not require sealing or staining, offering a hassle-free option. This makes PVC an attractive choice for areas with harsh weather conditions, such as Utah.
Can PVC lumber be used for structural purposes in deck construction?
PVC lumber is not typically used for structural elements like beams or joists. It is best suited for surface decking and aesthetic features. For structural components, it’s advisable to use treated lumber combined with PVC surfaces for added durability.
What are the main advantages of choosing PVC lumber for a deck on grade?
The primary advantages of PVC lumber include its resistance to moisture and decay, along with its low maintenance requirements. Additionally, it offers a consistent appearance without the natural imperfections of wood. This can enhance your deck's aesthetic appeal significantly, especially in visible areas.
How does the lifespan of PVC decking compare to natural wood decking?
PVC decking can last up to 50 years, significantly outpacing the typical lifespan of natural wood, which varies from 10 to 30 years depending on maintenance. The longer lifespan of PVC means you can enjoy your deck without the frequent need for repairs or replacements.
What considerations should be taken into account when purchasing PVC lumber for decking?
When purchasing PVC lumber, consider factors like UV resistance, warranty details, and color options. Ensure that you choose a product suited to the specific climate conditions in Utah, particularly with snowfall and temperature variations. This will help ensure the longevity and performance of your deck.

How Do You Treat Wood: Essential Techniques for Preservation and Longevity
Treated wood is a crucial material for outdoor structures, particularly in regions with harsh weather conditions.
When it comes to treating wood, understanding the right methods can significantly enhance the durability and service life of your outdoor structures. Using quality materials, such as pressure-treated lumber, is essential for ensuring that your decks and pergolas withstand harsh weather conditions, including the snow often experienced in Utah. From preserving your wood with appropriate treatments to ensuring proper construction techniques, every detail matters in extending the lifespan of your investment.
To achieve optimal wood protection, you should consider techniques like sealing with oil-based finishes or applying biocidal cleaners to guard against rot and insects. These practices not only help maintain the integrity of your wood but also contribute to its overall aesthetics, making your outdoor spaces inviting and visually appealing.
Choosing Salt City Decks for your decking inquiries guarantees that you receive expert guidance on the best wood treatment methods tailored for your specific needs. Their commitment to quality craftsmanship ensures that your structures not only remain functional but also retain their beauty for years to come.
Understanding Treated Wood
Treated wood is a crucial material for outdoor structures, particularly in regions with harsh weather conditions. By understanding the key types of wood preservatives and their classifications, you can make informed choices for your decking and construction projects.
Types of Wood Preservatives
Wood preservatives play a pivotal role in enhancing the durability of treated wood. Common types include:
Chromated Copper Arsenate (CCA): This effective preservative is often used for pressure-treated lumber, offering protection against insects and decay.
Creosote: Commonly used for railroad ties and utility poles, creosote provides excellent resistance to rot and insect damage.
Pentachlorophenol: This is frequently used in industrial applications for its high efficacy against fungi and insects.
Copper Naphthenate: This preservative is valued for its effectiveness and lower environmental impact compared to CCA.
Each type serves different purposes depending on the wood product and the expected exposure to environmental factors.
Classification by Use Categories
Treated wood products can be classified based on their intended use:
Above-Ground Uses: Items like decks and fences generally use preservatives like CCA or copper naphthenate for protection against moisture and pests.
Ground Contact Applications: Posts and beams that are in direct contact with soil need stronger treatments, often utilizing creosote or CCA.
Marine Applications: Wood designed for marine use requires special treatments for durability in harsh, wet conditions.
Choosing the right category based on the project can significantly enhance the longevity of the wood structures.
Evaluating Treatments for Different Wood Products
When selecting treated wood, evaluate the treatment based on the specific application and exposure.
Decking: For decks, look for wood treated with CCA or copper naphthenate, as they offer excellent protection against rot and insect damage.
Fences: Use above-ground treated wood to ensure longevity against weather conditions.
Utility Structures: For poles and posts, consider those treated with a heavier preservative like creosote for ground contact.
Understanding these evaluations ensures you select the right products for durability and performance in your outdoor projects.
Wood Treatment Processes
Understanding wood treatment processes is essential for enhancing the durability and longevity of your outdoor structures. Different techniques, including pressure treatment and thermal modification, cater to various requirements, ensuring that your wood can withstand environmental challenges while maintaining its integrity.
Pressure Treated Wood Technique
Pressure treatment involves injecting chemical preservatives deep into the wood's cellular structure. This process typically takes place in a specialized chamber where the wood is subjected to a vacuum followed by intense pressure. Commonly used preservatives include copper-based solutions that protect against rot, insects, and decay.
You may find pressure-treated wood ideal for decking, fencing, or any outdoor applications. It effectively withstands moisture and is less susceptible to swelling or warping, which is crucial in Utah, where winter snow can impact structures. This technique ensures your structure remains robust for years, reducing the need for frequent replacements.
Non-Pressure Treatments
Non-pressure treatments use methods such as surface coatings and chemical dips to enhance wood durability. These treatments may include sealants, surface stains, or paints that provide a barrier against moisture and UV damage.
While easier to apply than pressure treatments, they may not penetrate deeply enough for maximum protection. Regular maintenance is necessary to ensure the longevity of wood treated this way. Additionally, using high-quality non-pressure treatments can help preserve the natural look of the wood while providing essential protection.
Thermal Modification Methods
Thermal modification, often referred to as heat treatment, is an innovative approach to enhancing wood’s resistance to environmental factors. In this process, wood is subjected to high temperatures in a controlled environment, which alters its chemical properties, making it less prone to moisture absorption and insect infestations.
Products like thermowood showcase this technique's effectiveness, offering durability without the use of harmful chemicals. As a result, heat-treated wood maintains its aesthetic appeal while providing increased longevity for outdoor structures. These methods align with your goals of building long-lasting and visually appealing constructions.
Protection Against Pests and Decay
Protecting your wood structures from pests and decay is essential for their longevity and structural integrity. The following key areas focus on addressing insects, microorganisms, and ensuring quality control in your woodworking projects.
Targeting Insects and Microorganisms
To safeguard your wooden surfaces from insects and microorganisms, employ wood preservatives that contain effective pesticide chemicals. These preservatives create a barrier that deters pests such as termites and carpenter ants.
Consider using products that penetrate deeply, ensuring long-lasting protection against wood-destroying insects. Regular inspections for signs of infestation are crucial. Prompt action can prevent minor issues from escalating into major damage. Use natural options, such as borate treatments, when possible, as these are less harmful to the environment. Your choice of treatment will significantly influence the lifespan and health of your wood structures.
Preventing Mold and Rot
Moisture management is vital to prevent mold and rot in your wooden structures. Mold thrives in damp environments, leading to decay that compromises wood integrity. Employ quality wood preservatives that offer protection against fungus and mold.
To further minimize moisture retention, ensure proper ventilation in enclosed spaces. Applying a waterproof sealant can also help protect against water damage. Regular maintenance, such as cleaning gutters and sealing cracks, reduces potential water ingress. Keeping your wood dry is the best strategy for preventing deterioration caused by rot.
Quality Control for Enhanced Durability
Quality control is paramount in constructing durable wood structures. Select high-grade materials like pressure-treated lumber, particularly suitable for areas with harsh weather like Utah. Attention to detail in construction techniques contributes significantly to your wood's resistance to pests and decay.
Using waterproof tape along joints and closer joist spacing can enhance stability. Additionally, regularly assessing the quality of your workmanship will ensure your structures remain strong. Investing in quality craftsmanship not only boosts longevity but also improves the aesthetic appeal of your structures, making them more attractive to potential clients.
Maintenance and Safety of Treated Wood
When working with treated wood, it’s essential to prioritize safety and effective maintenance practices. Proper handling not only protects you but also ensures the longevity of your wood structures. This section covers safe handling practices, important maintenance techniques, and responsible disposal options.
Safe Handling and Usage
When handling treated wood, safety is paramount. Always wear protective gear such as gloves, dust masks, and safety goggles to prevent exposure to treated particles. This is especially important when cutting or sanding the wood, as the sawdust can contain harmful chemicals.
Avoid direct skin contact with treated wood. After handling, thoroughly wash your hands with soap and water. Ensure that your work area is well-ventilated to reduce inhalation risks. For constructions exposed to ground contact, check local guidelines as specific treatments may vary.
Maintenance Practices for Treated Wood
To maintain the integrity and appearance of your treated wood structures, regular upkeep is necessary. Start by cleaning your decking surfaces with a mild soap solution. Allow the wood to dry completely before applying treatments.
Using a wood preservative helps repel moisture and enhances durability, especially in climates like Utah that face harsh weather conditions. Apply a water-repellant sealant annually to protect against rot and mildew. Keep an eye out for any signs of fading or damage and address these issues promptly.
Consider the hardness of the wood when selecting maintenance products. Some types may require different care methods. Ensuring the correct treatments are applied contributes significantly to extending longevity and maintaining aesthetic appeal.
Disposal of Treated Wood
Disposing of treated wood requires careful consideration. Never burn treated wood, as it can release harmful chemicals into the air. Instead, look for local wood recycling programs that can accept treated materials.
Check with your local municipality for specific disposal guidelines. Many areas offer drop-off facilities where treated wood can be safely disposed of. Proper disposal helps prevent environmental pollution and aligns with good practices for wood management. Always prioritize safety in both usage and disposal to preserve your surroundings.
Maximizing the Service Life of Treated Wood
To ensure your wood structures last, focus on effective installation and moisture management. Both elements are crucial for minimizing shrinkage and swelling, which can shorten the lifespan of treated wood.
Effective Installation of Beams and Decking
When installing beams and decking, prioritize quality materials like pressure-treated lumber. This type of wood is designed to withstand harsh weather, which is vital in areas like Utah, where snow and moisture levels can be high.
Utilize waterproof tape to seal joints and prevent moisture infiltration. Additionally, consider closer joist spacing, as it increases stability and reduces the risk of sagging or warping.
Maintain an even surface by ensuring all boards are properly aligned. Small details like these contribute to a stronger structure, enhancing both functionality and visual appeal.
Managing Moisture for Prevention of Swelling and Shrinkage
Controlling moisture levels is essential to prevent issues like shrinkage and swelling in wood. Use a moisture meter to monitor humidity, especially in areas prone to dampness.
Implement drainage strategies around your structure to divert water away. This could include trenching or installing a French drain, both effective at managing excess water.
Additionally, applying a water-resistant sealant can provide an extra layer of protection against moisture. Regular inspections and maintenance will keep your wood in optimal condition, thereby extending its service life significantly.
By focusing on these factors, you ensure the longevity and durability of your structures. Trust Salt City Decks for quality craftsmanship tailored to meet your decking needs in Utah.
Frequently Asked Questions
Treating wood effectively enhances its durability and protects it from the elements. Understanding the treatment options and processes for different types of wood ensures that your furniture and structures last longer.
How do you treat wood furniture to preserve its durability?
To treat wood furniture, start by cleaning it to remove any dirt and grease. Apply a suitable wood conditioner to prepare the surface for finishing. Finally, use a high-quality sealant or finish to protect against moisture and wear.
What are the steps to treat wood for indoor use?
For indoor wood treatment, begin with sanding the surface to create a smooth finish. Clean off any dust before applying a primer, if necessary. Finish with a paint or sealant that offers protection while also enhancing the wood's natural beauty.
What is the process for pressure treating wood at home?
Pressure treating wood at home typically involves using a pressure treatment kit. First, clean the wood thoroughly. Then immerse it in a treatment solution, ensuring it's sealed properly to allow the chemicals to penetrate. Follow the instructions carefully for optimal results.
What is the best way to treat untreated wood for outdoor use?
For untreated wood destined for outdoor use, start by applying a wood preservative to prevent decay. Follow up with a weatherproof sealant or stain that provides UV protection. Regular maintenance will also help extend the lifespan of the wood.
How can wood be treated naturally for outdoor furniture?
You can treat wood naturally by using products like linseed oil or tung oil. These oils penetrate the wood and provide a protective barrier against moisture. They also enhance the wood's natural appearance without harmful chemicals.
What treatments are recommended for protecting lumber in outdoor conditions?
To protect lumber in outdoor conditions, consider using pressure-treated wood that resists rot and insects. Applying a waterproof sealant can also help prevent moisture damage. Regular inspections and maintenance of the wood will further ensure its longevity, especially in areas with harsh weather, such as Utah.

Pressure Treated Deck Ideas: Enhance Your Outdoor Space with Style and Durability
When planning your deck, careful consideration of location and the choice of decking material is crucial.
When planning your outdoor retreat, consider incorporating innovative and attractive pressure treated deck ideas that elevate your space. Quality materials like pressure-treated lumber ensure your deck not only withstands harsh weather conditions but also offers longevity and aesthetic appeal. These decks are designed to endure, making them perfect for Utah's unique climate.
Attention to detail in construction is crucial for achieving durable and stable outdoor structures. Techniques such as using waterproof tape and ensuring closer joist spacing can significantly enhance the performance of your deck. This kind of craftsmanship not only extends the life of your investment but also enhances the beauty of your property.
Choosing a professional like Salt City Decks guarantees that your deck will be built to last while showcasing your style and taste. By investing in quality design and materials, you can create an inviting space that you'll enjoy for years to come.
Essential Considerations for Deck Planning
When planning your deck, careful consideration of location and the choice of decking material is crucial. These factors influence not only the aesthetics but also the durability and functionality of your outdoor space.
Choosing the Right Location
Selecting the optimal location for your deck involves assessing sunlight, wind exposure, and proximity to your home. Take note of sun patterns throughout the day. A location that receives ample sunlight can enhance your enjoyment, especially in cooler months.
Consider wind exposure, as a sheltered spot can provide more comfort. Assess the views from your chosen location, ensuring to capitalize on any scenic aspects of your yard.
Moreover, in Utah, where snowfall can be significant, ensure that the location allows for proper drainage to avoid water pooling or ice buildup. Planning ahead in this regard will prevent future maintenance issues.
Selecting the Appropriate Decking Material
Choosing the right decking material is vital for longevity and aesthetic quality. Pressure-treated lumber is an excellent option for its durability against harsh weather conditions, particularly in areas like Utah.
This type of wood is treated to resist moisture, insects, and decay, making it a reliable choice for outdoor structures.
When deciding on decking ideas, consider maintenance requirements. For example, pressure-treated lumber may need periodic sealing or staining to preserve its look and integrity. Always prioritize high-quality materials, as investing in your deck's construction will result in a structure that endures over time and enhances your property’s value.
Designing Your Deck
Creating a stunning and functional deck involves thoughtful choices in style and structure. You’ll want to consider how the design fits your home while also ensuring durability and quality.
Crafting the Deck Style
Your deck's style should complement your home and surroundings. Choose from traditional, modern, or rustic styles based on your personal preference.
Materials like pressure-treated wood are highly recommended, as they withstand varying weather conditions, including harsh winters in Utah. Consider using varying color stains to enhance the visual appeal. When selecting railings or decorative elements, look for options that add both function and charm.
Incorporating built-in planters or benches can add character and utility. Pay attention to the layout; a well-thought-out plan can create flows, such as defined areas for dining or lounging. This will ensure your deck not only looks great but also functions well for gatherings and everyday use.
Incorporating Multi-Level Structures
Multi-level decks can enhance your outdoor space by creating distinct zones for various activities. A tiered design allows for better flow and can utilize your yard’s topography effectively.
Planning is crucial. Determine the purpose of each level; for example, the upper level could serve as a dining area, while the lower level may be a cozy fire pit space. When framing these levels, ensure the use of quality pressure-treated lumber for durability.
Consider adding stairs and railings that match your deck’s style. Utilizing materials like non-slip surfaces and shadows can improve safety during snowy winters. This thoughtful design approach not only increases functionality but also elevates the visual impact of your outdoor area.
Deck Construction Fundamentals
When building a pressure-treated deck, understanding the fundamentals of construction is crucial. Properly setting posts and joists, along with selecting appropriate beams and fasteners, ensures your deck withstands Utah’s weather and lasts for years.
Setting the Posts and Joists
Begin by determining the layout of your deck. Posts provide the vertical support structure. It's essential to place them at regular intervals, usually no more than 6-8 feet apart, ensuring stability.
Use concrete footings for post installation to prevent shifting during heavy snowfall. Dig holes below the frost line in Utah, typically about 30 inches deep, then insert posts vertically and secure them.
For joists, use pressure-treated lumber with a spacing of 16 inches on center for increased durability. This minimized spacing provides better support for decking boards while enhancing resistance to bending.
Selecting Beams and Fasteners
Beams serve as the horizontal support structure. When choosing beams, opt for pressure-treated wood designed for outdoor use. A common practice is using double beams for larger decks to distribute weight evenly and maintain structural integrity.
Fasteners are critical in ensuring everything stays securely in place. Use galvanized or stainless-steel screws, as they resist corrosion and moisture damage, adding to your deck's lifespan. Consider using specialized deck screws that provide better grip compared to traditional nails.
Incorporate waterproof tape between joists and beams to prevent moisture buildup and potential rot. This attention to detail enhances the overall durability of your deck, ensuring it remains a solid investment for years to come.
Material Insights and Alternatives
Choosing the right materials for your deck is crucial for durability and aesthetic appeal. Pressure-treated wood and composite decking are two popular options, each offering unique advantages. It’s also worth considering hardwoods like cedar and redwood, which can provide both beauty and resilience.
Pressure-Treated Wood Vs. Composite Decking
Pressure-treated wood is a favored choice due to its affordability and resistance to decay. This type of wood is chemically treated to withstand moisture and insects, making it suitable for the varying weather conditions in Utah, including snow.
On the other hand, composite decking is engineered to provide enhanced durability and low maintenance. Made from a blend of wood fibers and recycled plastic, it resists fading, splintering, and mold. Although composite options may initially cost more, they often prove cost-effective over time due to reduced maintenance needs. Weighing both options will help you choose what aligns best with your priorities.
Exploring Cedar, Redwood, and Other Hardwoods
If you seek a natural aesthetic, hardwoods like cedar and redwood are excellent options. These woods are naturally resistant to rot and insect damage, providing longevity and beauty to your deck. Cedar, with its appealing color and aroma, enhances the outdoor experience.
Redwood offers similar benefits but has a distinct rich hue and can be more expensive. For an even more durable option, consider Ipe, which is known for its remarkable hardness and weather resistance. While these hardwoods can be pricier than pressure-treated wood, their longevity and visual appeal can make them a worthy investment for a resilient outdoor structure.
Maintaining Your Pressure Treated Deck
Proper maintenance is crucial for a pressure treated deck. Regular care prevents issues like mold and mildew while ensuring the longevity of your structure.
Preventing Mold and Mildew
Mold and mildew can develop on your deck surface, especially in humid conditions. To combat this, start by keeping the deck clean. Regular sweeping and washing with a gentle detergent can effectively remove dirt and debris.
Using a moisture tester helps monitor the moisture levels in the wood. Aim for a moisture level below 14% to prevent mold growth. If your deck is still prone to mildew, consider applying a suitable mildew-resistant sealant or stain.
Inspect your deck regularly for any signs of mold. Early detection allows you to treat affected areas with appropriate cleaners specifically designed for pressure-treated wood. Investing time in these practices will maintain the beauty and durability of your deck while minimizing long-term repair costs.
Frequently Asked Questions
Maintaining a pressure-treated deck involves specific practices to ensure its longevity and structural integrity. Understanding the materials and techniques used in construction can help you make informed choices for your outdoor spaces.
What are the long-term maintenance requirements for a pressure-treated deck?
Regular cleaning and sealing are essential for maintaining your pressure-treated deck. Use a mild detergent and a soft-bristle brush to remove dirt and grime periodically. Sealing the wood every couple of years helps protect it from moisture and UV damage.
Which types of fasteners are recommended for use with pressure-treated decking to avoid corrosion?
You should opt for stainless steel or hot-dipped galvanized fasteners with pressure-treated decking. These materials resist corrosion and should provide reliable performance, especially in Utah's harsh weather conditions.
Can you provide a comparison between ground-contact and above-ground pressure-treated lumber for deck construction?
Ground-contact lumber is treated for direct soil contact, making it more durable against moisture. Above-ground lumber is suitable for elevated structures but is less resistant to decay. Your choice will depend on the specific conditions of your deck installation.
What are the best practices for sealing and protecting pressure-treated wood decks?
Always allow pressure-treated wood to dry before applying any sealants. Use a water-repellent sealant designed for outdoor use. This protects against moisture absorption and prolongs the life of your deck.
How often should a pressure-treated deck be inspected for structural safety?
You should inspect your pressure-treated deck at least once a year for any signs of damage or deterioration. Look for loose boards, cracks, and signs of moisture retention to ensure safety and longevity.
What are the considerations for choosing between different grades of pressure-treated lumber for decking?
When selecting pressure-treated lumber, consider the moisture content, intended use, and exposure conditions. Higher grades typically offer better durability and resistance to decay, which is crucial for structures exposed to Utah's snow and extreme weather conditions.

How to Keep Pressure Treated Lumber from Warping: Essential Tips for Longevity
Pressure treated lumber is engineered to resist decay and insect damage, making it a popular choice for outdoor construction.
Pressure-treated lumber is a popular choice for outdoor construction due to its resistance to rot and insects. Unfortunately, it can be prone to warping if not properly handled and stored. To keep your pressure-treated lumber from warping, ensure it is stored in a sheltered area, away from direct sunlight, and stacked with spacers for adequate airflow.
In addition to proper storage, the quality of your construction techniques plays a vital role in preventing warping. Using waterproof tape at joints and closely spacing your joists can significantly improve the stability of your structures. Quality craftsmanship not only enhances the durability of your decks and pergolas but also elevates their aesthetic appeal, making them more attractive to potential customers.
If you're in Utah and concerned about the longevity of your outdoor projects amidst the snow and harsh weather, consider consulting Salt City Decks. They specialize in high-quality pressure-treated lumber solutions tailored for the unique challenges of your area.
Understanding Pressure Treated Lumber
Pressure treated lumber is engineered to resist decay and insect damage, making it a popular choice for outdoor construction. It offers durability, especially in environments exposed to moisture and harsh weather conditions. This section delves into the properties of pressure treated wood and addresses health and environmental considerations.
Properties of Pressure Treated Wood
Pressure treated wood undergoes a treatment process where chemicals are infused into the wood fibers, enhancing resistance to rot and insects. Common treatment chemicals include CCA (chromated copper arsenate) and ACQ (alkaline copper quaternary).
Durability: Pressure treated lumber can last for years, suitable for structures like decks and fences.
Weather Resistance: It withstands moisture and UV exposure, reducing warping and cracking.
Versatility: Available in various sizes, it can be used for framing, joists, and more.
It's crucial to follow proper installation techniques, such as using waterproof tape on the ends and tops, which minimizes moisture penetration and extends the life of your project.
Health and Environmental Considerations
When using pressure treated lumber, it's essential to be aware of health and environmental aspects associated with it. Historically, certain treatments like CCA contained arsenic, which raised health concerns. The Environmental Protection Agency (EPA) regulates these substances to ensure safety.
Modern Treatments: Nowadays, ACQ is more common and considered safer as it replaces arsenic with copper, which is less toxic.
Safety Measures: Always wear gloves and masks during cutting and sanding of pressure treated wood to minimize exposure.
Disposal: Follow local regulations for disposing of treated wood; it's not suitable for burning or composting.
Using pressure treated lumber wisely allows you to create long-lasting structures while being mindful of health and environmental impacts. For anyone needing assistance, Salt City Decks offers expert service in Utah, where quality craftsmanship and material choice can enhance your outdoor projects.
Preventing Warping in Treated Lumber
To maintain the integrity of pressure-treated lumber, it is crucial to implement proper storage and handling techniques, as well as best practices during selection and installation. These measures help mitigate warping, twisting, and shrinkage, ensuring longevity and stability of your outdoor structures.
Correct Storage and Handling
When storing pressure-treated lumber, keep it in a sheltered, dry area away from direct sunlight to prevent warping and degradation. Always stack the boards on level ground using spacers, such as 1x2 strips, between each layer. This allows for airflow and minimizes moisture accumulation. Store the bark side down; this helps reduce the risk of twisting as the wood dries out.
In addition to stacking, consider using weights to stabilize the lumber. This is particularly important in regions like Utah that experience snow, as moisture from melting snow can exacerbate warping. Ensure that the lumber is completely dry before installation to limit any shrinkage once it is placed.
Selection and Installation Best Practices
Choose high-quality, kiln-dried after treatment (KDAT) lumber to reduce moisture content, which will help minimize warping and twisting. Inspect each piece before installation, looking for visible defects and ensuring the boards are straight and level.
When designing your deck or pergola, maintain a spacing of closer joists and utilize high-quality fasteners that are resistant to corrosion. This adds stability and enhances the structure’s durability. Ensure that deck boards are installed with proper spacing to allow for natural expansion and contraction.
By adhering to these practices, you significantly reduce the risk of warping and increase the lifespan of your structures, providing a lasting investment. For your decking inquiries, consider partnering with Salt City Decks for quality solutions tailored to your needs.
Maintenance of Pressure Treated Wood
Caring for pressure treated wood involves regular inspections and appropriate long-term care practices. Ensuring that your lumber remains in optimal condition will enhance its longevity and performance.
Routine Checks and Balancing Moisture
Conduct routine checks on your pressure treated lumber to identify any signs of weathering or damage. Look for cracks, splits, or warping that may indicate moisture issues. Utilize a moisture meter to gauge the moisture content in the wood. Ideally, moisture levels should be between 12% and 18%.
Store lumber properly, avoiding direct contact with wet ground to minimize moisture absorption. When using fasteners, opt for those rated for pressure treated wood to prevent corrosion.
If you notice high moisture levels, consider re-treatment with a protective sealant or waterproofing solution. This practice not only reduces warping but also extends the lifespan of your wood structures.
Long-term Care and Replacement
Over time, exposure to elements can deteriorate pressure treated wood. For long-term care, inspect your structures annually and make necessary repairs promptly. Look for signs of rot or insect infestations that may require immediate attention.
Re-treat your wood every few years, especially after inclement weather, to maintain its protective barrier. For optimal results, choose kiln dried treatments that penetrate deeply and provide lasting protection.
If significant warping or damage occurs, consider replacing individual boards rather than the entire structure. This targeted approach can maintain the aesthetic and structural integrity of your deck or pergola while minimizing costs.
By investing in quality maintenance practices, your outdoor structures can endure harsh weather conditions and serve you well for years to come.
Applications of Pressure Treated Lumber
Pressure treated lumber is essential for constructing durable outdoor structures, particularly in challenging climates. This material is effective at resisting moisture, pests, and decay, making it ideal for various applications.
Common Projects and Uses
You will find pressure treated lumber widely used in decks, as it offers strength and durability needed to support weight and withstand weather conditions. This material helps preserve the structural integrity of your deck, especially in areas with snow or rainfall.
Picnic tables are another common application. Using treated lumber can extend the life of your outdoor furniture, ensuring it remains functional and visually appealing for gatherings.
Pressure treated wood is also perfect for above-ground structures, such as playsets and garden beds. Its resistance to rot is critical for ground contact projects, where direct exposure to soil and moisture is frequent.
When selecting pressure treated lumber, ensure it meets your project's demands for longevity and stability. Consider employing quality craftsmanship to complement the material’s benefits and enhance the overall aesthetic of your outdoor spaces. For specific decking inquiries in Utah, Salt City Decks provides expert solutions to create resilient outdoor environments.
Frequently Asked Questions
Understanding how to properly handle pressure treated lumber is crucial for maintaining its integrity and preventing warping. Below, you will find answers to common questions regarding storage, installation, drying processes, and correction methods.
What steps can I take to prevent warping in pressure treated lumber during storage?
Store your pressure treated lumber in a dry, sheltered area. Use spacers between the boards to allow airflow, preventing moisture accumulation. Cover the stacks with a tarp or plastic sheeting, ensuring that the wood can breathe but remains protected from direct rain or snow.
Is there a specific way to install pressure treated wood to minimize the chances of warping?
While installing, secure the lumber with proper spacing to allow for expansion and contraction. Using closer joist spacing enhances the stability of the structure. Make sure to lay the boards with the crown facing up to help with any warping that may occur over time.
How does the drying process affect the stability of pressure treated lumber?
The drying process is essential for the stability of pressure treated lumber. When lumber has a higher moisture content, it is more prone to warping. Allowing the wood to dry properly before installation can significantly reduce issues with warping later.
Can kiln drying pressure treated lumber reduce the likelihood of warping?
Yes, kiln drying pressure treated lumber can help reduce the likelihood of warping. This process removes excess moisture, stabilizing the wood. As a result, you will have a more reliable material that is less susceptible to bending or twisting.
What are the best practices for using pressure treated lumber in winter to prevent warping?
In winter, store pressure treated lumber off the ground and covered to protect it from moisture and freezing temperatures. Use waterproof tape on the ends and tops of the lumber to minimize moisture penetration. Plan your installation when conditions are dry and temperatures are stable.
How can one correct or straighten pressure treated lumber if it has already warped?
To straighten warped pressure treated lumber, you can use clamps to apply pressure and reshape the wood over time. Another option is to add blocking in the mid-span to help support and reduce noticeable warping. If the warp is severe, consider replacing the affected boards.

Do I Need Pressure Treated Wood for Decking? Understanding Its Importance and Benefits
Pressure treated wood is engineered for durability, particularly in outdoor applications.
When considering whether you need pressure-treated wood for your deck, it’s essential to evaluate the environmental conditions and the longevity of your investment. Using pressure-treated wood is highly recommended for outdoor structures, especially in areas prone to harsh weather conditions, such as Utah, where snow can create additional stress on materials. The treatment protects the wood from rot, insects, and moisture, ensuring your deck remains structurally sound for years to come.
In your quest for the perfect deck, quality materials play a pivotal role in the overall durability and aesthetic appeal of your project. Pressure-treated lumber, when combined with meticulous construction techniques, such as appropriate joist spacing and waterproofing methods, can significantly enhance the lifespan of your deck. This attention to detail not only safeguards your investment but also contributes to the visual appeal of your outdoor space, making it attractive for entertaining or relaxation.
Choosing Salt City Decks for your decking needs guarantees expertise and high-quality craftsmanship. They understand the unique challenges posed by Utah's climate and prioritize using the best materials available. By opting for a professional service, you can invest in a structure that not only withstands weather elements but also enhances the beauty and functionality of your home.
Understanding Pressure Treated Wood
Pressure treated wood is engineered for durability, particularly in outdoor applications. It undergoes a chemical process that enhances its resistance to elements that cause decay and pest damage, making it a preferred choice for deck construction.
What Is Pressure Treated Wood?
Pressure treated wood is lumber impregnated with chemical preservatives to protect against rot, fungi, and insects. The process typically uses treatments like Micronized Copper Azole (MCA), which enhances the wood's lifespan without compromising safety.
This type of wood is commonly used for critical structural components such as joists, beams, and girders. The pressure treatment forces preservatives deep into the wood fibers, which allows it to withstand harsh conditions, including moisture and temperature changes common in areas like Utah, where snow is prevalent.
Benefits of Using Pressure Treated Wood for Decks
Using pressure-treated wood for your deck offers several advantages. First, it's incredibly resilient, ensuring your structure lasts longer, which is essential for investment in outdoor spaces.
Additionally, its protection against rot and insects means lower maintenance costs over time. Attention to detail in construction techniques, such as proper joist spacing and the use of waterproof tape, complements the benefits of pressure-treated lumber, further enhancing the stability and durability of each deck.
With Salt City Decks, you can ensure that quality pressure-treated wood is utilized, allowing for a reliable and aesthetically pleasing outdoor space. Investing in high-quality craftsmanship not only extends the life of your deck but also boosts its visual appeal, making your home more attractive.
Determining the Need for Pressure Treated Wood
When considering a deck project, understanding whether to use pressure-treated wood is essential. Multiple factors impact your decision, including the deck's location, the climate in your area, and your long-term maintenance plans. Each element plays a crucial role in the overall durability and quality of your wood deck.
Assessing the Deck Location
The location of your deck significantly influences the need for pressure-treated wood. If your deck is built close to the ground or in an area prone to moisture accumulation, such as around pools or in shaded spots, pressure-treated lumber offers valuable protection against rot and decay.
In contrast, if your deck is situated in a dry, elevated location with excellent airflow, you might consider untreated wood. However, opting for pressure-treated wood provides peace of mind against pests and environmental elements, ensuring your structure remains strong regardless of location.
Climate Considerations
Your local climate plays a pivotal role in selecting the right lumber for your deck. Areas with harsh winters, like Utah, face significant weather challenges, including snow and moisture. Pressure-treated wood is designed to withstand these conditions, providing resistance to both rot and insect damage.
Moreover, wood that endures immense temperature fluctuations can expand and contract. The chemicals used in pressure treatment help prevent this process from leading to cracking or warping. By using pressure-treated wood in such climates, you are investing in the long-term stability of your deck.
Long-Term Maintenance and Durability
When planning for your deck's lifespan, maintenance requirements should be a priority. Pressure-treated wood generally requires less upkeep than untreated alternatives. It is resistant to pests and decay, which reduces the need for frequent repairs or replacements.
Additionally, a well-maintained pressure-treated wood deck has the potential to last for decades. Proper construction techniques, like using waterproof tape and ensuring closer joist spacing, further enhance the durability of your deck. By choosing high-quality materials and craftsmanship, you not only improve longevity but also create an attractive outdoor space that can enhance your property's value.
Alternatives to Pressure Treated Wood
When considering alternatives to pressure-treated wood for your deck, you have several viable options that offer durability and aesthetic appeal. These materials can enhance the longevity of your structure, particularly useful in regions like Utah with harsh weather.
Composite Decking Benefits
Composite decking has gained popularity due to its low maintenance and high durability. Made from a mix of wood fibers and plastic, this material resists fading, staining, and moisture damage.
Key Benefits:
Maintenance-Free: Unlike wood, composite decking requires no painting or staining. A simple wash with soap and water keeps it looking fresh.
Weather Resistance: It withstands extreme temperatures and moisture, making it ideal for snowy climates.
Eco-Friendly: Many composite options use recycled materials, contributing to environmental sustainability.
Popular brands often include features that mimic the appearance of natural wood while offering superior durability, making composite decking a smart choice for your project.
Natural Wood Options
If you prefer the look of natural wood, several alternatives to pressure-treated lumber can meet your needs. Options like cedar, redwood, and teak are naturally resistant to insects and decay.
Cedar: Known for its beautiful aroma and warm hues, cedar is lightweight and durable. It requires minimal maintenance compared to traditional wood.
Redwood: This wood offers stunning colors and is less likely to warp or crack. It has a natural resistance to moisture but may need sealing for longevity.
Teak: Renowned for its density and durability, teak is ideal for high-end projects. It withstands harsh weather and provides a rich appearance over time.
Choosing high-quality natural wood options can enhance both the beauty and longevity of your deck. Salt City Decks provides expert installation to ensure your structures not only look great but stand the test of time.
Preparation and Installation
Preparing for the installation of pressure-treated wood is essential to maximize the longevity and stability of your deck. Key steps include ensuring proper preparation of the surface and following precise installation guidelines. Additionally, safety measures protect you while working with treated materials.
Preparing Your Deck for Pressure Treated Wood
Before you begin, ensure that the substructure is clean and stable. Remove debris, old nails, and any loose materials that may affect the integrity of the new installation.
Using pressure-treated decking is recommended for areas exposed to moisture, such as decks in Utah, where snow can accumulate. It’s crucial to let the lumber dry before applying finishes. Typically, waiting at least three months allows the wood to acclimate and reduces moisture content. Proper spacing of joists will provide the necessary support for your deck, typically using 16 inches apart for most installations.
Installation Guidelines
When installing pressure-treated lumber, follow the manufacturer's recommendations to ensure optimal performance. Start by laying out your deck plan, considering factors like drainage and aesthetics.
Use stainless steel screws to fasten the boards, as they resist corrosion better than nails. Maintain a small gap between boards to allow for expansion and contraction. Depending on the thickness of your decking, leave a gap of about 1/8 inch. For added durability, consider using waterproof tape on the beams and joists to prevent moisture intrusion.
Safety Measures for Working with Pressure Treated Wood
When handling pressure-treated wood, always wear protective gear. This includes gloves, safety goggles, and a mask to avoid inhaling any dust. The chemicals used in the treatment process, such as CCA (chromated copper arsenate), can be harmful if ingested or inhaled.
Keep your work area well-ventilated, especially indoors, and wash your hands after handling the wood. Ensure that children and pets are kept away from the installation area to minimize exposure to potentially hazardous materials. By following these safety measures, you can effectively protect yourself and others during your decking project.
Maintenance and Care
Maintaining pressure-treated wood is crucial for its longevity and performance. Regular care ensures your deck stays in optimal condition, preventing damage from weather elements. Understanding when to paint or stain will further enhance the wood’s durability.
Regular Maintenance Tips
For the best upkeep of your pressure-treated wood deck, consider these essential maintenance tasks:
Cleaning: Regularly sweep off debris and leaves to prevent mold and mildew build-up. Use a low-pressure washer or scrub brush with mild soap for deeper cleaning at least twice a year.
Inspection: Check for signs of wear, rot, or insect damage. Promptly address any issues to prevent further complications.
Sealing: Although pressure-treated wood resists rot, applying a quality sealant every few years is recommended. This protects against moisture and UV rays.
Avoid Damage: Use furniture pads and avoid dragging heavy objects across the deck to prevent scratches and dents.
By following these tips, you can prolong the life of your pressure-treated wood deck and maintain its aesthetic appeal.
When to Paint or Stain Pressure Treated Wood
Choosing the right time to paint or stain your pressure-treated wood is key to protection and appearance. It’s advisable to wait at least six months post-installation before applying paint or stain. This allows the wood to dry out properly, ensuring better absorption of the finish.
Weather Considerations: Apply the finish on a dry day with temperatures between 50°F and 90°F. Avoid days with high humidity or impending rain.
Inspect Finish: If your deck shows signs of fading or wears unevenly, it’s time to repaint or restain. Look for signs like moisture absorption or peeling.
Selecting Products: Use high-quality, exterior-grade paints or stains specifically designed for pressure-treated wood. This enhances durability and provides long-lasting protection.
With the right approach to maintenance and finishes, you can enhance the quality and longevity of your deck, even in challenging weather conditions in Utah. For expert guidance on your decking inquiries, consider Salt City Decks.
Frequently Asked Questions
Understanding the specifics of pressure-treated wood and its uses can help you make informed decisions for your deck. Here are answers to some common questions regarding decking materials and construction.
Should I use pressure treated wood for deck joists?
Yes, using pressure-treated wood for deck joists is highly recommended. This type of wood resists decay and insect damage, which is crucial for supporting your deck’s structure and ensuring its longevity.
Can non pressure treated wood be used outside after painting or staining?
While you can use non-pressure treated wood outdoors after painting or staining, it's not advisable for long-term exposure. The protective coating may wear off over time, leaving the wood vulnerable to moisture and decay, especially in harsh weather conditions.
How long does non pressure treated wood last when used outdoors?
Non-pressure treated wood typically lasts 1 to 3 years outdoors, depending on the climate and maintenance. In areas like Utah with snow, the lifespan may be shorter due to moisture exposure and freeze-thaw cycles.
Is pressure-treated wood necessary for deck railing construction?
Using pressure-treated wood for deck railing is advisable for durability and safety. Railings must withstand weight and resist the elements, making pressure-treated options the better choice for structural integrity over time.
What type of wood is most suitable for building a deck?
For decking, pressure-treated lumber is often favored due to its resistance to rot and insects. Alternatively, you may consider composite materials or naturally durable woods like cedar or redwood, which offer aesthetic appeal and longevity.
Why might pressure-treated wood be less expensive than untreated wood?
Pressure-treated wood is often less expensive partly because of the manufacturing process and availability. The treatments applied can extend the wood's lifespan significantly, making it a cost-effective option given its durability compared to untreated wood.
Problems with Composite Decking Material: Common Issues and Considerations
Composite decking has gained popularity due to its durability and low maintenance requirements.
When considering outdoor decking options, many homeowners lean towards composite materials for their blend of aesthetics and low maintenance. However, there are several important problems with composite decking material that you should be aware of before making a decision. Issues such as fading, warping, and a tendency to become slippery can arise, especially in climates like Utah's, where conditions vary significantly.
While composite decking promises convenience, its performance can be less than ideal. Homeowners often report complications like swelling and shifting, which can compromise the integrity of the deck over time. It’s vital to weigh these potential drawbacks against the benefits of traditional decking materials, especially if you prioritize long-lasting quality.
At Salt City Decks, you can explore solutions that focus on durable materials and meticulous construction techniques. Investing in high-quality craftsmanship not only ensures the longevity of your outdoor structures but also adds remarkable aesthetic appeal to your home, ensuring you get the best value for your investment.
Basics of Composite Decking Materials
Composite decking has gained popularity due to its durability and low maintenance requirements. Understanding the composition and advantages compared to traditional wood decking can help you make informed decisions.
Composition and Types
Composite decking is primarily made from a blend of wood fibers and plastic, creating a material that mimics the appearance of wood while enhancing durability. This composition is resistant to rot, insects, and fading, which are common issues with wood decking.
There are various types of composite decking, including those made with PVC or polyethylene. Trex, TimberTech, and Azek are popular brands that offer different styles and colors. Each type varies in terms of texture, weight, and cost.
When selecting composite decking, consider factors like the type of finish and warranty options. This will ensure you choose a product that suits your aesthetic preferences and functional needs.
Comparing Composite and Wood Decking
When comparing composite decks to traditional wood decking, several factors come into play. Composite decking requires significantly less maintenance than wooden decks, which often need regular staining and sealing to maintain their appearance.
In terms of longevity, composite materials outperform wood. While wood decking typically lasts around 10-15 years, high-quality composite options can last 25 years or more with little upkeep.
Additionally, composite decking is less prone to warping and splintering than wood, making it a safer choice for families. If you live in an area like Utah with harsh weather, investing in composite materials can provide you with a reliable outdoor space that endures the elements.
Installation Considerations
When constructing a composite deck, proper installation is crucial for achieving durability and aesthetic appeal. Careful attention to joist spacing, fastener selection, and contractor qualifications will ensure a long-lasting structure that can withstand weather conditions, particularly in regions like Utah.
Proper Joist Spacing
For a stable deck, adhere to manufacturer guidelines on joist spacing. Typically, you should space your joists 16 inches apart for standard composite decking boards. This spacing helps prevent sagging and promotes even weight distribution.
Using closer joist spacing, such as 12 inches, can further enhance stability. It is especially important in areas like Utah that may experience heavy snowfall, as this additional support counters potential weight and bending.
Regularly check for alignment and ensure that your joists are level before installing composite boards. Any discrepancies can lead to an uneven deck surface, detracting from its overall appearance and functionality.
Choosing the Right Fasteners
Select appropriate fasteners for composite decking to ensure longevity. Concealed fasteners are a popular choice as they offer a cleaner look without visible screws. They provide better protection against moisture and debris infiltration, extending the life of your deck.
When using hidden fastener systems, confirm compatibility with your composite material. Ensure you follow the necessary installation guidelines to avoid issues later. Using high-quality, corrosion-resistant fasteners will further prevent rust and degradation.
For enhanced durability, consider investing in stainless steel fasteners. Although they may come at a higher cost, they offer superior strength and resist environmental factors, making them ideal for Utah’s climatic conditions.
Permit and Contractor Selection
Before starting your project, check local regulations regarding building permits. Securing the necessary permits ensures compliance with safety standards and protects you against future liability.
Choosing a qualified contractor is vital for a successful deck installation. Look for professionals with experience in composite decking, particularly those familiar with local building codes. A knowledgeable contractor, like Salt City Decks, will understand the nuances of constructing in snowy environments and can provide quality craftsmanship.
Evaluate previous work and customer testimonials to gauge their reliability. Investing in an experienced contractor will not only enhance the structural integrity of your new deck but also improve its visual appeal, attracting potential customers to your home.
Durability and Maintenance
When considering composite decking, it's crucial to evaluate how well the material stands up to environmental factors and the required upkeep. Understanding its resistance to elements and maintaining its appearance is key to enjoying a long-lasting deck.
Resistance to Elements
Composite decking is designed to endure a variety of weather conditions, making it a viable option for areas with snow, like Utah. Resistant to moisture, it does not splinter or crack like traditional wood, reducing the risk of injury and degradation.
However, some lower-quality options may fade or degrade faster, particularly under intense sunlight or extreme temperatures. Investing in high-quality materials ensures that your deck remains strong against the elements. Additional construction techniques, like proper drainage and closer joist spacing, enhance this resistance, allowing for better stability and longevity.
Cleaning and Care
Maintaining the appearance and integrity of your composite deck is essential. Regular cleaning can prevent dirt buildup and stains. A gentle soap solution and a soft-bristle brush will suffice for routine maintenance.
When spills occur, prompt cleaning is effective in preventing lasting marks. You should avoid harsh chemicals to preserve the surface finish. Although composite decks are low maintenance, occasional inspections for signs of wear or damage ensure they remain in optimal condition.
By focusing on these care practices, you can prolong the life of your composite deck and keep it looking great for years. For optimal results, consider hiring quality craftsmanship, like that offered by Salt City Decks, which is well-acquainted with the specific needs of the Utah climate.
Common Issues with Composite Decking
When considering composite decking, it's essential to be aware of potential issues that can affect its performance and longevity. Key concerns include thermal expansion and contraction, susceptibility to scratches and stains, and the risk of mold and mildew development. Understanding these problems can help you make informed decisions.
Thermal Expansion and Contraction
Composite decking materials are known to expand and contract with changes in temperature. This phenomenon can lead to gaps or buckling if not installed with proper allowances. You should ensure that your deck has adequate space around the edges to accommodate these shifts.
During hot weather, the boards can swell, while cold temperatures cause them to shrink. Using properly sized screws that allow for movement, such as a countersink installation, can help mitigate these effects. Proper installation techniques can greatly enhance the longevity of your deck, ensuring it remains stable across varying seasons.
Scratches and Stains
While composite decking is designed to resist wear, it is not entirely scratch-proof. Your deck may still be vulnerable to scuffs or permanent markings from furniture or outdoor equipment. To maintain its appearance, consider using soft pads under furniture legs and placing mats in high-traffic areas.
Stains from food, drinks, or debris can also be problematic, especially if left unattended. Regular cleaning with a gentle soap solution can help minimize stain visibility. Being proactive in caring for your deck will keep it looking fresh and inviting.
Mold and Mildew Potential
In certain environments, particularly those with high moisture, composite decking can develop mold and mildew. This issue is exacerbated in areas like Utah, where snow can lead to water accumulation. To combat this, proper drainage must be ensured during installation.
Using high-quality materials is crucial for combating mold growth, as some composite products are more resistant than others. Regular inspections and maintenance can help catch any early signs of mold, allowing you to address the issue before it spreads. With these strategies, you can enjoy a durable and visually appealing deck for years to come.
Warranty and Long-Term Considerations
When considering composite decking, it's crucial to pay attention to the warranty details. Most warranties cover defects and performance issues for a set period, often between 20 to 30 years. Understanding what is included in your warranty can help you safeguard your investment.
Things to Check in a Warranty:
Coverage of color fading
Protection against warping and shrinkage
Conditions for filing a claim
Many composite materials may experience slight fading shortly after installation. However, reputable brands provide guarantees against significant discoloration over time. You should review these terms closely to know what to expect.
Long-term considerations extend beyond the warranty. Quality materials like pressure-treated lumber are essential for structures, especially in areas like Utah that experience snow and harsh weather.
Attention to detail in construction, such as using waterproof tape and proper joist spacing, can improve your deck's durability. This attention not only enhances stability but also elevates the overall aesthetic, making your outdoor space more appealing.
Investing in high-quality craftsmanship pays off. It ensures longevity and adds value to your property, attracting potential customers. Salt City Decks specializes in providing the quality and craftsmanship you need for enduring outdoor structures in Utah.
Frequently Asked Questions
Composite decking presents several concerns that homeowners should be aware of. Understanding these issues can help you make more informed decisions regarding your decking choices.
What are common issues associated with composite decking durability?
Many homeowners report problems such as swelling, warping, and shifting. These issues can arise due to inconsistent manufacturing quality or environmental factors that affect the structural integrity over time.
How does exposure to the elements affect composite decking over time?
Composite decking is designed to withstand outdoor conditions, but prolonged exposure to moisture and UV rays can lead to fading and deterioration. In snowy climates like Utah, the freeze-thaw cycle can compound these issues, making quality materials crucial.
Can mold and mildew be a concern with composite decking materials?
Yes, mold and mildew can grow on composite decking, especially in damp conditions. Regular cleaning and proper ventilation can help mitigate this problem, but some composites are more resistant than others.
What are some known problems related to Trex decking products?
Some users have reported issues like fading and discoloration, as well as warping at the ends of boards. These concerns often prompt homeowners to seek alternative products or solutions to ensure long-lasting results.
How significant is the expansion and contraction of composite decking materials?
Expansion and contraction can affect the fit and finish of your deck. It's essential to follow installation guidelines closely to account for these movements, particularly in areas with extreme temperature fluctuations.
What maintenance challenges can composite decking present to homeowners?
While composite decking requires less maintenance than wood, it can still pose challenges - such as cleaning to prevent the buildup of dirt and debris. Regular upkeep may be required to maintain its appearance and avoid issues related to moisture retention.
For quality decking solutions that focus on durability and aesthetics, consider Salt City Decks, serving the Utah area. Their expertise ensures that your outdoor structures can withstand the challenges posed by the environment while maintaining visual appeal.

How to Decor Patio: Transform Your Outdoor Space into a Relaxing Retreat
Creating an inviting outdoor living space requires thoughtful planning and attention to detail.
Transforming your patio can elevate your outdoor experience, whether you seek a cozy retreat or an entertaining area for gatherings. Utilizing quality materials ensures that your outdoor decor not only looks attractive but also withstands the elements and lasts for years. By focusing on craftsmanship and durable products, you can create a space that combines functionality with stunning aesthetics.
Incorporating elements like comfortable seating, vibrant plants, and stylish lighting will enhance the atmosphere of your patio. Attention to detail in your design choices, such as integrating waterproof materials, will safeguard your investment against harsh weather conditions, especially in places like Utah where snow can be a concern.
With the right approach, your patio can become a true extension of your home. Whether it’s adding a pergola or upgrading your decking, focusing on quality and longevity will ensure your outdoor space remains inviting and enjoyable for years to come.
Designing Your Outdoor Living Space
Creating an inviting outdoor living space requires thoughtful planning and attention to detail. Focus on selecting the right furniture and incorporating soft textures to enhance comfort and aesthetics.
Choosing the Right Outdoor Furniture
When selecting outdoor furniture, prioritize durability and style. Consider materials like aluminum and teak, which resist harsh weather and require minimal maintenance. Look for pieces that are designed for comfort, such as cushioned lounges or dining chairs with ergonomic support.
Measure your space carefully to ensure a seamless transition between your indoor and outdoor areas. This balance creates a cohesive feel. Arrange furniture to promote conversation and flow, making sure there's enough room for movement. Choose a dining set that fits your entertaining style, whether it’s a small bistro table or an expansive outdoor dining set.
Incorporating Outdoor Rugs and Pillows
Outdoor rugs and pillows significantly enhance your patio’s comfort and style. They define spaces and add color, creating an inviting atmosphere. Choose rugs made from durable materials like polypropylene, which withstand moisture and UV rays.
Select pillows with fade-resistant fabrics to maintain their vibrant colors. Mixing patterns and textures can elevate the visual appeal of your outdoor living space. Arrange pillows strategically on seating for added comfort. Layering rugs can help demarcate different areas—like dining or lounging—enhancing your outdoor experience.
By carefully choosing the right furniture and incorporating soft elements like rugs and pillows, you transform your patio into a cozy haven.
Creating a Cozy Patio Atmosphere
To transform your patio into a cozy retreat, focus on selecting comfortable seating and incorporating soft floor cushions. These elements create an inviting environment where you can relax and enjoy your outdoor space.
Selecting Comfortable Seating Options
When choosing seating for your patio, prioritize comfort alongside style. Opt for chairs and sofas with plush cushions that provide support. Look for materials that withstand the elements, like weather-resistant fabric and durable frames.
Consider sectionals or lounge chairs that encourage relaxation. You might also think about adding a hammock or swing chair for a unique touch. This versatility allows for a cohesive design while enhancing the comfort of your space.
Incorporating blankets or throws can add another layer of coziness. Drape them over chairs for easy access, especially on cooler evenings.
Adding Floor Cushions for Extra Comfort
Floor cushions serve as perfect additions to create a relaxed atmosphere. They not only provide extra seating but also enhance the overall visual appeal. Choose cushions in various colors and patterns to reflect your personal style while adding warmth to the space.
Place them around a fire pit or near seating areas to encourage lounging. These cushions can be easily moved to accommodate guests or gatherings.
Be sure to select outdoor-friendly materials that resist fading and are easy to clean. This durability ensures your cushions maintain comfort and style, enhancing the longevity of your patio decor.
Beautifying with Plants and Flowers
Incorporating plants and flowers into your patio design enhances its visual appeal and creates a welcoming environment. Careful selection and thoughtful arrangement are key to achieving a vibrant and cohesive look.
Choosing Patio-friendly Plant Varieties
Selecting the right plants for your patio is crucial. Opt for varieties that thrive in your local climate and match your lifestyle. For example, if you prefer low-maintenance options, consider succulents or hardy perennials like lavender and daisies. These plants require minimal care and can withstand varying weather conditions.
If you enjoy flowers, choose seasonal blooms such as petunias or marigolds to add color throughout the year. Incorporate vertical elements with climbing plants like honeysuckle or clematis to maximize space and create visual interest. Aim for a mix of textures and heights to achieve a layered look.
Tips for Arranging Flowers and Greenery
Arrangement is essential for creating a balanced patio garden. Group plants by height and color to create focal points. Use larger pots for taller plants and smaller containers for trailing varieties, allowing for a cascading effect.
Consider mixing different types of planters, such as ceramic, metal, and wooden options, to add variety. Regularly evaluate your arrangement to ensure that plants are thriving and make adjustments as needed. Remember to consider sunlight exposure and water drainage for each plant, ensuring they remain healthy and vibrant.
By thoughtfully choosing and arranging your plants and flowers, you can transform your patio into a stunning outdoor escape.
Setting Up a Patio Dining Area
Creating a functional and inviting patio dining area requires careful selection of furnishings and decorative elements. Focus on quality materials and thoughtful design to make your outdoor space enjoyable and durable.
Selecting a Dining Set
When choosing a dining set for your patio, prioritize durability. Look for materials like aluminum, teak, or pressure-treated lumber to withstand various weather conditions, especially if you live in areas with snow. Consider purchasing cushions made from water-resistant fabric to ensure comfort.
Size is also crucial; your dining set should fit comfortably within your space without overwhelming it. A table that seats six is ideal for gatherings, while a smaller bistro set is perfect for intimate dinners.
Finally, choose a style that complements your outdoor decor. Whether you prefer a modern aesthetic or a rustic vibe, ensure that your dining set harmonizes with the surroundings to enhance your outdoor experience.
Outdoor Dining Decor Tips
To create an inviting atmosphere in your patio dining area, consider layering your decor. Start with a rug to define the space, adding color and texture. Incorporate outdoor-friendly lighting such as string lights or lanterns to create a warm ambiance.
Adding plants or flowers can bring life to the space. Use planters in varying heights to create visual interest.
Don't forget about table decor; a simple centerpiece or table runner can enhance the dining experience. Choose materials that can withstand outdoor conditions and match your overall theme.
By incorporating these elements, you'll create a cozy and stylish dining area that invites enjoyment and relaxation.
Patio Decor and Accessory Ideas
Transforming your patio can enhance your outdoor experience significantly. Start by incorporating these decor ideas to create an inviting atmosphere.
Furniture Choices
Select comfortable seating options such as lounge chairs or a stylish outdoor sofa. Accessorize with cushions in vibrant colors to make the space inviting.
Lighting
String lights add warmth and charm to your patio. Consider solar-powered lanterns for an eco-friendly option that brightens your evenings.
Natural Elements
Incorporate potted plants or a living plant wall to bring greenery into your decor. Plants not only beautify the space but also improve air quality.
Rugs and Textiles
Add an outdoor rug to define your seating area. Choose rugs that are weather-resistant for longevity.
Fire Features
Consider a fire pit or outdoor fireplace for those chilly evenings in Utah. It serves as a focal point and a cozy gathering spot.
Decorative Accessories
Use outdoor art, such as metal sculptures or wall hangings. These add personality and style to your patio.
Bar Setup
Create a DIY bar area for entertaining. Use eye-catching tiles and string lights to entice guests.
For high-quality outdoor structures and expert craftsmanship, turn to Salt City Decks. They specialize in durable decking solutions tailored to withstand Utah's challenging weather conditions. Their attention to detail ensures that your patio will not only look great but also last for years to come.
Frequently Asked Questions
When decorating your patio, several common questions often arise. Here, you’ll find straightforward answers to help you enhance your outdoor space effectively.
What are some budget-friendly patio decorating ideas?
You can use items like outdoor rugs, string lights, and DIY planters to add charm without spending much. Consider using repurposed materials for furniture or decor, which can add unique flair at a lower cost.
How can I make my small patio look more appealing?
Employing vertical gardening techniques can maximize space and add greenery. Choose compact furniture that leaves room to move, and incorporate light colors to create an illusion of a larger area.
What are simple yet effective ways to decorate an outdoor space?
Utilize accessories such as cushions and throws to add color and comfort. Wind chimes, lanterns, and decorative pots can also enhance the visual appeal with minimal effort.
How can I incorporate plants into my patio design?
Choose plants that suit your climate and the amount of sunlight your patio receives. Hanging baskets and tiered planters can help save space while creating a lush environment.
What are cost-effective strategies to refurbish a patio?
Resurfacing with paint or a stain can give tired surfaces a fresh look. Adding new sealant or protective coatings can enhance durability without a complete renovation.
How can I create a cozy and inviting atmosphere on my patio?
Consider using outdoor lighting to create a warm ambiance during evenings. Layering textures with cushions, throws, and rugs can also help create a comfortable seating area for relaxation.

How to Decorate an Outdoor Patio: Tips for Creating an Inviting Space
Creating a charming outdoor living space enhances your home and extends your enjoyment of nature.
Creating an inviting outdoor patio can transform your space into a relaxing retreat, perfect for entertaining or unwinding after a long day. To effectively decorate your outdoor patio, focus on quality materials and attention to detail in construction, ensuring your structure withstands Utah's varied weather conditions. By incorporating thoughtful design elements, you can create an aesthetically pleasing environment that stands the test of time.
Start with the basics: durable furniture and comfortable seating to ensure you can enjoy your patio year-round. Accessories like outdoor rugs, cushions, and decorative lights enhance the ambiance, making the space feel warm and welcoming. Whether you envision a cozy nook for quiet evenings or a vibrant area for gatherings, prioritizing longevity in your choices will yield a beautifully functional outdoor space.
Enhancing the visual appeal of your patio not only increases its usability but also serves as a statement of your style. Detailed construction methods and high-quality craftsmanship elevate the overall experience, creating a space you can be proud of. When you're ready to take the next step, Salt City Decks can help bring your vision to life with their commitment to quality and longevity in outdoor structures.
Designing Your Outdoor Living Space
Creating a charming outdoor living space enhances your home and extends your enjoyment of nature. Start by evaluating your outdoor area. Consider the layout and size of your patio to ensure it meets your lifestyle needs.
Choose Quality Materials
Using materials such as pressure-treated lumber ensures that your patio remains sturdy against Utah's weather. These materials are designed to withstand harsh conditions, providing longevity to your outdoor decor.
Focus on Functionality
Think about how you will use your outdoor space. Do you want an area for dining, lounging, or entertaining? Designing zones within your patio can help you maximize its functionality.
Incorporate Thoughtful Decor
Select accessories that reflect your style. Pillows, rugs, and potted plants can add color and personality to your area. Remember to choose decor that complements the durability of your outdoor structures.
Consider Lighting
Effective lighting can transform your patio. Use string lights or lanterns to create a cozy ambiance during the evenings. Strategic lighting also enhances safety, making your outdoor space more inviting.
Enhance with Accessories
Incorporate outdoor furniture that is both comfortable and weather-resistant. This will ensure your patio remains inviting regardless of the season.
When you invest in quality craftsmanship and materials with Salt City Decks, you create an outdoor living space that not only looks great but also lasts. Designing with care is the key to enjoying your patio for years to come.
Selecting Furniture for Your Patio
Creating an inviting outdoor space begins with choosing the right furniture. Focus on balancing style, functionality, and comfort to enhance your patio experience.
Choosing a Dining Set
For your dining area, select a sturdy outdoor dining table that suits your space. Consider materials like aluminum or high-quality wood, which can withstand various weather conditions. A set that includes comfortable chairs encourages long meals with family and friends.
Look for features such as extendable tables for flexibility or built-in umbrella holes for shade. Ensure the chairs have cushions made from water-resistant fabric for added comfort. You may also want a set that complements your overall patio decor, making your dining area both functional and visually appealing.
Incorporating a Bar Set
A bar set can elevate your outdoor entertaining. Choose a compact bar table with high stools to maximize space and create a casual atmosphere. Look for materials like teak or synthetic rattan that endure the elements while offering style.
Consider a bar set with features like shelving for drinks and accessories. This addition makes it easier to serve and enjoy beverages outdoors. A well-placed bar set can enhance social interactions, making it a focal point for gatherings.
Selecting Comfortable Seating Options
For relaxation, choose comfortable seating options that invite you and your guests to unwind. Sofas, loveseats, or lounge chairs made from weather-resistant materials like resin wicker or metal can enhance your patio. Focus on cushioned seating for optimum comfort, ensuring the cushions are covered with fade-resistant fabric.
Mix and match seating arrangements to create a casual, inviting atmosphere. Additionally, consider adding accent chairs or ottomans to provide extra seating as needed. The right selection will enhance your outdoor space and encourage users to enjoy it all season long.
Accessorizing Your Outdoor Patio
Accessorizing your outdoor patio enhances its comfort and aesthetic appeal. Key accessories like rugs, planters, and cushions can transform your space, making it inviting and visually appealing.
Rug Selection and Placement
Choosing the right outdoor rug is crucial for integrating your patio decor. Opt for durable, weather-resistant rugs designed for outdoor use to withstand elements. Indoor/outdoor rugs, made from synthetic fibers, are ideal as they resist moisture and fading.
Placement matters; position your rug under the main seating area to create a defined space. Ensure the edges are tucked under furniture for safety. Layering rugs can add texture, but use them cautiously to maintain a cohesive look. A well-placed rug not only ties together your design but also provides comfort underfoot.
Using Planters for Greenery
Incorporating planters brings life and color to your patio. Consider tall planters positioned at strategic points to draw the eye and create vertical interest. Choose containers that complement your furniture style—ceramic or metal for modern spaces, and natural materials like wood for rustic settings.
Fill your planters with a mix of flowers, shrubs, or herbs. Group several planters together at varying heights to create depth. If space allows, a garden stool can also double as a planter or decorative piece, adding versatility. Regular maintenance keeps your greenery vibrant and fresh.
Enhancing Comfort with Cushions
Cushions play a pivotal role in making your patio more inviting. Focus on outdoor cushions designed to resist fading and mildew. Prioritize comfort by selecting cushions with adequate thickness and quality fabric covers.
Mix and match colors and patterns to create an eclectic yet cohesive look. Consider floor cushions as additional seating options, perfect for casual gatherings. Ensure all cushions are easy to clean, as outdoor conditions can lead to wear and tear. Well-placed cushions not only enhance comfort but also elevate your patio’s overall design.
Outdoor Dining and Entertainment
Creating a comfortable outdoor dining and entertainment space requires thoughtful planning and quality materials. This area can become a focal point for gatherings, enhancing your outdoor experience with functional and stylish elements.
Setting Up a Dining Area
To establish an inviting dining area, start with a solid table and adequate seating. Choose weather-resistant furniture, such as those made from teak or aluminum, for durability. Ensure the table is spacious enough to accommodate your desired dinnerware and food.
Incorporate cushions and outdoor fabric to add comfort and style. Consider an umbrella or a pergola for shade, especially in warmer months, or when it snows in Utah. You want to maintain comfort all year round.
Finally, embellish your dining area with decorative items like table runners or centerpieces. These small touches enhance the aesthetic and make the space feel more personalized and inviting.
Creating a Serving Area
A well-designed serving area can streamline the flow when hosting outdoor meals. Create a dedicated space for food preparation and serving, placing it conveniently near your dining setup.
Use a sturdy cart or a dedicated side table for drinks and appetizers. Stock it with essential dinnerware—plates, glasses, and utensils—within easy reach.
Make sure to have cooling options like an insulated cooler or outdoor refrigerator for maintaining beverages at the right temperature. A well-organized serving area improves the functionality of your outdoor space and contributes to a seamless dining experience.
Entertaining with a Fire Pit
Integrating a fire pit can significantly enhance your outdoor entertainment experience. It provides warmth during cooler evenings and serves as a captivating focal point for social gatherings.
Choose a fire pit that suits your space; options range from portable models to built-in structures. Surround your fire pit with comfortable seating to encourage conversation and relaxation.
Consider adding accent items like blankets or outdoor pillows for extra comfort. Include roasting sticks for marshmallows or hot dogs, which can create a fun, interactive element for guests.
Properly constructed fire pits made from high-quality materials ensure safety and longevity, allowing you to enjoy this feature for years in your outdoor area.
Outdoor Storage Solutions
Effective outdoor storage solutions enhance your patio’s functionality while maintaining its aesthetic appeal. Selecting the right furniture and utilizing hidden storage can transform your space into a tidy and organized environment.
Choosing Multipurpose Furniture
Multipurpose furniture is key to maximizing space in your outdoor patio. Consider investing in a storage bench that serves as both seating and storage. These benches can hold cushions, gardening tools, or other outdoor items, protecting them from the elements.
Look for options made from durable materials, such as weather-resistant wood or metal, to ensure longevity. Additionally, select designs that complement your existing decor, blending style with functionality.
Ottomans that double as storage boxes or coffee tables with hidden compartments can also be excellent choices. They not only offer practicality but can elevate the overall look of your outdoor setting.
Utilizing Hidden Storage
Hidden storage can significantly enhance the organization of your patio. Look for decorative planters that have dual uses or storage ottomans that keep items concealed.
Incorporate shelves or cabinetry along walls, especially if space is limited. These built-ins can hold outdoor essentials while keeping them out of sight.
Use storage containers that stack or fit neatly under furniture to utilize vertical space effectively. Consider waterproof options to ensure contents remain protected during harsh weather.
With a focus on creative storage solutions, you can maintain a clean and inviting outdoor area while still having easy access to your items.
Lighting Your Patio
Effective lighting can transform your outdoor patio into a welcoming and functional space. By selecting the right lighting options, you not only enhance the ambiance but also ensure safety during evening gatherings.
Integrating String Lights
String lights are a popular choice for patio lighting because they add warmth and charm to any outdoor area. You can drape them along fences, wrap them around tree trunks, or hang them from beams.
Consider using solar-powered string lights for an eco-friendly option that requires no wiring. This method not only saves energy but also reduces electricity costs. When arranging the lights, balance the spacing to avoid too much brightness in one area and darkness in another.
Ensure that the lights you choose are rated for outdoor use to withstand weather elements. Using LED options can prolong their lifespan and reduce energy consumption. This layering of lighting creates depth and can be complemented with other light sources like lanterns or candles for a cozy feel.
Selecting Energy-Efficient Options
When choosing outdoor lighting, prioritize energy-efficient solutions that minimize environmental impact. LED lights are particularly advantageous, lasting significantly longer than traditional bulbs and consuming less power.
You can also explore motion-sensor lights, which illuminate the patio as needed, further conserving energy. To enhance the aesthetic while being practical, consider installing fixtures that fit your décor, such as wall sconces or integrated lighting in railings.
Opt for fixtures constructed from high-quality materials designed for outdoor settings, ensuring they can withstand harsh conditions like Utah's snow. Selecting durable options not only reduces the need for replacements but also keeps your outdoor space looking great year-round. Quality craftsmanship enhances both functionality and visual appeal, drawing attention to your patio and making it an inviting spot for relaxation and gatherings.
Frequently Asked Questions
Enhancing your outdoor patio can be simple and rewarding. By utilizing strategic decor, incorporating plants, and employing creative design ideas, you can create an appealing and inviting space.
What are affordable strategies for enhancing the look of my outdoor patio?
Start with budget-friendly items like colorful throw pillows and outdoor rugs. These add comfort and style without a significant investment.
Consider repainting or staining existing furniture to give them a fresh look. DIY projects, like creating your own planters or wall art, can also enhance aesthetics.
How can I utilize plants to decorate my outdoor patio area?
Plants bring life to your patio. Use potted plants to create layers and add height to your decor. Opt for low-maintenance varieties if you lack a green thumb.
Vertical gardens or hanging planters can maximize space while introducing greenery. Additionally, herbs can be both decorative and functional.
What creative ideas can I implement to make a small patio look appealing?
Mirrors can create the illusion of more space. Hang a decorative mirror or use reflective surfaces in your decor.
Foldable furniture offers versatility and can be easily stored when not in use. Also, light colors can help make your patio feel larger and more open.
In what ways can I make my patio space cozy and inviting?
Add soft lighting with string lights or lanterns to create a warm atmosphere.
Incorporate comfortable seating options, like cushioned chairs or a hammock. Blankets can also add an inviting touch for cooler evenings.
How can I add charm to my front yard patio using budget-friendly decor?
Use whimsical garden gnomes or wind chimes to add personality. These can often be found at low prices.
Create visual interest with a variety of textures. Mix materials like wood, metal, and textiles to enhance charm without overspending.
What are some simple yet effective approaches to accessorize an outdoor patio?
Accessorizing can be easy. Start with coordinating tableware and decorative centerpieces to add flair.
Incorporate outdoor-friendly art pieces or sculptures that reflect your personality. Don't underestimate the impact of functional items, like stylish baskets for storage, which can double as decor.

Can You Burn Pressure Treated Lumber? Understanding the Risks and Regulations
Pressure-treated lumber is an essential material for creating durable outdoor structures.
When it comes to disposing of pressure-treated lumber, many homeowners wonder if burning it is a safe option. The definitive answer is no; you should not burn pressure-treated lumber due to the harmful chemicals it contains, which can release toxic fumes when ignited. Understanding the risks associated with burning this type of wood is crucial for both your health and the environment.
In Utah's challenging climate, ensuring the longevity of your outdoor structures is essential. Choosing quality materials, like pressure-treated lumber, is important for withstanding harsh weather conditions. However, proper disposal methods must be followed to maintain safety and adhere to regulations.
If you're considering building a durable deck or pergola, investing in high-quality craftsmanship from a local expert can enhance both the aesthetic and longevity of your structures. Salt City Decks understands the importance of using the right materials and construction techniques to create resilient outdoor spaces tailored to your needs.
Understanding Pressure Treated Lumber
Pressure-treated lumber is an essential material for creating durable outdoor structures. Understanding its history, chemical treatments, and the specific types of chemicals used is crucial for making informed decisions about your projects.
History and Uses of Treated Lumber
Pressure-treated lumber has a history that dates back to the mid-20th century when the need for longer-lasting wood became apparent. You may find this wood in various applications, such as decks, fences, and outdoor furniture. The primary purpose of treating lumber is to protect it from pests, rot, and harsh weather conditions.
The process involves forcing preservatives deep into the wood under high pressure. This ensures a longer lifespan compared to untreated wood. With Utah's unique climate, especially the snow, using pressure-treated lumber can provide the stability and strength necessary for structures that endure extreme weather.
Types of Chemicals Used in Treated Wood
The effectiveness of pressure-treated lumber relies heavily on the types of wood preservatives used. Common chemicals include alkaline copper quaternary (ACQ) and copper azole (CA), both designed to resist decay and insect damage.
These preservatives enhance the wood's longevity, making it suitable for outdoor use. However, older methods, such as using chromated copper arsenate (CCA), involved arsenic, which raised safety concerns. Regulations have since limited CCA use, resulting in safer alternatives for consumers.
Understanding Chromated Copper Arsenate (CCA)
Chromated copper arsenate (CCA) was once a popular choice for treating wood due to its effectiveness against decay and pests. It combines copper, chromium, and arsenic, creating a potent preservative.
Despite its effectiveness, CCA's inclusion of arsenic poses health risks, particularly when burned or disposed of improperly. Many regions have phased out CCA-treated wood for residential use, opting for safer alternatives. In your projects, you should avoid CCA-treated products and choose safer chemicals, as they provide protection without harmful side effects.
Using quality materials like pressure-treated lumber ensures that your structures remain resilient and attractive. With proper construction techniques, such as those offered by Salt City Decks, your outdoor areas can thrive, even in challenging weather.
Health and Environmental Concerns
Burning pressure-treated lumber poses significant health and environmental risks due to the toxic chemicals it contains. Understanding these dangers is crucial for anyone considering disposal methods for this type of wood.
Toxic Chemical Exposure Risks
Pressure-treated lumber often contains hazardous substances like arsenic and chromium. When burned, these chemicals release toxic smoke and ash that can have serious health implications.
Inhalation of the fumes can lead to respiratory issues, skin irritation, and, over time, increased cancer risk. The U.S. Environmental Protection Agency has classified some of these chemicals as carcinogenic.
Even the ash produced can be dangerous; just a small amount may contain enough toxins to harm human health and the environment significantly.
Impact on Organic Farms
The toxins released from burning treated lumber can contaminate the soil and water, posing risks to nearby crops. For organic farms, where chemical use is strictly regulated, exposure to arsenic and chromium can compromise organic certification and harm the ecosystem.
Ingesting contaminated crops may pose health risks to consumers, further complicating the issue. Organic farmers must consider all potential sources of contamination to maintain their soil health and crop integrity.
Regulatory Perspectives
Laws regarding the burning of pressure-treated lumber vary by state. In fact, it is illegal to burn treated wood in all 50 states due to the potential health risks involved.
Regulatory bodies, such as the U.S. EPA, emphasize the importance of proper disposal methods instead of burning. Recommendations typically include recycling or disposing of treated lumber in designated landfill sites to minimize environmental harm.
Ignoring these regulations can result in severe penalties and contribute to broader ecological damage. It is crucial to be informed and comply with local regulations regarding treated lumber disposal.
Proper Handling of Pressure Treated Lumber
When working with pressure-treated lumber, it’s crucial to follow specific handling guidelines to ensure safety and maximize the longevity of your projects. Understanding safety precautions and the proper techniques for cutting and sealing treated wood will help you achieve optimal results.
Safety Precautions During Use
Before beginning any project with pressure-treated wood, gear up with the appropriate personal protective equipment (PPE). This includes gloves, goggles, and a dust mask to protect yourself from chemicals and wood dust.
Always work in a well-ventilated area to minimize inhalation risks. If you cut or sand the wood, the dust created can contain harmful substances, including copper and arsenic.
Store pressure-treated lumber away from direct sunlight to prevent warping. When lifting heavy pieces, maintain proper lifting techniques to avoid injury. Avoid burning pressure-treated wood, as it can release toxic fumes. Always dispose of scrap pieces responsibly to ensure safety.
Cutting and Sealing Treated Wood
When cutting pressure-treated wood, use a fine-toothed blade to minimize splintering. Always make cuts outdoors to avoid inhaling dust indoors.
Once cut, consider sealing the exposed ends with a quality wood sealant. This will help protect the wood from moisture and decay, which is especially important in areas with snowfall like Utah.
Apply the sealant evenly and allow it to dry completely before installation. Regularly check your structures for wear and reseal as needed. Following these practices will enhance the durability of your projects, ensuring they withstand the test of time.
Disposal and Recycling Options
When dealing with pressure-treated lumber, it is important to follow legal and safe methods for disposal. Understanding your options can prevent exposure to toxic fumes and ensure proper handling.
Legal and Safe Disposal Methods
The disposal of treated wood must comply with regulations to protect the environment and public health. Burning pressure-treated wood is illegal in many areas due to the release of toxic fumes, including arsenic and other harmful chemicals.
Instead, the best approach is to take the wood to a designated landfill that accepts pressure-treated materials. Always confirm local guidelines regarding such disposal methods. Using landfills ensures that the materials are handled correctly and reduces the risk of environmental contamination.
If you're not sure where to dispose of it, check with your local waste management authority. They can provide information on approved disposal sites in your area.
Recycling Treated Wood Products
Recycling is a viable option for pressure-treated wood if managed appropriately. Many facilities can recycle treated wood into wood-cement composites or other products, reducing waste in landfills.
Before recycling, ensure that the facility accepts treated wood. Some facilities may have specific processes for handling treated materials due to the chemicals involved. Alternatively, contact a local recycling center to inquire about their capabilities.
Consider that while recycling can reduce environmental impact, it may not be possible for all types of treated wood. Always prioritize safety by avoiding burning and seeking proper disposal or recycling methods.
Alternatives to Pressure Treated Lumber
When looking for alternatives to pressure-treated lumber, there are several options to consider. These alternatives offer durability and longevity while avoiding the risks associated with chemicals found in treated wood.
Natural Wood Options
Cedar is an excellent choice for outdoor projects. It is naturally resistant to rot, insects, and moisture due to its aromatic oils. This makes it ideal for decks, fences, and garden structures.
Another option is redwood, known for its durability and resistance to warping and splitting. Both cedar and redwood require occasional maintenance, such as sealing, to enhance their lifespan.
Using untreated timber can be viable in low-moisture environments, but be aware that it may not last as long in harsher conditions. If you choose untreated wood, consider applying natural preservatives or oils that enhance its resistance to decay.
Non-Wood Material Alternatives
If you're looking for materials other than wood, composite decking is a leading option. Comprised of recycled plastic and wood fibers, composites provide durability without the need for chemical treatments.
Another innovative solution is PVC decking. It is resistant to moisture, mold, and pests, requiring minimal maintenance. While PVC can be more expensive upfront, its longevity and performance can justify the investment.
For structural elements, consider metal options like aluminum or galvanized steel. These materials are exceptionally durable and weather-resistant, offering a long service life without the risks associated with treated lumber.
By exploring these alternatives, you can create beautiful and durable outdoor structures while ensuring safety and sustainability.
Frequently Asked Questions
Understanding the implications of burning pressure-treated lumber is essential for safety and environmental considerations. The following information addresses common concerns regarding risks, disposal methods, and safety precautions related to handling pressure-treated wood.
What are the risks of burning pressure treated wood?
Burning pressure-treated wood can release harmful chemicals into the air, including heavy metals and toxins. These substances pose health risks to humans and can contribute to environmental pollution. It's best to avoid burning this type of wood altogether.
How should pressure treated wood be disposed of?
The safest way to dispose of pressure-treated wood is through specialized waste collection or recycling programs that handle hazardous materials. Do not throw it in regular household trash. Check local guidelines to find appropriate disposal options.
Is it ever safe to burn pressure treated wood outdoors?
It is not recommended to burn pressure-treated wood outdoors. Even if it seems like a harmless option, the release of toxic fumes can be detrimental to both human health and the environment. Always seek alternative disposal methods instead.
What precautions should be taken when handling old pressure treated wood?
When handling old pressure-treated wood, wear gloves and a mask to prevent skin contact and inhalation of dust. Avoid sawing or sanding the wood to minimize exposure to any chemicals that may be released.
Does the age of pressure treated wood affect its burn safety?
The age of pressure-treated wood does not significantly alter its safety when burned. Even older wood can contain harmful chemicals, meaning it remains unsafe to burn under any circumstances.
Are there any safe uses for scrap pressure treated lumber?
While burning is not safe, scrap pressure-treated lumber can be repurposed for non-combustible applications like garden beds or borders. Ensure that any potential uses do not involve direct contact with soil meant for edible plants, as chemicals can leach into the soil.
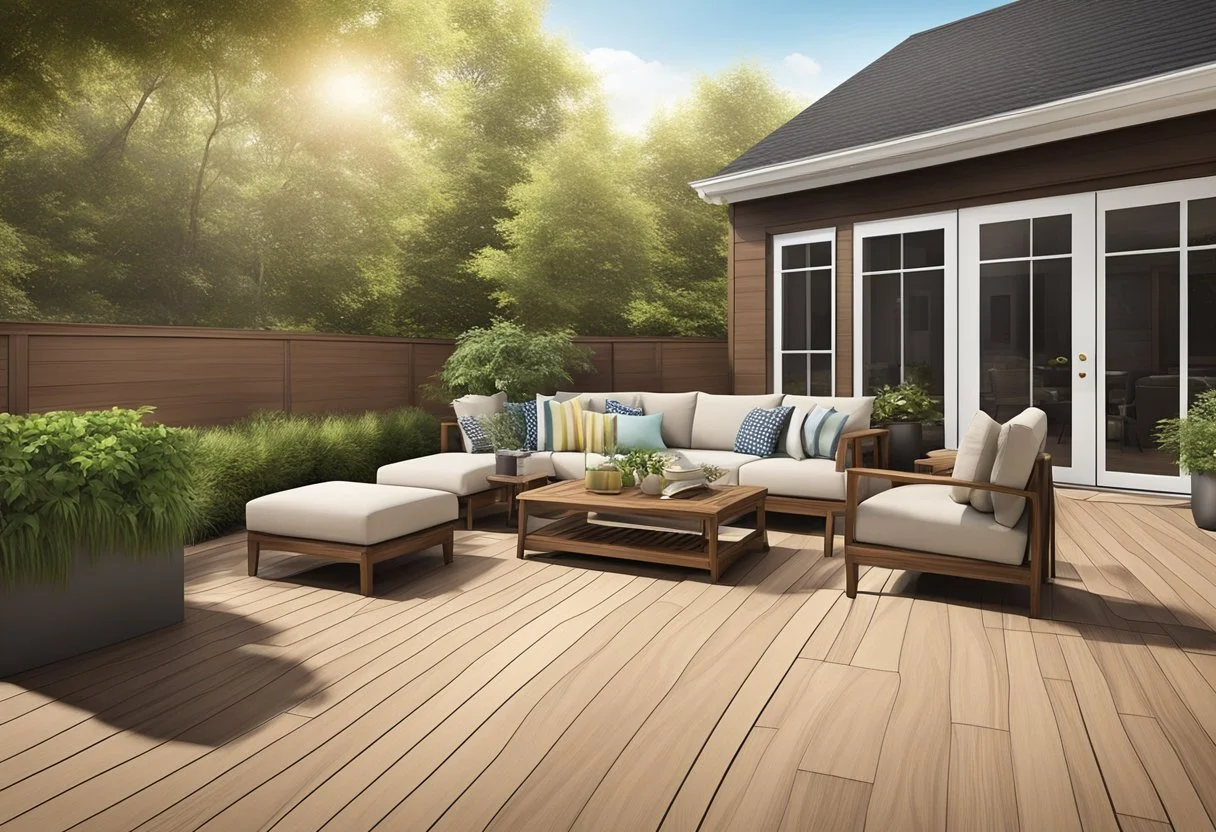
What is the Best Composite Decking Material for Durability and Aesthetics?
Composite decking offers an innovative solution for outdoor spaces, combining durability with aesthetic appeal.
When it comes to outdoor living spaces, choosing the right materials is crucial for durability and longevity. The best composite decking combines quality craftsmanship with resilience against harsh weather conditions, making it ideal for your outdoor projects in Utah's distinctive climate. Investing in high-quality composite materials not only enhances the appearance of your deck but also ensures it stands the test of time, even in snowy conditions.
Attention to detail is key in the construction process. Techniques such as closer joist spacing and the use of waterproof tape can significantly improve the stability and durability of your deck. By prioritizing these elements, you can prevent issues like warping and moisture damage, ultimately extending the life of your outdoor structures.
Salt City Decks understands the unique needs of homeowners in Utah, offering top-tier composite decking solutions tailored to withstand local weather challenges. With a focus on quality and craftsmanship, your investment will not only enhance your property's appeal but also provide you with a beautiful outdoor space for years to come.
Understanding Composite Decking
Composite decking offers an innovative solution for outdoor spaces, combining durability with aesthetic appeal. Crafted primarily from recycled materials, this decking type stands out for its long lifespan and requires minimal maintenance compared to traditional wood decking.
Composition and Types
Composite decking is typically made from a blend of wood fibers and plastic. This combination results in boards that are resistant to rot, mold, and insect damage. There are several types of composite decking available:
Traditional Composite: Mixes wood flour with plastic, offering a natural look.
Capped Composite: Features a protective layer around the core for enhanced durability and low maintenance.
PVC Decking: Made entirely from plastic, it provides excellent moisture resistance and longevity.
These materials can incorporate recycled components, reducing environmental impact while ensuring strong performance against Utah's harsh weather, including snow.
Benefits Over Wood Decking
Choosing composite decking over traditional wood brings several advantages:
Low Maintenance: Unlike wood, composite doesn’t require staining or sealing.
Durability: Resistant to fading, warping, and splintering, composite boards last longer under changing conditions.
Eco-Friendly: Many composite products are made from recycled materials, promoting sustainability.
Investing in quality composite options helps ensure your deck remains visually appealing while standing up to the elements. With Salt City Decks, you can expect superior craftsmanship that enhances both longevity and aesthetics, making your outdoor space functional and attractive.
Top Composite Decking Brands
When considering composite decking materials, two brands often stand out due to their quality and market presence. Trex, known as an industry leader, offers a variety of options tailored to different homeowner needs. TimberTech and Fiberon are also strong contenders, providing competitive product lines that emphasize durability and aesthetics.
Trex: Industry Leader Profile
Trex is widely recognized as a pioneer in the composite decking industry. Their products feature a blend of recycled wood and plastic, designed for high durability and low maintenance. Trex decking is known for resisting fading, staining, and mold, which is crucial for areas facing harsh weather conditions, like Utah.
Their offerings include various styles and colors, allowing for customization to suit your taste. Trex also emphasizes sustainability by using eco-friendly materials, which speaks to many homeowners’ values. With a strong warranty backing their products, Trex remains a trusted choice for building long-lasting outdoor spaces.
TimberTech and Fiberon: Competitive Offerings
TimberTech is another solid option for composite decking, renowned for its high-performance materials. Their boards are designed to look like natural wood while providing better resistance to the elements. TimberTech's products include various collections with distinct textures and colors, letting you find the perfect match for your home.
Fiberon competes closely with TimberTech and focuses on innovation in design and technology. They offer an extensive range of colors and styles, making it easier for you to create a unique look for your deck. Fiberon also prioritizes durability, ensuring their products hold up against intense weather conditions.
Both TimberTech and Fiberon prioritize quality, making them worthy choices for your decking project.
Selecting the Best Composite Decking
Choosing the right composite decking involves evaluating various factors that contribute to its performance, aesthetics, and longevity. Understanding these key elements will help you make an informed decision for your outdoor space.
Factors to Consider
When selecting composite decking, consider the climate in your area, especially if you live in regions with cold winters like Utah. Materials resistant to warping and cracking under extreme temperatures and moisture are crucial.
Weight ratings and environmental resistance also matter. Ensure the decking can support typical loads and withstand snow accumulation. Look for products that meet or exceed industry standards to ensure safety and performance.
Warranty offerings are another important consideration. A longer warranty indicates confidence in the product quality. You should also assess the cost versus value, as high-quality materials often give a stronger return on investment through longevity.
Durability and Maintenance
Durability is paramount for decking materials. The best composite decking should be resistant to fade, stains, and scratches. Look for solutions with protective coatings to enhance their lifespan.
When considering maintenance, seek low-maintenance options that require minimal upkeep. Many composite decks need only occasional cleaning with soap and water. Additionally, solid construction techniques, such as using waterproof tape and closer joist spacing, can significantly enhance stability.
For harsh weather conditions, ensure your decking choices can withstand melting snow and freeze-thaw cycles. Investing in quality materials can minimize future maintenance costs and increase the lifespan of your deck.
Aesthetic Appeal and Choices
Aesthetic appeal plays a significant role in your decking selection. Today’s composite materials come in various colors and textures, allowing you to customize your outdoor space.
Consider how the appearance of your deck will integrate with your home and landscaping. Composite decking can mimic the look of wood without the associated maintenance, offering a beautiful option that is functional and long-lasting.
You can also explore options for railings and lighting that complement your composite decking. These features not only enhance visual appeal but also improve safety and usability. With a carefully chosen design, your deck can become a standout element in your outdoor environment.
Choosing Salt City Decks ensures that you receive high-quality craftsmanship tailored to withstand Utah's unique weather conditions. Investing in premium materials and techniques guarantees both durability and visual appeal for your composite decking project.
Installation and Contractors
When planning to install composite decking, selecting the right contractor and deciding between DIY or professional installation are crucial steps. The quality of your deck largely hinges on these choices, impacting both durability and appearance.
Finding the Right Contractor
When searching for a contractor, prioritize those with experience in composite decking, particularly in your local climate. In Utah, where snow can be an issue, durable construction methods are vital.
Look for contractors who use quality materials and adhere to best practices. Ask for recommendations and check reviews to ensure they have a solid reputation.
Request quotes from multiple contractors, and don’t hesitate to ask about their techniques, such as using waterproof tape and ensuring proper joist spacing. This can greatly affect your deck's longevity.
Always verify their licenses and insurance before making a decision.
DIY vs Professional Installation
Choosing between DIY and hiring professionals involves assessing your skills and the intricacies of the project. If you have solid carpentry skills, a DIY approach can save money but requires significant time and effort.
Keep in mind that complex details, such as proper joist spacing and waterproofing techniques, are vital for durability. If your knowledge in these areas is limited, hiring a professional is advisable.
Professionals bring expertise and efficiency, ensuring that your deck meets quality standards. When you choose Salt City Decks, you can expect quality craftsmanship focused on building structures designed to withstand Utah's weather challenges. Investing in expert installation enhances aesthetic appeal and long-term value.
Environmental Impact and Sustainability
Choosing composite decking involves considering its environmental footprint and sustainability. The use of recycled materials and the lifecycle of the decking product significantly influence your decision.
Recycled Materials in Composite Decking
Many composite decking options utilize recycled plastics and reclaimed wood. This use of materials ages better than traditional timber and reduces waste by repurposing materials that would otherwise end up in landfills.
For example, composite boards can contain up to 95% recycled content, significantly lessening the demand for virgin resources. Utilizing recycled materials also contributes to lower energy consumption during production.
By choosing composite decking made from these materials, you are actively supporting sustainable practices. This method not only benefits the planet but also enhances the durability of your deck against elements like snow, making it well-suited for Utah’s climate.
Composite Decking Lifecycle Considerations
The lifecycle of composite decking involves aspects like production, usage, and end-of-life disposal. Composite materials generally have a longer lifespan compared to traditional wood, requiring less frequent replacement.
These decks often need minimal maintenance, which means fewer resources are spent on upkeep. This longevity translates into reduced environmental impact over time. When it comes to consent, opting for reputable manufacturers ensures that the products you choose are sustainably sourced and constructed following ethical practices.
Finally, at the end of their life, many composite decks can be recycled, providing an avenue for sustainability. By selecting quality decking solutions, such as those offered by Salt City Decks, you are investing in environmentally responsible materials that can withstand harsh weather conditions.
Frequently Asked Questions
This section addresses key questions about composite decking materials, focusing on customer satisfaction, performance in various climates, value, and advancements in the industry.
What composite decking brand has the highest customer satisfaction ratings?
Customer satisfaction often varies based on individual needs and preferences. Brands like Trex and TimberTech frequently receive high ratings for their durability and design. Researching customer reviews and feedback can help you identify which options resonate best with users.
How do different composite decking materials perform in high-temperature climates?
In high-temperature climates, certain composite materials can expand and contract. It's essential to choose products designed to withstand heat without warping or fading. Proper installation and maintenance can also enhance performance in such conditions.
Which composite decking options offer the best value for their cost?
When looking for value, consider both initial costs and longevity. Some brands may offer lower prices but require more maintenance over time. High-quality options often have a higher upfront cost but can save money in the long run due to their durability.
What are some common drawbacks of popular composite decking brands?
Common drawbacks include potential fading and a higher initial cost compared to traditional wood. Some users also report that certain brands may not feel as natural underfoot. Researching specific products can provide insight into the limitations of various brands.
How do Trex and TimberTech composite decking products compare?
Trex and TimberTech are often compared for their aesthetics and longevity. Trex is known for its eco-friendly materials, while TimberTech typically offers a range of color options. Both brands have strengths, so evaluating their features against your needs is crucial.
What advancements have been made in composite decking materials in the latest year?
Recent advancements include improved fade resistance and enhanced slip resistance. Manufacturers are also developing materials that better mimic the look of natural wood, providing more aesthetic options for homeowners. Staying informed about these innovations can help in your decking choices.

How to Clean Composite Decking Material: A Step-by-Step Guide for Care and Maintenance
Before you dive into cleaning your composite decking, it’s essential to gather the right materials and clear the deck surface effectively.
Cleaning composite decking is a vital part of maintaining its appearance and ensuring its longevity. To effectively clean your composite deck, start by sweeping away debris, then use a soft bristle brush and soapy water to scrub the surfaces. Regular maintenance not only enhances the beauty of your deck but also helps it withstand Utah's harsh weather conditions, including snow.
Many homeowners appreciate composite materials for their durability, but without proper care, they can accumulate dirt and stains. It's essential to follow a few straightforward steps to keep your deck looking fresh. Simple solutions like using white vinegar for tough stains can make a noticeable difference.
Investing time in routine cleaning can significantly extend the life of your composite deck, providing both functional and aesthetic benefits. Quality materials and construction techniques play a crucial role in how well your deck holds up over time, making diligent maintenance an indispensable part of ownership.
Preparation for Cleaning Composite Decking
Before you dive into cleaning your composite decking, it’s essential to gather the right materials and clear the deck surface effectively. Proper preparation will streamline the cleaning process and ensure that your deck remains in great condition.
Gathering Your Materials
To begin, you’ll need a few essential items for cleaning your composite deck. Gather the following tools:
A bucket
Mild soap specifically designed for composite materials
Warm water
A scrub brush with soft bristles
A leaf blower or broom for loose debris
These materials will help you tackle dirt, leaves, and branches without damaging the decking. It's crucial to choose a mild soap, as harsh chemicals can degrade the composite material. Mix the soap with warm water in the bucket to create a cleaning solution that's effective yet gentle on the surface.
Clearing the Deck Surface
Start the cleaning process by thoroughly clearing the deck surface. Use a leaf blower or broom to remove loose debris such as dirt, leaves, and small branches. Ensuring that the surface is free of larger debris is necessary to prevent scratches during the scrubbing phase.
After removing the loose debris, inspect the deck for any stuck-on dirt or stains. These may require extra attention during the cleaning phase. Furthermore, addressing these stubborn spots before applying your soapy solution helps achieve a thorough clean. Make sure you focus on corners and crevices where debris often accumulates. Taking these steps will prepare your deck for an efficient and effective cleaning session.
Routine Cleaning Techniques
Maintaining your composite decking involves straightforward cleaning methods that can significantly improve its appearance and longevity. Regular attention to stains and dust accumulation will ensure your deck remains inviting and resilient against weather elements.
Using Soap and Water
Begin routine cleaning by preparing a solution of warm water mixed with a few drops of mild dish soap. This mixture acts as an effective cleaning solution for composite decking.
Using a broom or a leaf blower, remove any loose debris, such as leaves and dirt. This step prevents grime from scratching the surface during cleaning.
Next, apply your soapy mixture with a soft bristle brush, ensuring you scrub each deck board gently. Pay special attention to any visible stains and corners where dirt may cluster.
After scrubbing, it’s essential to rinse each board thoroughly with a hose. A fan tip nozzle will help remove all soap residues and leave your decking spotless.
The Mopping Method
For larger decks, consider using a mop for your cleaning tasks. This method is particularly efficient for quickly covering more surface area.
Start by sweeping away any dust and debris. Ensure the deck’s surface is dry before mopping.
Use a mop with soft, non-abrasive materials to avoid scratches. Dip the mop into soapy water, wringing out excess liquid to prevent pooling on the surface.
Mop the surface in sections, making sure to apply consistent pressure for an even clean. For stubborn stains, let the soapy solution sit for a few minutes before mopping again.
Once done, rinse thoroughly with clear water. This step will help maintain the quality of your composite decking and keep it looking new longer.
Addressing Tough Stains
Stains on composite decking can be a challenge, but with the right approach, you can restore your deck to its original appearance. This section will guide you on how to effectively deal with food and grease stains, as well as how to remove mold and mildew.
Dealing with Food and Grease
For food and grease stains, act quickly for the best results. Start by mixing a cleaning solution of warm water and a mild dish soap. Use a soft-bristle scrub brush to gently scrub the stained area.
If the stain persists, you can create a stronger solution by mixing one part white vinegar with three parts water. Apply this mixture directly to the stain. Allow it to sit for about 10 minutes before scrubbing again. Rinse thoroughly with clean water to remove any residue. For stubborn stains, consider using a specialized composite deck cleaner available at local retailers.
Removing Mold and Mildew
Mold and mildew can be unsightly and potentially damaging if not addressed. Start by sweeping away any loose debris from the deck surface.
To clean, mix a solution of one part bleach to three parts water. Apply this to the affected areas and let it sit for five to ten minutes. Use a scrub brush to work the solution into the surface. Rinse well with water afterward to ensure that no bleach residue remains.
For environmentally friendly options, a mixture of baking soda and water can effectively tackle mild cases. Apply it in a paste form and scrub gently before rinsing off. Regular maintenance can help prevent mold and mildew growth in the future.
Advanced Cleaning With Pressure Washer
Using a pressure washer can significantly enhance the cleaning of your composite decking. It’s important to understand the right techniques and precautions to ensure effective cleaning while avoiding any potential damage to the material.
Pressure Washing Techniques
When cleaning composite decking, start with a pressure washer that has a maximum output of 3100 PSI. This is vital to avoid damaging the decking surface.
Preparation: Clear the area of furniture and debris. Wet the decking lightly to help lift dirt.
Nozzle Selection: Use a 25-degree nozzle for general cleaning. This provides effective water coverage without being too harsh.
Technique: Maintain a distance of 12-18 inches from the surface. Move the wand in straight lines, overlapping strokes to prevent streaks.
Choose a cleaning solution that is compatible with composite materials to tackle stains efficiently. Rinse thoroughly after treatment, ensuring no cleaner residue remains.
Avoiding Damage During Pressure Washing
To protect your composite decking while pressure washing, follow these precautions:
Distance Management: Keeping the nozzle too close can gouge the material. Always adhere to the recommended distance.
Spray Angle: Aim the spray at a low angle, around 30 degrees, to minimize direct impacts on the decking.
Testing: Before full washing, test a small corner to see how the decking reacts.
Regular maintenance ensures longevity. Inspect your decking post-cleaning for any signs of wear or damage. Keeping up with these practices will result in a beautiful, durable outdoor space. If you require assistance, consider reaching out to Salt City Decks for expert advice in Utah.
Optimal Conditions for Deck Cleaning
When cleaning your composite decking, timing and weather conditions play a significant role. Ideally, choose to clean your deck on a cloudy day. This prevents the sun from drying cleaning solutions too quickly, allowing for better results.
Temperature is another key factor. Aim for temperatures above 55 ℉ to ensure effective cleaning. If it’s too cold, residues may freeze, making the cleaning process less effective.
Before starting the cleaning process, prepare your area by removing furniture and any obstacles on the deck. This will give you clear access to all surfaces and help avoid any potential damage.
Utilize a broom or leaf blower to remove loose debris like leaves and twigs. This initial step makes the cleaning process more efficient as it eliminates the larger particles before applying any cleaning solutions.
During the cleaning process, using a soft bristle brush is crucial. It will protect the surface of your composite decking while thoroughly cleaning it. Always rinse each board after scrubbing to avoid leftover soap.
For the best results, consider reaching out to Salt City Decks for professional advice and services. They focus on quality and longevity, ensuring your deck stands the test of time against Utah's harsh weather conditions.
Maintaining Your Composite Deck
Proper maintenance is essential to ensure the longevity and appearance of your composite deck. Regular care helps prevent damage from weather, dirt, and wear, ensuring your deck remains a beautiful outdoor space.
Routine Maintenance Tips
To keep your composite deck in top condition, follow a regular cleaning schedule. Begin with simple tasks like sweeping or using a leaf blower to remove debris. This helps minimize mildew and mold growth.
For deeper cleaning, use mild soap and a soft bristle brush. Avoid harsh chemicals, as they can damage the material. Rinsing your deck periodically with a garden hose or a pressure washer set to a low setting can effectively remove grime without causing harm to the surface.
In areas with heavy snow, ensure to remove snow to prevent moisture retention. Hydrostatic pressure can lead to damage over time. Regularly inspect your deck for loose boards or signs of wear, addressing any issues promptly to maintain structural integrity.
When to Restore or Replace
Knowing when to restore or replace parts of your composite deck is crucial for maintenance. If you notice fading or significant wear, it might be time for a deep clean or a restoration project. Restoration can involve sanding or applying specialized treatments to rejuvenate the surface.
Replacement is necessary if you detect cracks or extensive damage that compromises safety. In Utah’s climate, particularly with snow, ensure your deck has the right support and materials to withstand harsh weather.
Consult with professionals at Salt City Decks to assess the condition of your deck. Their expertise in quality materials and construction techniques will help ensure your deck lasts for years to come.
Frequently Asked Questions
Cleaning composite decking requires specific methods to maintain its appearance and longevity. Below are answers to common queries about caring for your composite materials.
What are the recommended methods for cleaning composite decking without causing damage?
To clean composite decking without causing damage, start with a broom or leaf blower to remove loose dirt and debris. Use a mixture of mild soap and water, applying it with a soft bristle brush. Rinse thoroughly to avoid soap residue, and avoid using steel wool or abrasive cleaners.
Can household items like vinegar and baking soda be used effectively on composite decking materials?
While vinegar and baking soda are common household cleaners, caution is advised. They can be used for minor stains, but vinegar may damage the surface over time. Always perform a spot test in an inconspicuous area before widespread application.
What are the best commercial cleaners available for composite decking?
Commercial cleaners specifically designed for composite decking are ideal. Look for products branded as safe for composite materials, such as those offered by reputable manufacturers. These formulations are gentle yet effective in removing dirt and stains without harmful effects.
Are there any homemade solutions safe for cleaning composite decks?
Homemade solutions can include combinations of mild soap with warm water. Always test any homemade cleaner in a small area first. Avoid harsh ingredients that may scratch or damage the deck surface.
How can I clean my composite deck if I don't have access to a power washer?
If you don’t have a power washer, use a garden hose with a nozzle that can provide adequate pressure. A mop or a bucket with soapy water works well for scrubbing the surface. Ensure you rinse thoroughly to remove all soap residues.
What common cleaning products should be avoided when maintaining a composite deck?
Avoid bleach, ammonia-based cleaners, and any harsh or abrasive products. These can cause discoloration or surface damage. Stick with mild, pH-balanced cleaners designed for composite decking, ensuring the integrity of the material remains intact.

How Long Does It Take for Treated Wood to Dry: Key Factors and Insights
Treated wood undergoes a specific process to enhance its durability and resistance to environmental factors.
When working with treated wood, understanding the drying process is crucial for achieving the best results in your projects. Typically, treated wood takes anywhere from 2 to 6 months to dry adequately, depending on various factors such as the type of wood and environmental conditions. Moisture content plays a significant role; if the wood is freshly treated, it may require more time to reach a suitable dryness level before you can safely stain or paint.
Different types of treated wood may also affect drying times. For instance, softwoods like pine often dry faster compared to hardwoods due to their cellular structure. Additionally, humidity and temperature in your area can either accelerate or delay the drying process, so it's wise to consider your local climate when planning your project.
With proper attention to these factors, you can optimize the drying time of treated wood and ensure that it performs well in your applications. Knowing how long you should wait can save you time and help prevent issues down the line.
Understanding Treated Wood
Treated wood undergoes a specific process to enhance its durability and resistance to environmental factors. Knowing the treatment process and types of treated lumber can significantly benefit your woodworking projects.
Treatment Process
The treatment process for wood typically involves the application of chemicals under pressure. This ensures that the preservatives penetrate deeply, providing better protection against rot, insects, and decay.
Common chemicals used in this process include copper-based compounds and other biocides. These treatments can also impart a greenish tint to the wood, which is a visual indicator of its treatment status.
Pressure-treated wood, often referred to as pressure-treated lumber, is usually dried after treatment to stabilize moisture content. This drying can be done in a kiln or through air drying. You might encounter KDAT (kiln-dried after treatment) wood, which offers reduced shrinkage and better dimensional stability compared to untreated wood.
Types of Treated Lumber
Various types of treated lumber are available, each suited for specific applications. The most common type is pressure-treated wood, which is ideal for outdoor projects such as decking, fencing, and structural supports.
Another type is ground-contact treated lumber, which is infused with heavy-duty preservatives for direct soil contact. This is crucial for projects like fence posts or deck supports that may be exposed to moisture.
Additionally, above-ground treatment is designed for use in environments where the wood is not in constant contact with water. This type of treated lumber is suitable for outdoor furniture and garden beds.
By understanding these treatments and types, you can make informed decisions for your woodworking needs.
Factors Influencing Drying Time
The drying time of treated wood is affected by various factors that are crucial for achieving optimal results. Key elements include the species and thickness of the wood, environmental conditions, and the treatment process itself, as these all play significant roles in how quickly your wood will dry.
Wood Species and Thickness
Different wood species have varying densities and moisture retention capacities, which influences drying times. For instance, hardwoods like oak and maple tend to retain moisture longer than softer woods such as pine.
Additionally, the thickness of the wood directly impacts drying. Thicker pieces will require more time to lose moisture. For example, pressure-treated fence boards may dry within 24 to 72 hours, while thicker posts may need 1 to 2 weeks or more.
Key Considerations:
Hardwoods typically take longer to dry than softwoods.
Thicker wood sections will require extended drying times.
Environmental Conditions
Environmental factors like temperature, humidity, and air circulation are crucial for effective drying. Higher temperatures generally speed up the drying process, while lower temperatures can extend it.
Humidity levels also have a significant impact; higher humidity typically slows drying by creating a more saturated environment that inhibits moisture evaporation from the wood. Using fans can enhance air circulation, promoting faster drying, especially in humid conditions.
Influential Factors:
High temperature: Speeds up drying.
High humidity: Slows down the drying process.
Good airflow: Promotes efficient moisture evaporation.
Wood Treatment and Moisture Level
The type of treatment applied to wood impacts its initial moisture content. Pressure-treated wood often comes with a higher moisture level due to the treatment process. This excess moisture must evaporate before you can apply finishes like stains or sealants.
To determine when your treated wood is ready, conduct a simple water test: if water beads on the surface, more drying time is needed. Monitoring moisture levels throughout the drying process ensures superior results in your projects.
Focus Areas:
Initial moisture content: Affects drying duration.
Treatment process: Influences how long the wood retains moisture.
Water test: Helps assess readiness for finishing.
Measuring and Assessing Moisture Content
Understanding moisture content is crucial when working with treated wood. Accurate measurements help prevent issues such as warping and mold growth. You have several methods available to assess moisture levels effectively.
Using a Moisture Meter
A digital moisture meter is the most reliable tool for assessing moisture content in wood. These devices measure the electrical conductivity of the wood, providing a quick reading of moisture levels.
Typical readings for treated wood should be between 15% to 19% moisture content. To use a moisture meter, simply insert the prongs into the wood and wait for a few seconds to get an accurate reading.
Always ensure the meter is calibrated and suited for lumber, as different types can yield varying results. Regular checks with this tool can guide you on when your wood is adequately dried.
Other Moisture Assessment Techniques
If you don’t have a moisture meter, there are alternative methods.
The touch test involves feeling the surface of the wood; if it feels cool and damp, moisture levels are likely high. This method, while not precise, can indicate whether further drying is needed.
Another effective method is the water test. Apply a few drops of water onto the wood surface; if it beads up, the wood is likely dry. If the water is absorbed, then moisture is present.
While these methods lack the accuracy of a digital moisture meter, they can provide useful insights to guide your drying process. Using a combination of these techniques can enhance your ability to gauge moisture content properly.
Drying Methods and Accelerating Drying
When it comes to drying treated wood, choosing the right method can significantly affect the outcome. By understanding various techniques and strategies, you can ensure the wood dries properly while minimizing the risk of warping and damage.
Natural Air-Drying Techniques
Air-drying is a common and effective method for drying treated wood. It relies on natural airflow and sunlight to facilitate moisture evaporation. For optimal results, stack the wood properly by using stickers or spacers to allow air to circulate around each piece.
Ensure that your wood is elevated off the ground. This minimizes moisture absorption from the soil. Direct sunlight exposure can further enhance drying efficiency. However, be cautious, as prolonged exposure can lead to surface cracking.
The drying time can vary between 2 to 5 days per inch of thickness in ideal conditions. Checking the moisture content regularly helps determine when the wood is ready for sealing or staining.
Accelerating the Drying Process
If you need to speed up the drying of pressure-treated wood, consider utilizing dehumidifiers in conjunction with air circulation. These devices help reduce humidity levels, especially in enclosed spaces, thus facilitating quicker moisture removal.
Kiln drying is another effective method for rapid drying. A wood kiln increases air temperature and improves airflow, drastically reducing drying time. It can take anywhere from a few hours to several days, depending on the kiln's design and settings.
Proper stacking remains crucial, as well as maintaining a consistent airflow. Remember that the faster you dry the wood, the more you need to monitor it to avoid damage or warping.
Avoiding Warping and Damage
To prevent warping during the drying process, it’s essential to maintain a balanced drying environment. Rapid drying can lead to uneven moisture loss, causing pieces to twist or bend.
Using weight on heavier pieces can help minimize movement. Additionally, avoid placing freshly treated wood directly in strong sunlight for extended periods. Instead, create a shaded drying area that allows for gradual moisture loss.
Regularly check for signs of moisture unevenness, such as soft spots or changes in color. Addressing issues promptly can save you from costly waste and ensure your wood remains usable for your projects.
Best Practices for Storing and Handling Treated Wood
Proper storage and handling of treated wood are essential for maintaining its quality and ensuring optimal drying. You can take specific steps to protect your investment while speeding up the drying process.
Proper Stacking and Spacing
When storing treated wood, ensure that you stack the boards in a way that promotes air circulation. Use spacers between each layer to allow air to flow freely. This will help reduce moisture retention and subsequently speed up drying.
Aim to stack the wood off the ground on a flat, stable surface. Using treated wood pallets or platforms will help avoid direct contact with moisture. Vertical stacking may also work, but ensure the wood remains stable to prevent shifts.
Avoid placing heavy objects on the stacks to prevent warping or crushing. Applying end sealing on cut ends can also help minimize moisture absorption. Always check stability and adjust spacing as necessary.
Maintaining Optimal Drying Conditions
Maintaining optimal drying conditions is crucial for treated wood. Store the wood in a well-ventilated area protected from rain and extreme humidity. Natural airflow will help remove excess moisture more efficiently.
If possible, position your stacks under a shade structure to avoid direct sunlight exposure, which can cause uneven drying and warping. Monitor the temperature; aim for 70°F to 90°F for ideal drying.
Using a dehumidifier can also enhance the environment by reducing moisture in the air. Regularly inspect your wood for signs of moisture buildup, and adjust your storage method as necessary to combat these issues.
Frequently Asked Questions
Understanding the drying process for treated wood can help you achieve better results in your projects. The following questions address common concerns about drying times and techniques.
Should pressure treated wood be dried before installation, and if so, for how long?
Yes, pressure treated wood should be allowed to dry before installation to reduce moisture-related issues. Typically, it is advisable to dry the wood for at least a few days to a week, depending on environmental conditions and the specific treatment used.
What is the recommended drying time for pressure treated wood before painting?
It's recommended to wait at least 30 days before painting pressure treated wood. This allows enough time for the wood to dry properly, ensuring better paint adhesion and longevity of the finish.
How long should pressure treated wood be left to dry prior to staining?
You should let pressure treated wood dry for about 3 to 12 months before staining. The exact time depends on factors like climate and wood species, so check moisture levels to determine readiness.
What are the methods for drying pressure treated wood to avoid warping?
To avoid warping, consider using air circulation or fans to enhance natural drying. Stacking the wood with spacers and keeping it off direct ground contact can also help moisture escape evenly.
How can you determine if pressure-treated wood is sufficiently dry for use?
You can check moisture levels using a moisture meter. Ideally, pressure treated wood should have a moisture content below 19% for optimal stability and performance.
Are there techniques to expedite the drying process of treated wood?
To expedite drying, place the wood in a well-ventilated area with low humidity. Direct sunlight and fans can also help, but be cautious to prevent direct, harsh conditions that may cause uneven drying.

Lumber Rock Decking: A Durable and Sustainable Choice for Outdoor Spaces
Lumberock decking offers an innovative alternative to traditional wood decking.
When considering options for your outdoor space, durability and aesthetics are key factors. Lumberock decking is an excellent choice for those seeking a long-lasting solution that combines strength with visual appeal. This innovative product is made from a composite of plastic and mineral compounds, offering resistance to rot, decay, and extreme weather conditions, making it particularly suitable for Utah's varied climate, including snowy winters.
Choosing quality materials is crucial for building structures that can withstand harsh elements. With Lumberock, you gain the advantage of a non-porous surface that reduces maintenance and enhances longevity. When coupled with expert construction techniques, like those offered by Salt City Decks, your decking can endure the test of time while maintaining an inviting appearance.
By investing in high-quality craftsmanship, you not only ensure the structural integrity of your decking but also create an attractive outdoor area that enhances your property’s appeal. Salt City Decks focuses on these principles to deliver exceptional results tailored to your needs.
Understanding Lumberock Decking
Lumberock decking offers an innovative alternative to traditional wood decking. It combines advanced materials with thoughtful design to provide durability and aesthetic appeal for your outdoor spaces.
Materials and Composition
Lumberock decking is primarily made from high-density polyethylene plastic and a mineral-fill compound. This unique composition results in a solid, non-porous material that won't splinter, crack, or rot.
Recycled Content: Lumberock incorporates approximately 95% recycled content, sourced from reclaimed wood and plastic, making it an environmentally friendly choice.
Innovative Extrusion Technology: The fabrication process uses advanced extrusion technology, which ensures a consistent finish and protection from the elements.
You can expect a reliable product that withstands various weather conditions, including snow, which is especially relevant in Utah.
Benefits of High-Density Polyethylene Plastic
High-density polyethylene (HDPE) plastic offers several advantages that enhance the performance of Lumberock decking.
Durability: HDPE is resistant to moisture, mildew, and UV rays, which prevents deterioration over time. This resilience makes it ideal for areas with harsh climates.
Maintenance-Free: With no need for sealing, staining, or painting, you save both time and money on upkeep. Simply clean with soap and water to maintain its appearance.
The combination of these factors results in a decking solution that not only lasts but also maintains its beauty, making it an appealing choice for your outdoor living spaces. Consider Salt City Decks for your decking needs to ensure a high-quality installation tailored to your specific environment.
Design and Style Options
When selecting Lumberock decking, you can enhance both functionality and aesthetics. The choices you make in color and design can transform your outdoor space into a stunning area that suits your lifestyle. Consider how these elements contribute to creating a harmonious outdoor environment.
Color Selection and Aesthetic Appeal
Lumberock decking offers a variety of colors that complement any outdoor aesthetic. Popular color options include deep hues like espresso and slate, which provide a rich backdrop against natural landscaping. Lighter shades such as driftwood and light gray can create a more open and airy feel.
When choosing a color, consider the overall design theme of your home and surroundings. Utilizing contrasting colors for trim can enhance visual interest. Remember, the right colors not only improve appeal but also contribute to the heat reflection of the deck, an important factor in sunnier locations.
Creating an Outdoor Oasis
Designing your outdoor oasis with Lumberock decking involves more than just choosing a material. Plan spaces for seating, dining, and entertainment to maximize usage. Incorporate built-in benches and flower boxes to personalize your area.
Utilizing quality materials maximizes longevity, ensuring your deck withstands Utah’s seasonal weather variations. Attention to detail is key; for example, proper spacing between joists enhances stability. By focusing on craftsmanship and style, you create a durable, visually appealing space perfect for relaxation and gatherings.
Durability and Maintenance
When considering Lumberock decking, two critical aspects stand out: its superior durability against the elements and its minimal maintenance needs. This makes it an excellent choice for homeowners looking for longevity and ease of care.
Weather Resistance and Longevity
Lumberock premium decking is engineered for exceptional weather resistance. It features a waterproof and impenetrable surface that withstands the harsh effects of rain, snow, and UV rays. This resilience means you won’t see noticeable fading or deterioration over time, even in Utah’s varied climate.
The material is designed to resist mold and mildew, keeping your outdoor space looking pristine. With proper installation and care, you can expect a lifespan that outlasts traditional wood options. This long-lasting durability makes Lumberock a smart investment for anyone looking for premium decking solutions.
Ease of Cleaning and Care
One of the standout features of Lumberock decking is its ease of cleaning. Regular maintenance is minimal; typically, a simple wash with soap and water is all that’s required to keep your deck looking its best. Stains from spills do not penetrate the surface, making cleanup straightforward.
Moreover, the surface is resistant to mold and mildew, reducing the frequency of deep cleaning. This means you can spend more time enjoying your outdoor space instead of maintaining it. The result is a beautiful, hassle-free deck that enhances your home’s value and aesthetic appeal.
Environmental Considerations
When choosing decking materials, it's crucial to focus on sustainability features and compliance with green building practices. Understanding these aspects will guide you in making a responsible choice for your outdoor spaces.
Sustainability Features
Lumber rock decking incorporates recycled plastic, which minimizes the need for new raw materials. This feature significantly reduces waste and contributes to sustainable manufacturing practices.
You’ll find that this type of decking is long-lasting and requires less maintenance than traditional materials. It eliminates the risk of rotting and splintering, promoting a healthier environment.
Moreover, using materials that are resistant to harsh weather, such as the snow common in Utah, ensures your deck remains intact and visually appealing throughout the year. This reduces waste from replacements and repairs, making it an environmentally sound choice.
Green Building Compliance
Lumber rock decking often meets various green building standards, making it an attractive option for eco-conscious consumers. By selecting materials with strong sustainability credentials, you can ensure compliance with local green building codes.
This compliance often supports projects aiming for LEED certification, which focuses on sustainable site development and resource conservation. Choosing compliant materials not only strengthens your project but enhances its marketability.
For outdoor structures in snowy climates, like those in Utah, investing in decking solutions that prioritize durability and environmental responsibility pays off in longevity and performance, creating a beautiful, sustainable outdoor space.
Decking Performance Factors
When considering decking materials, two critical performance factors to evaluate are traction and safety, along with fade and stain resistance. These aspects significantly influence the longevity and usability of your deck, especially in regions that experience various weather conditions.
Traction and Safety
Traction is vital for preventing slips and falls, particularly during rain or after snow in areas like Utah. Composite lumber, such as Lumberock, is engineered to provide excellent traction. This is essential for maintaining safety when the deck is wet or icy.
Key Features:
Textured Surface: Many composite options feature a textured surface that enhances grip.
No Organic Fills: Lumberock uses no organic fills, which can degrade over time and reduce traction.
By selecting materials with these attributes, you can ensure a safe environment for your family and guests, while also minimizing maintenance related to wear.
Fade and Stain Resistance
Fading and staining can detract from the aesthetic appeal of your deck. Using a durable composite material helps combat these issues effectively. Lumberock’s mineral-based composition resists fading, alongside offering a range of colors that stay vibrant longer.
Key Advantages:
UV Protection: Advanced UV protection helps minimize fading from sun exposure.
Easy Cleaning: Stain resistance allows for simple maintenance, keeping your deck looking new.
Investing in a material that performs well in these areas not only enhances the lifespan of your deck but also maintains its visual appeal through years of use.
Warranty and Investment Protection
When investing in Lumberock decking, understanding the warranty and protection offered is crucial. A comprehensive warranty provides peace of mind, ensuring your investment remains secure over time.
Coverage and Assurance
Lumberock offers a Limited Lifetime Warranty, ensuring that your decking remains free from defects in material and workmanship. This warranty is designed to protect against issues such as rotting, cracking, and splintering, which can compromise the structural integrity of your deck.
To file a warranty claim, you must complete a specific form, providing details about your purchase and the issues encountered. This process ensures that your claim is processed efficiently.
With Salt City Decks' high-quality craftsmanship, you can be confident that your decking will withstand harsh Utah winters. Utilizing quality materials and precise construction techniques will further enhance the longevity of your deck, providing you with lasting beauty and stability. Investing in these features not only protects your investment but also elevates the overall appeal of your property.
Frequently Asked Questions
When considering composite decking, you may have several important questions about its durability, color options, installation guidelines, and sustainability. This section addresses these common inquiries to help you make informed decisions.
How do composite deck materials compare in durability and cost?
Composite deck materials are often more durable than traditional wood decks due to their resistance to rot, splintering, and insect damage. While the initial cost may be higher, the longevity and low maintenance needs often result in cost savings over time.
What color options are available for composite decking?
Composite decking typically offers a wide range of color options, allowing you to customize your outdoor space. Common choices include earth tones, grays, and browns, which can complement various architectural styles and landscaping.
What are the typical installation guidelines for composite decking?
Installation guidelines for composite decking generally recommend spacing boards properly to allow for expansion and contraction. Ensure that the underlying structure is sound, and follow manufacturer specifications, including appropriate fasteners and support spacing, to achieve the best results.
What are the pros and cons of using composite decking for marine applications?
Composite decking can be beneficial for marine applications due to its resistance to moisture and staining. However, you should consider factors like slip resistance and weight capacity, as some materials may not perform optimally in all marine conditions.
What constituents are involved in the manufacturing of composite decking?
The manufacturing of composite decking typically involves a blend of recycled plastic and wood fibers. This combination offers strength, durability, and sustainability, creating a product that performs well in outdoor environments.
How does composite decking sustainability compare to traditional wood decking?
Composite decking is often viewed as a more sustainable choice compared to traditional wood. Its use of recycled materials reduces waste, and it generally requires less maintenance, minimizing the need for chemicals and preservatives that can impact the environment.

Pressure Treated Wood vs Cedar Deck: Key Differences and Considerations
When deciding between cedar and pressure-treated wood for your deck, it's essential to evaluate their natural resistance, durability, and aesthetic appeal.
When considering a deck for your outdoor space, the choice between pressure-treated wood and cedar can significantly impact the longevity and appearance of your investment. Pressure-treated wood is generally more durable and resistant to moisture and insects, making it a practical choice for those seeking a long-lasting option. Cedar, on the other hand, offers natural beauty and rot resistance but may require more maintenance over time.
Understanding the distinct properties of each type of wood will help you make an informed decision tailored to your specific needs. For example, while cedar boasts an attractive, rustic look that many homeowners desire, pressure-treated wood excels in strength and can withstand harsh weather conditions.
As you weigh your options, consider factors such as cost, maintenance, and aesthetic preferences. This will guide you in selecting the best material to enhance your outdoor living experience.
Comparing the Qualities of Cedar and Pressure-Treated Wood
When deciding between cedar and pressure-treated wood for your deck, it's essential to evaluate their natural resistance, durability, and aesthetic appeal. Each material has unique qualities that can impact the longevity and visual impact of your outdoor space.
Natural Resistance and Durability
Cedar, particularly Western Red Cedar, is well-known for its natural resistance to decay and rot. This wood contains natural oils that help to repel insects and resist moisture, making it a suitable choice for outdoor applications. On the other hand, pressure-treated lumber undergoes a chemical process that enhances its durability and weather resistance.
While both options are durable, the longevity can depend on specific environmental conditions. Cedar requires regular maintenance, including sealing and staining, to retain its rot-resistant properties. In contrast, pressure-treated wood is often more robust against harsh weather but may require treatment to prevent warping or splintering over time.
Aesthetic Differences and Visual Appeal
The natural beauty of cedar is a significant factor for many homeowners. Its warm tones and distinct grain patterns provide an inviting and rustic look that enhances any outdoor setting. Cedar's aesthetic appeal lies in its ability to blend with natural surroundings, offering a visual charm that many prefer.
Conversely, pressure-treated wood typically has a more uniform appearance, often with a greenish or brown tint due to the treatment chemicals. While it can be painted or stained, it may not achieve the same level of richness as cedar without additional effort. If aesthetics are a priority for your deck, cedar's natural look can be a strong selling point.
Maintenance and Longevity Concerns
Understanding the maintenance requirements and projected lifespan of both pressure-treated wood and cedar decking will help you make an informed choice. Here’s a detailed look at what to expect with each material.
Maintenance Requirements Over Time
Pressure-treated wood typically requires less frequent maintenance compared to cedar. Its chemical treatment enhances resistance to rot and insects, leading to lower upkeep needs. However, you still need to inspect for signs of wear or damage periodically.
To maintain its condition, apply a stain or sealer every 2-3 years. This will help protect against moisture and UV rays. Cleaning the surface with soap and water will also prolong its lifespan.
Cedar decking, while beautiful, demands more attention. You should apply a protective sealer annually to maintain its rich color and resistance to decay. Regular cleaning is necessary to prevent mold buildup, which can occur in humid conditions.
Projected Lifespan of Decking Materials
The lifespan of pressure-treated wood can exceed 20 years with proper maintenance, making it a durable option for outdoor projects. It stands well against various environmental conditions due to its enhanced resilience.
In contrast, cedar decking has a projected lifespan of 15-25 years, depending on factors such as regional climate and maintenance habits. Its natural beauty may fade without protective measures, but many find the aesthetics worth the extra upkeep.
Geographical location and exposure to moisture also play significant roles in longevity. Be sure to consider local conditions when selecting your decking material for optimal lifespan.
Environmental and Health Considerations
Selecting between pressure-treated wood and cedar for your deck extends beyond aesthetics and durability. You should consider their environmental and health impacts, including how the wood is treated and sourced.
Chemical Treatments and Eco-Friendliness
Pressure-treated lumber utilizes chemical preservatives to ward off rot and insect damage. Common treatments include chromated copper arsenate (CCA) and alkaline copper quat (ACQ). While effective, these chemicals raise health concerns about leaching into the soil and affecting nearby plants and animals.
On the other hand, cedar wood is valued for its natural resistance to decay and pests, eliminating the need for toxic treatments. Its natural oils make it inherently durable, providing an eco-friendly option for decking. Cedar is biodegradable, making it a sustainable choice that minimizes environmental impact.
Sustainability of Wood Sources
Sourcing practices significantly influence the sustainability of both cedar and pressure-treated wood. Cedar is often harvested from managed forests, which can be certified by organizations like the Forest Stewardship Council (FSC). This certification ensures responsible forestry practices that maintain biodiversity and protect ecosystems.
In contrast, pressure-treated lumber may originate from less sustainable sources. The wood’s treatment process also relies on chemicals that can impact local ecosystems. Choosing responsibly sourced cedar or FSC-certified pressure-treated wood helps ensure you are supporting sustainable forestry efforts while enhancing the ecological balance in your area.
Practical Aspects of Building a Deck
When constructing a deck, understanding the material differences is crucial for achieving structural integrity and long-lasting performance. Cedar and pressure-treated wood present unique characteristics that impact your choice for outdoor projects.
Structural Strength and Deck Construction
Structural strength is essential when selecting lumber for your deck. Pressure-treated wood, often made from Southern Yellow Pine, boasts a high strength-to-weight ratio that makes it suitable for joists and support beams. This lumber can handle significant weight, ensuring stability for your deck.
Cedar lumber, while slightly less durable than pressure-treated options, is still a popular choice due to its natural beauty and resistance to warping. It can support moderate loads effectively, though care should be taken with spacing and support design.
When constructing your deck, consider the type of fasteners and connectors as well. Galvanized or stainless steel hardware is preferred for securing wood types, preventing rust and maintaining strength.
Weather Resistance and Outdoor Suitability
Weather resistance is a critical factor when choosing your decking material. Pressure-treated wood is treated with chemical preservatives, making it highly resistant to rot, insects, and decay. This characteristic allows for longevity, making it ideal for the harshest outdoor conditions.
Cedar, on the other hand, has natural oils that repel moisture and insects, offering some level of protection. This makes cedar suitable for mild environments but may require regular maintenance to preserve its appearance and integrity.
In regions with extreme weather conditions, pressure-treated wood might be the wiser option due to its durability. Regular sealing and staining can enhance cedar's weather resistance, but this adds to maintenance efforts. Understanding these differences aids in making an informed decision for your outdoor project.
Cost and Budget Considerations
When planning your project, understanding the costs associated with pressure-treated wood and cedar is essential. These costs can impact your budget both initially and in the long term, including disposal expenses after the wood's lifespan.
Initial Investment and Long-Term Value
Pressure-treated lumber typically has a lower initial cost. Prices range from $1 to $5 per linear foot, making it an attractive option for those on a budget. In contrast, dimensional cedar lumber costs between $3 and $10 per linear foot, reflecting its higher quality and aesthetic appeal.
While pressure-treated wood is cost-effective upfront, cedar offers excellent rot resistance and lasts longer, often exceeding 20 years with proper maintenance. The long-term value depends on your environment and usage. If you opt for cedar, anticipate higher maintenance costs, including staining and sealing for longevity.
Disposal and End-of-Life Expenses
Disposal costs can fluctuate based on the type of wood. Pressure-treated wood may incur additional expenses due to chemical treatments used in its composition. You might need special handling or disposal for fence posts or decking, which could impact your budget.
Cedar, being a natural material, is generally easier to dispose of and may not require the same level of special treatment. However, consider the implications of disposal when budgeting for your project. Cost considerations should include both types of wood's end-of-life management alongside initial purchases to avoid unexpected financial burdens.
Frequently Asked Questions
When choosing between cedar and pressure-treated wood for your deck, you may have several specific questions. This section addresses key considerations, including pros and cons, costs, longevity, maintenance, and suitability for different climates.
What are the pros and cons of cedar decking compared to pressure treated wood?
Cedar decking offers natural beauty and resistance to warping and splitting. Its aromatic oils provide some resistance to insects. However, it may require more frequent maintenance due to its susceptibility to rot and decay compared to pressure-treated wood, which is treated with chemicals for increased durability.
How do the costs of installing a cedar deck compare to a pressure-treated wood deck?
Cedar is typically more expensive than pressure-treated wood due to its aesthetic appeal and natural properties. Installation costs can also vary based on local labor rates. While cedar may cost more upfront, pressure-treated wood usually requires a lower investment initially but may incur higher maintenance costs over time.
What is the expected longevity of cedar decking versus pressure-treated wood when used outdoors?
Cedar decking can last around 15 to 25 years with proper maintenance, whereas pressure-treated wood often lasts 20 years or more. The chemical treatment in pressure-treated wood enhances its resistance to rot and pests, contributing to a longer lifespan when maintained correctly.
What are the main disadvantages of using cedar for decking?
The primary disadvantages of cedar decking include its higher cost and the need for regular maintenance. Cedar can be more prone to fading and surface checking if not properly sealed. Additionally, it may require more frequent inspections and treatments to prevent decay and insect damage.
How do cedar and pressure-treated wood differ in terms of maintenance needs for outdoor decks?
Cedar requires regular sealing or staining to maintain its appearance and protect it from moisture. It's advisable to inspect cedar decks annually. In contrast, pressure-treated wood needs less frequent attention but should still be sealed periodically to extend its lifespan and maintain its integrity.
Which type of wood is more suitable for a deck in a high-moisture climate: cedar or pressure-treated?
In high-moisture climates, pressure-treated wood is generally more suitable due to its chemical treatment that enhances resistance to rot and insect damage. While cedar has some natural resistance, it may not hold up as well in consistently damp conditions, necessitating more rigorous maintenance.

Painting Composite Decking Material: A Comprehensive Guide to Best Practices and Tips
Composite decking is a popular choice for outdoor spaces due to its durability and aesthetic appeal.
If you're looking to refresh your outdoor space, painting composite decking can be a viable option. While not all composite materials are suitable for painting, older uncapped boards can often be transformed with the right approach. This method not only enhances the visual appeal of your deck but can also extend its lifespan when done correctly.
Composite decking is known for its durability and low-maintenance benefits, making it a popular choice for homeowners. However, with time, even the best materials may start to show signs of wear. Painting your composite decking can provide a new lease on life, allowing you to match your deck's color to your home's exterior or landscape design.
Living in Utah, where snow and changing weather conditions can impact outdoor structures, ensuring your deck remains sturdy is crucial. High-quality craftsmanship, along with careful attention to detail, can significantly improve the durability of your painted deck. To explore this option and achieve lasting results, consider reaching out to Salt City Decks for expert guidance on your decking needs.
Understanding Composite Decking
Composite decking is a popular choice for outdoor spaces due to its durability and aesthetic appeal. This section explores the composition of composite decking and the necessary maintenance to ensure its longevity.
Composition and Types
Composite decking typically combines wood fibers and recycled plastic to create a material that mimics the appearance of wood while offering enhanced durability. There are two main types:
Capped Composite Decking: This type features a protective PVC cap that shields the wood fibers from moisture and UV damage, resulting in greater longevity and less maintenance.
Early Generation Composite Material: Older composites lack the protective cap and may be more susceptible to fading and moisture issues compared to newer options.
Popular Brands: Notable brands like Trex offer high-quality capped composites designed to resist weather elements, making them suitable for varied climates, including areas with snowfall.
Maintenance of Composite Decking
To maintain the integrity of your composite decking, proper care is essential. Here are key maintenance tips:
Regular Cleaning: Use a hose and a soft-bristle brush with mild soap to remove dirt and debris. This prevents mold and mildew buildup.
Inspect for Damage: Routinely check for signs of wear, such as cracking or fading, especially in older composites.
Avoid Harsh Chemicals: Stick to gentle cleaners that won't harm the surface.
Investing time in maintaining your composite decking contributes to its durability, ensuring it remains an attractive feature of your outdoor space for years to come. Salt City Decks can provide the quality craftsmanship needed for your decking projects in Utah’s challenging weather.
Preparation for Painting
Proper preparation is crucial for achieving a long-lasting finish when painting composite decking. This process involves thorough cleaning and careful surface preparation to ensure paint adheres effectively and the final result is visually appealing.
Cleaning the Deck
Start by selecting a deck cleaner that’s suitable for composite materials. Clear the deck of furniture and debris. Using a pressure washer, apply the cleaner to remove dirt, mildew, and any previous coatings. Ensure you follow the manufacturer’s instructions on dilution and application methods.
After washing, rinse the surface thoroughly to prevent any cleaner residue from affecting paint adhesion. Allow the deck to dry completely, which may take 24 to 48 hours depending on weather conditions. A clean, dry surface is essential for optimal results and will significantly enhance the longevity of your paint job.
Surface Preparation
Once the deck is clean, you need to prepare the surface for painting. Check for any rough spots or imperfections. If necessary, use fine-grit sandpaper to sand the deck lightly. This helps to smooth out surfaces and improve paint adhesion without damaging the composite material.
Inspect the deck for any potential issues, such as cracks or peeling areas. If you find any, address them before painting, as this will ensure a better finish. Finally, use high-quality brushes and choose paint specifically designed for composite surfaces to guarantee durability and resistance against Utah’s harsh weather conditions.
Choosing the Right Paints and Stains
Selecting the appropriate paint or stain for your composite decking is crucial for enhancing its appearance and longevity. The right choice will protect your deck from UV damage and moisture, ensuring it maintains its beauty over time.
Paint and Stain Options
You have several options when it comes to painting or staining your composite deck. Acrylic latex paints are popular due to their durability and flexibility. They offer good adhesion and are resistant to fading.
Oil-based paints provide excellent coverage and durability but may require longer drying times and more maintenance. For those looking for a more natural finish, composite deck stains are available. These come in solid or semi-transparent varieties, providing an attractive appearance while allowing some of the wood's texture to show through.
High-quality exterior paint or stain is essential to ensure longevity. Invest in products specifically formulated for composites, as they offer better protection against the elements, especially in areas like Utah, where snow and harsh weather are common.
Factors to Consider
When selecting paint or stain for your composite decking, consider the following factors:
Durability: Look for high-quality paints that resist chipping and fading. Products with UV protection are preferable.
Finish: Decide if you want a glossy or matte finish. This will affect the appearance and maintenance of your deck.
Application: Ensure you select a paint or stain that’s easy to apply. Water-based paints can be easier to work with compared to oil-based options.
Climate Resistance: Choose products designed for your local climate conditions. For snowy areas like Utah, opt for those with moisture resistance.
By taking these aspects into account, you can make a more informed decision that not only enhances the aesthetic appeal of your deck but also increases its lifespan. For expert assistance in selecting the best options for your specific needs, reach out to Salt City Decks.
The Painting Process
Painting composite decking requires careful attention to detail to ensure lasting results and protection. Proper preparation and technique are essential for achieving a smooth and professional finish on your deck.
Applying Primer
Start by selecting a primer specifically designed for composite decking. A quality primer ensures better paint adhesion and enhances the longevity of your paint job.
Surface Preparation: Thoroughly clean the decking surface using a power washer or a stiff brush to remove dirt and debris. Make sure it is completely dry before proceeding.
Application: Use a brush or roller to apply an even coat of primer. Focus on edges and hard-to-reach areas to avoid any missed spots.
Drying Time: Allow the primer to dry according to the manufacturer's instructions, usually for several hours. This step is crucial for optimal adhesion when you apply the paint.
Applying Paint or Stain
Choosing the right paint or stain is vital for protecting your composite decking. Look for products specifically formulated for composite materials.
Selection: Opt for acrylic or epoxy paints that provide moisture resistance and UV protection. These options are durable and can significantly enhance the appearance of your deck.
Application Method: Use a high-quality brush, roller, or paint sprayer for application. Apply a thin, even coat, and avoid over-saturating the surface to prevent drips.
Multiple Coats: For better coverage, consider applying a second coat once the first has dried completely. Follow the drying times recommended by the manufacturer.
By following these steps for priming and painting, you will enhance the durability and visual appeal of your composite decking. This will ensure your outdoor space remains attractive and functional throughout the seasons.
Post-Painting Care and Maintenance
Proper care and maintenance after painting your composite decking are essential for preserving its appearance and ensuring durability. Focus on protecting the newly painted surface from harsh weather and establish a routine to keep your deck in great shape.
Durability and Weather Considerations
In Utah's varied climate, your painted composite decking is subjected to harsh weather conditions, including snow and UV rays. To combat potential damage, consider applying a waterproofing sealer. This adds a protective layer that enhances UV resistance while preventing moisture penetration.
Choosing high-quality paints with UV inhibitors will also extend the life of your finish. Regularly inspect the surface for signs of wear or peeling, particularly after severe weather events, and promptly address any issues. A glossy finish can help repel dirt, making maintenance easier over time.
Routine Maintenance
Routine maintenance is crucial for painted composite decking. Use a gentle deck cleaner to remove dirt and debris; avoid harsh chemicals that could strip the paint. Clean the surface at least twice a year, particularly after winter.
Regular touch-ups of the painted areas can help maintain the aesthetic appeal of your deck. Pay special attention to the edges and corners where wear may be more pronounced. Keeping up with routine care ensures that your deck remains visually appealing and protected against the elements.
Frequently Asked Questions
When considering painting composite decking, it's important to address common inquiries related to paint types, application methods, and durability. The following sections cover key aspects to help you make informed decisions.
What type of paint adheres best to composite decking?
For composite decking, the best paint options are latex acrylic paints designed for exterior surfaces. These paints offer durability and flexibility, which helps them adhere to the material effectively. Always choose paint labeled for harsh weather conditions to ensure long-lasting results.
Can you paint composite decking to mimic the appearance of wood?
Yes, you can paint composite decking to achieve a wood-like finish. You’ll want to choose colors and textures that replicate natural wood. Applying a wood-grain faux technique can enhance the visual effect, making your composite decking resemble traditional wood surfaces.
What are the necessary steps for painting composite decking?
Start by cleaning the decking thoroughly to remove any dirt, mildew, or debris. Next, sand the surface lightly to improve paint adhesion. After that, apply a primer specifically designed for composite materials, followed by your chosen paint. Allow adequate drying time between coats for the best finish.
Is it possible to change the color of composite decking?
Yes, you can change the color of composite decking through painting. Ensure that you select high-quality paint suitable for composite surfaces to avoid premature wear. Keep in mind that the color change may affect the final aesthetics, so choose a shade that complements your outdoor space.
How does painted composite decking hold up over time?
Painted composite decking can last several years, but its longevity depends on factors like weather exposure and maintenance. Regular cleaning and periodic touch-ups will help maintain the appearance and protect against fading or peeling. Quality paints designed for outdoor use significantly enhance durability.
Can staining be an alternative to painting on composite decking?
Staining is indeed an alternative to painting and can enhance the natural look of the decking while providing protection. Stains penetrate the surface, offering a more integrated color solution. Consider using semi-transparent or solid stains formulated for composite materials for effective results.

Pressure Treated Lumber Deck Railing: A Durable Choice for Outdoor Spaces
Pressure treated lumber is wood that has been treated with chemical preservatives.
When it comes to enhancing the safety and aesthetic appeal of your outdoor space, pressure treated lumber deck railing is an excellent choice. This type of lumber is specifically designed to resist rot, decay, and insect damage, ensuring that your deck railing will stand the test of time. Investing in pressure treated wood not only adds visual interest to your deck but also provides a sturdy barrier that enhances your overall outdoor experience.
You might be wondering what the advantages of using pressure treated lumber are compared to other materials. Beyond its durability, pressure treated lumber is often more cost-effective than alternatives like composite or vinyl. It can be easily customized with stains or paints, allowing you to match your home’s aesthetic while maintaining the strength and resilience necessary for outdoor conditions.
As you consider your options for deck railings, understanding the benefits and maintenance requirements of pressure treated wood is crucial. With the right care, pressure treated lumber can maintain its integrity and look great for years to come, making it a sound investment for your outdoor living area.
Understanding Pressure Treated Lumber
Pressure treated lumber is wood that has been treated with chemical preservatives. This process protects it from rot, insects, and harsh weather conditions. It extends the lifespan of the wood, making it suitable for outdoor use.
When choosing pressure treated lumber, consider the following key points:
Treatment Process: The wood is placed in a chamber where preservatives are forced deep into its fibers under high pressure.
Common Chemicals: Typical preservatives include ACQ (Alkaline Copper Quaternary) and MCA (Micronized Copper Azole), which resist decay and insect activity.
Uses: You often find pressure treated lumber in decks, railings, fence posts, and other outdoor structures.
Benefits:
Cost-effective compared to other materials.
Durable against environmental factors.
Requires less maintenance.
Health Considerations: When working with pressure treated lumber, it’s essential to wear gloves and a mask to avoid direct contact with chemicals. Although modern treatments are safer, proper handling is still advised.
In summary, pressure treated lumber is a practical choice for various outdoor projects, including deck railings. Its treatment gives it enhanced protection, making it sturdy and reliable for long-term use. For more details, you can check this informative article on pressure treated wood.
Design Considerations for Pressure Treated Deck Railings
When choosing pressure treated lumber for your deck railings, consider the style and overall design of your deck. The railing should complement the architecture of your home and enhance the outdoor space.
Height and Code Compliance: Make sure your deck railing meets local building codes. Typically, the height should be at least 36 inches for residential decks.
Material Finishes: Pressure treated wood can be stained or painted to match your decor. Consider applying a weather-resistant finish for added protection against the elements.
Security Features: Ensure that your deck handrail includes secure connections. Check that posts are properly anchored to withstand pressure and prevent wobbling.
Spacing of Balusters: If your design includes balusters, maintain appropriate spacing. A common guideline is a maximum of 4 inches between balusters to prevent children from squeezing through.
Durability and Maintenance: Although pressure treated lumber is resistant to rot and insects, it still requires ongoing upkeep. Plan for regular staining and sealing to maintain its appearance and prevent deterioration.
Visual Elements: Incorporate decorative elements like post caps or lattice for added character. You can also choose between various styles, from classic to modern, based on your personal preference.
By carefully considering these factors, you can create an attractive and functional railing that enhances your deck while ensuring safety and longevity.
Choosing the Right Materials for Deck Railings
Selecting appropriate materials for your deck railings is crucial for safety, aesthetics, and longevity. Understanding the different types of pressure-treated lumber and baluster materials can help you make informed decisions.
Types of Pressure-Treated Lumber for Railings
When opting for pressure-treated lumber for your railings, consider the wood species and treatment process. Southern Yellow Pine is a commonly used option due to its strength and affordability. It withstands the elements well when properly maintained.
Other choices include cedar and redwood, which naturally resist rot and insects. While they can be pricier, they also offer attractive grain patterns and colors.
Make sure to select lumber treated with preservatives that protect against decay and insects, ensuring your railings last. Look for options that meet industry standards for quality and safety.
Comparison of Baluster Materials
Balusters serve as vertical supports in your railing system, and the material you choose can significantly affect the overall look and durability. Common materials include wood, metal, and composite.
Wood balusters provide a classic, warm appearance but require regular maintenance to prevent deterioration. They can also be made from pressure-treated lumber for added durability.
Metal balusters, such as aluminum or wrought iron, offer a modern look and are resistant to weather damage. They generally require less maintenance over time.
Composite balusters combine wood fibers and plastic, providing a low-maintenance option that mimics wood's appearance. They resist fading, staining, and rotting, making them increasingly popular among homeowners.
When selecting baluster materials, consider the balance between aesthetics and maintenance needs, ensuring the final choice complements your overall deck design.
Installation Process for Pressure Treated Deck Railings
Installing pressure treated deck railings requires careful planning and execution. Follow these steps for a successful installation.
Gather Materials: You will need pressure treated lumber for the posts, rails, and balusters. Don’t forget screws or nails designed for outdoor use.
Measure and Cut: Cut the posts to the desired height, usually around 36 inches for safety. The top and bottom rails should span the length between posts.
Install the Posts: Secure the posts into the ground or base using concrete or post anchors. Make sure they are plumb and properly spaced, typically 6 to 8 feet apart.
Attach the Bottom Rail: Connect the bottom rail between the posts. This reinforces the structure and helps in spacing the balusters.
Install Balusters: Space the balusters evenly between the bottom and top rails. The gap should not exceed 4 inches to comply with safety standards.
Attach the Top Rail: Fasten the top rail securely to the posts, ensuring a snug fit. This adds strength and stability to your deck railing.
Finish Up: Sand any rough edges and apply a weather-resistant sealant or paint to protect the wood. Maintenance is key to prolonging the lifespan of your pressure treated deck railing.
By following these steps, you will achieve a durable and attractive railing for your deck.
Maintenance and Care for Pressure Treated Decks and Railings
Maintaining your pressure-treated deck and railings is essential for longevity and safety. Regular care prevents issues like rot, warping, and insect damage.
Cleaning: Sweep your deck regularly to remove debris. Use a mild soap or a deck cleaner with a pressure washer on a low setting to clean surfaces thoroughly.
Inspection: Examine your decking and railings at least twice a year. Look for signs of damage such as loose screws, protruding nails, or warped boards. Prompt repairs help maintain structural integrity.
Sealing and Staining: Apply a protective sealant or stain every couple of years. This helps guard against moisture and UV damage. Choose products specifically designed for pressure-treated wood for optimal results.
Mold and Mildew: If you notice mold or mildew, scrub the affected areas with a mixture of water and white vinegar. Ensure good drainage around your deck to minimize these issues.
Safety Check: Regularly check the stability of your railings. Ensure they meet local safety codes. Replace any damaged components to keep your deck safe for use.
By following these maintenance steps, you can keep your pressure-treated decking and railings looking great and functioning safely for years to come.
Frequently Asked Questions
Choosing pressure-treated lumber for deck railings involves various considerations. From costs and design ideas to maintenance and building codes, you’ll find practical insights to help inform your decisions.
How much does it cost to install pressure-treated lumber deck railings?
The installation cost for pressure-treated lumber deck railings typically ranges from $15 to $25 per linear foot. This price can vary based on the complexity of the design and local labor rates. Additional costs may include hardware, paint, or stain if desired.
What are some design ideas for pressure-treated wood deck railings?
You can create various designs using pressure-treated wood. Classic vertical pickets or horizontal slats work well for a traditional look, while cable railings provide a modern twist. Incorporating decorative elements such as caps or lighting can enhance the aesthetic appeal.
Where can I buy pressure-treated lumber for deck railing?
Pressure-treated lumber is widely available at home improvement stores, lumber yards, and specialty building supply companies. Major retailers often carry a selection of sizes, ensuring you'll find suitable options for your railing project.
What are the building code requirements for deck railings?
Building codes for deck railings often require a minimum height of 36 inches in residential areas. The spacing between balusters is typically limited to 4 inches to prevent falls. It's crucial to check your local codes before installation to ensure compliance.
What are the disadvantages of using pressure-treated lumber for deck railings?
While pressure-treated lumber is affordable and durable, it can have drawbacks. The chemicals used in treatment may raise concerns about environmental impact. Additionally, untreated wood may require more frequent maintenance due to warping or splitting over time.
How long will pressure-treated deck railings last?
Pressure-treated wood can last anywhere from 15 to 25 years with proper care and maintenance. Factors like climate conditions, exposure to moisture, and maintenance routines play significant roles in determining longevity. Regular inspections can help identify any issues before they become serious.